(Optional) Full-cycle collaborative workflow
Questions
How can we implement automatic testing each time we push changes to the repository?
Why is it good to autoclose issues with commit messages?
Exercise a full-cycle collaborative workflow
This exercise is a collaborative version of the Automated testing exercise.
FullCI-1: Create and use a continuous integration workflow on GitHub or GitLab with pull requests and issues
This is an expanded version of the automated testing demonstration. The exercise is performed in a collaborative circle within the exercise group (breakout room).
The exercise takes 20-30 minutes.
In this exercise, everybody will:
A. Create a repository on GitHub/GitLab (everybody should use a different repository name for their repository) B. Commit code to the repository and set up tests with GitHub Actions/ GitLab CI C. Everybody will find a bug in their repository and open an issue in their repository D. Then each one will clone the repo of one of their exercise partners, fix the bug, and open a pull request (GitHub)/ merge request (GitLab) E. Everybody then merges their co-worker’s change
Overview of this exercise. Below we detail the steps.
Prerequisites
If you are new to Git, you can find a step-by-step guide to setting up repositories and making commits in this git-refresher material.
Step 1: Create a new repository on GitHub/GitLab
Select a different repository name than your colleagues (otherwise forking the same name will be strange)
Before you create the repository, select “Initialize this repository with a README” (otherwise you try to clone an empty repo).
Share the repository URL with your exercise group via shared document or chat
Step 2: Clone your own repository, add code, commit, and push
Clone the repository.
Add a file example.py containing:
def add(a, b):
    return a + b


def test_add():
    assert add(2, 3) == 5
    assert add('space', 'ship') == 'spaceship'


def subtract(a, b):
    return a + b  # <--- fix this in step 8


# uncomment the following test in step 5
#def test_subtract():
#    assert subtract(2, 3) == -1
Test example.py with pytest.
Then stage the file (git add <filename>), commit (git commit -m "some commit message"),
and push the changes (git push origin main).
Step 3: Enable automated testing
In this step we will enable GitHub Actions. Select “Actions” from your GitHub repository page. You get to a page “Get started with GitHub Actions”. Select the button for “Set up this workflow” under Python Application:
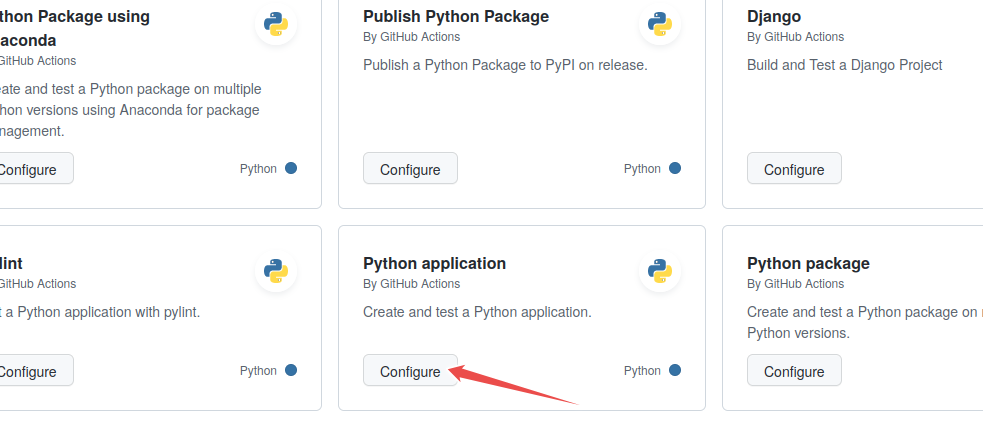
Select “Python application” as the starter workflow.
GitHub creates the following file for you in the subfolder .github/workflows.
Add pytest example.py to the last line (highlighted):
# This workflow will install Python dependencies, run tests and lint with a single version of Python
# For more information see: https://help.github.com/actions/language-and-framework-guides/using-python-with-github-actions

name: Python application

on:
  push:
    branches: [ main ]
  pull_request:
    branches: [ main ]

jobs:
  build:

    runs-on: ubuntu-latest

    steps:
    - uses: actions/checkout@v2
    - name: Set up Python 3.8
      uses: actions/setup-python@v2
      with:
        python-version: 3.8
    - name: Install dependencies
      run: |
        python -m pip install --upgrade pip
        pip install flake8 pytest
        if [ -f requirements.txt ]; then pip install -r requirements.txt; fi
    - name: Lint with flake8
      run: |
        # stop the build if there are Python syntax errors or undefined names
        flake8 . --count --select=E9,F63,F7,F82 --show-source --statistics
        # exit-zero treats all errors as warnings. The GitHub editor is 127 chars wide
        flake8 . --count --exit-zero --max-complexity=10 --max-line-length=127 --statistics
    - name: Test with pytest
      run: |
        pytest example.py
Commit the change by pressing the “Start Commit” button:
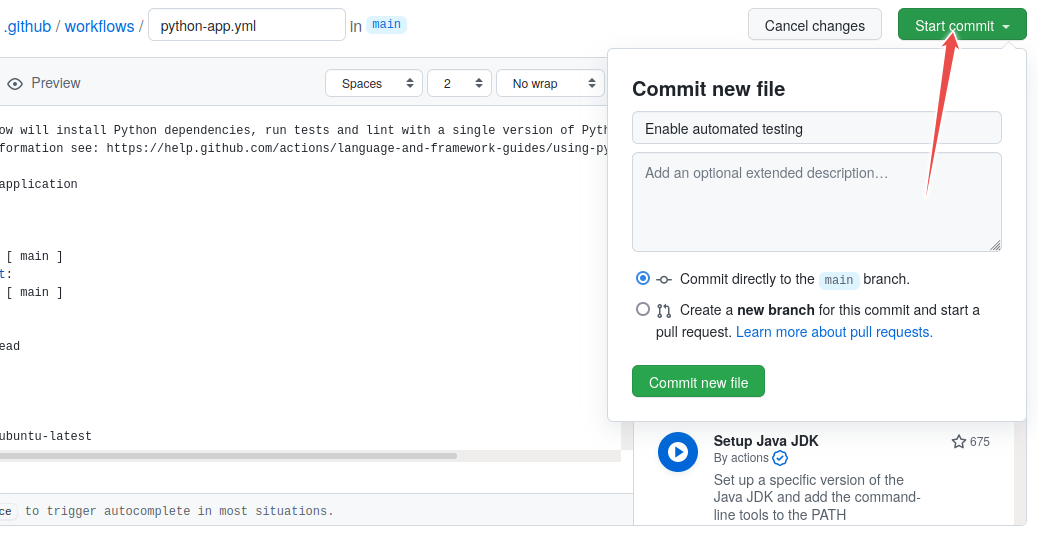
Committing the file via the GitHub web interface: follow the flow, give it some commit name. You can commit directly to master.
In this step we will enable GitLab CI.
Select “CI/CD” from your Gitlab sidebar of the project. You get to a page
“Editor”. (Instead you can also click on “Add CI/CD” on the main page or just add a .gitlab-ci.yml file the result is identical.
Copy the following code snippet into the file. Gitlab will save it as .gitlab-ci.yml.
Add pytest example.py to the last line (highlighted):
# This workflow will install Python dependencies, run tests and lint with a single version of Python
# For more information see: https://gitlab.com/gitlab-org/gitlab/-/blob/master/lib/gitlab/ci/templates/Python.gitlab-ci.yml

image: python:latest
stages:
  - linting
  - test
before_script:
  - cat /proc/version #print out operations system
  - python -V  # Print out python version for debugging
  - pip install pytest flake8
  - if [ -f requirements.txt ]; then pip install -r requirements.txt;fi

linting:
  stage: linting
  script:
    - flake8 . --count --select=E9,F63,F7,F82 --show-source --statistics
    - flake8 . --count --exit-zero --max-complexity=10 --max-line-length=127 --statistics

test:
  stage: test
  script:
    - pytest example.py
Commit the change by pressing the “Commit changes” button:
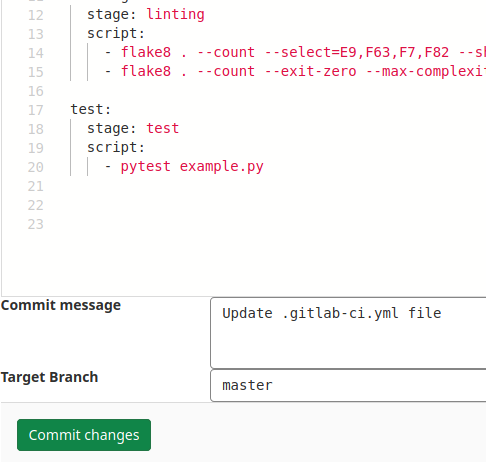
Committing the file via the GitLab web interface: follow the flow, give it some commit name. You can commit directly to master.
Step 4: Verify that tests have been automatically run
Observe in the repository how the test succeeds. While the test is executing, the repository has a yellow marker. This is replaced with a green check mark, once the test succeeds:
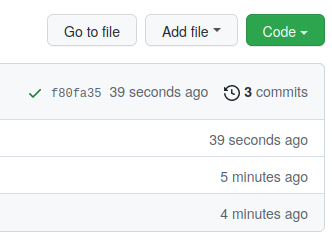
Green check means passed.
Also browse the “Actions” tab and look at the steps there and their output.
Observe in the repository how the test succeeds. While the test is executing, the repository has a blue marker. This is replaced with a green check mark, once the test succeeds:
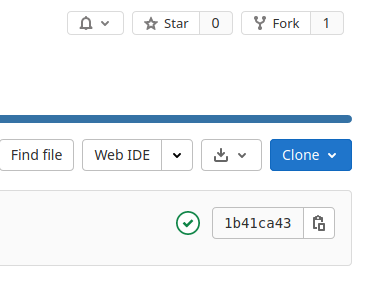
Green check means passed.
Also browse the “Pipelines” tab and look at the steps there and their output.
Step 5: Add a test which reveals a problem
After you committed the workflow file, your GitHub/GitLab repository will be ahead of your local cloned repository. Update your local cloned repository:
$ git pull origin main
Hint for helpers: if the above command fails, check whether the branch name on the GitHub/GitLab
repository is called main and not perhaps master.
Next uncomment the code in example.py under “step 5”, commit, and push.
Verify that the test suite now fails on the “Actions” tab (GitHub)
or the “CI/CD->Pipelines” tab (GitLab).
Step 6: Open an issue on GitHub/GitLab
Open a new issue in your repository about the broken test (click the “Issues” button on GitHub or GitLab and write a title for the issue). The plan is that your colleague will fix the issue through a pull/merge request.
Step 7: Fork and clone the repository of your colleague
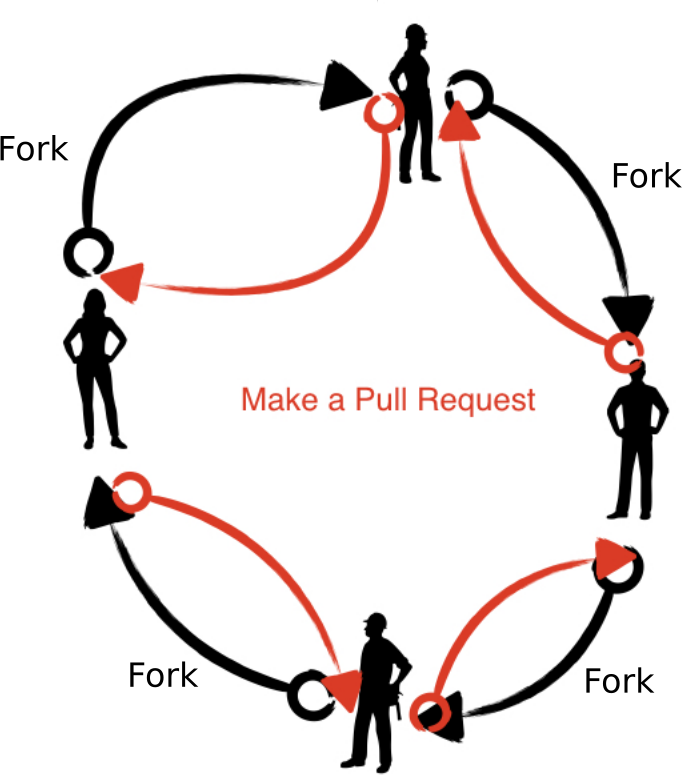
Fork the repository using the GitHub/GitLab web interface. (if you are unfamiliar with forking and pull requests, have a look at this visual representation).
Make sure you clone the fork after you have forked it. Do not clone your colleague’s repository directly.
$ git clone https://github.com/your-username/the-repository.git
$ git clone https://gitlab.com/your-username/the-repository.git
Step 8: Fix the broken test
After you have fixed the code, commit the following commit message
"restore function subtract; fixes #1" (assuming that you try to fix
issue number 1).
Then push to your fork.
Step 9: Open a pull request (GitHub)/ merge request (GitLab)
Then before accepting the pull request/ merge request from your colleague, observe how GitHub Actions/ Gitlab CI automatically tested the code.
If you forgot to reference the issue number in the commit message, you can still add it to
the pull request/ merge request: my pull/merge request title, closes #NUMBEROFTHEISSUE
Step 10: Accept the pull request/ merge request
Observe how accepting the pull request/ merge request automatically closes the issue (provided the commit message or the pull request/ merge request contained the correct issue number).
See also:
GitHub: closing issues using keywords
GitLab: closing issues using keywords
Discuss whether this is a useful feature. And if it is, why do you think is it useful?
Discussion
Finally, we discuss together about our experiences with this exercise.
(optional) FullCI-2: Add a license file to the previous exercise’s repository
In the Social coding and open software lesson we learn how important it is to add a LICENSE file.
Your goal:
You discover that your coworker’s repository does not have a LICENSE file.
Open an issue and suggest a LICENSE.
Then add a LICENSE via a pull/merge request, referencing the issue number.
Where to go from here
This example was using Python but you can achieve the same automation for R or Fortran or C/C++ or other languages
GitHub Actions has a Marketpace which offer wide range of automatic workflows
On GitLab use GitLab CI
For Windows builds you can also use Appveyor
Keypoints
When fixing bugs or other problems reported in issues, use the issue autoclosing mechanism when you send the pull/merge request.