Using git to collaborate
Objectives
Understanding the distributed nature of git collaborations
Learning about the key terms
Being able to suggest changes to repositories you do not own
Terminology: Commits, branches, repositories, forks, clones
repository: The project, contains all data and history (commits, branches, tags).
commit: Snapshot of the project, gets a unique identifier (e.g.
c7f0e8bfc718be04525847fc7ac237f470add76e).branch: Independent development line. The main development line is often called
main. Technically, a branch in Git is implemented as a pointer to a commit (imagine a sticky note with a branch name on it).tag: A pointer to one commit, to be able to refer to it later. Like a commemorative plaque that you attach to a particular commit (e.g.
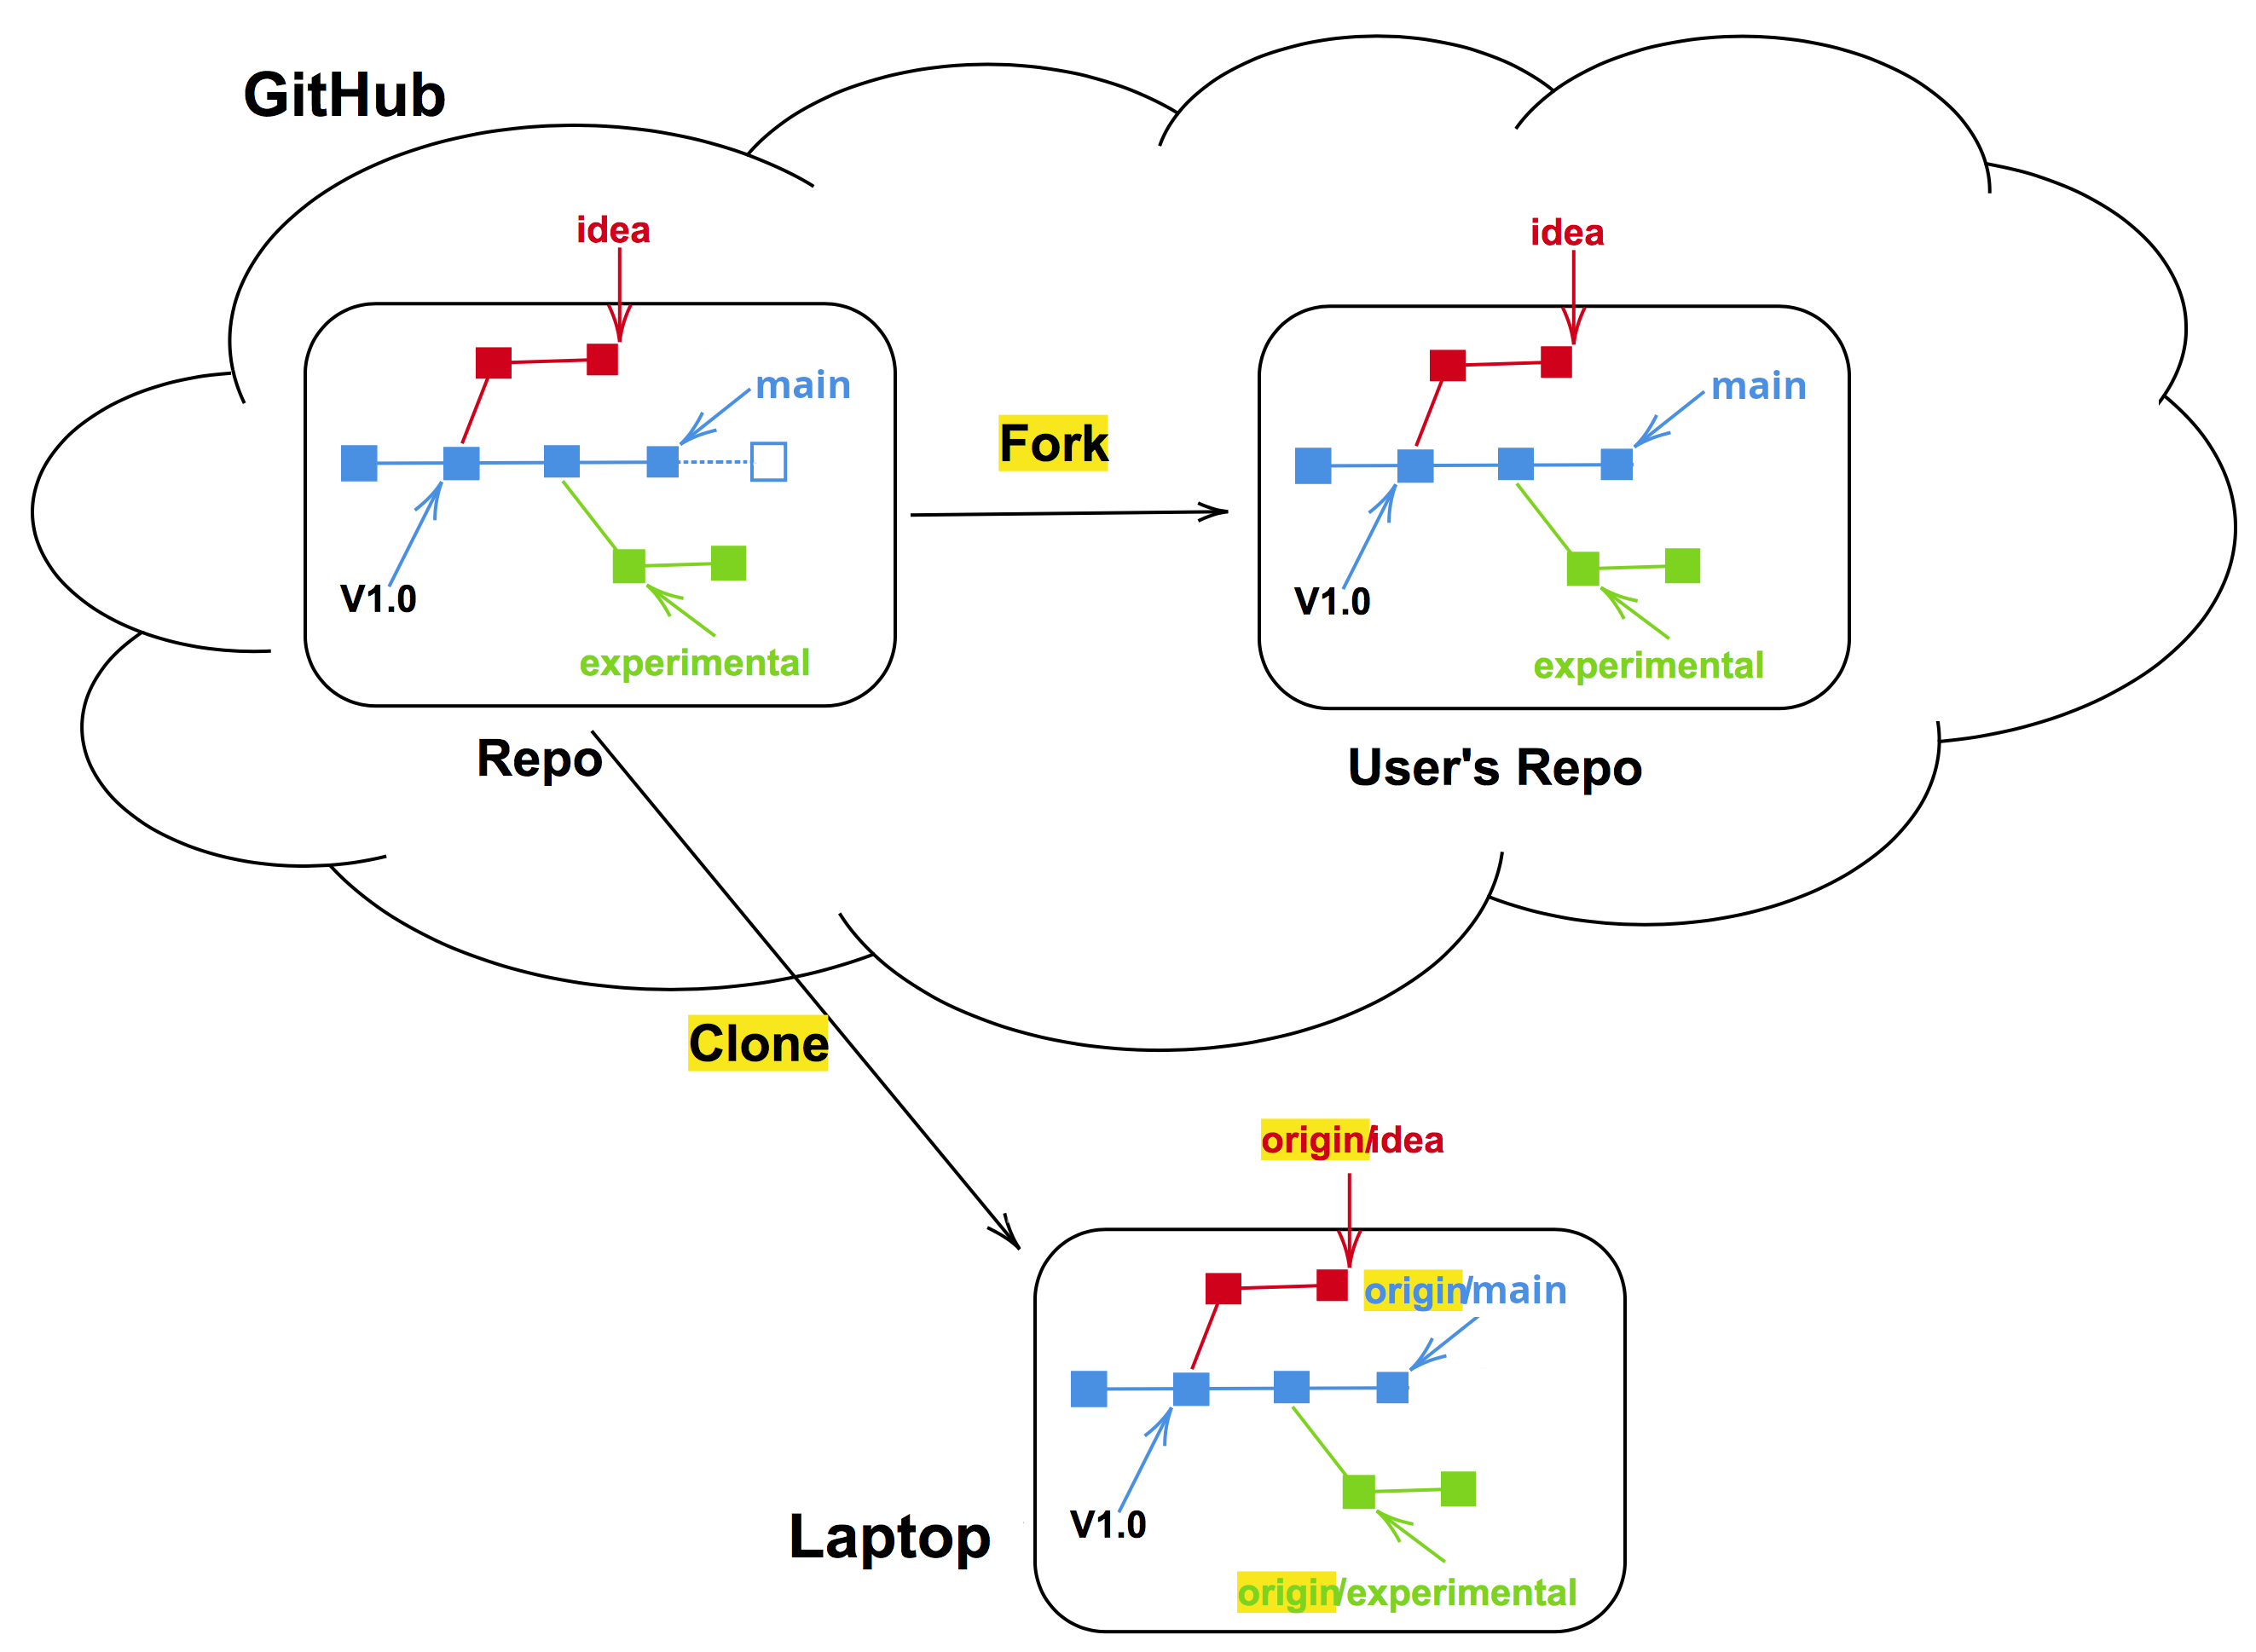
phd-printedorpaper-submitted).cloning
: Copying the whole repository to your laptop - the first time. It is not necessary to download each file one by one. forking
: Taking a copy of a repository (which is typically not yours) - your copy (fork) stays on GitHub/GitLab and you can make changes to your copy.
Cloning a repository
In order to make a complete copy a whole repository, the git clone command
can be used. When cloning, all the files, of all or selected branches, of a
repository are copied in one operation. Cloning of a repository is of relevance
in a few different situations:
Working on your own, cloning is the operation that you can use to create multiple instances of a repository on, for instance, a personal computer, a server, and a supercomputer.
The parent repository could be a repository that you or your colleague own. A common use case for cloning is when working together within a smaller team where everyone has read and write access to the same Git repository.
Alternatively, cloning can be made from a public repository of a code that you would like to use. Perhaps you have no intention to change the code, but would like to stay in tune with the latest developments, also in-between releases of new versions of the code.
Forking and cloning
Forking a repository
When a fork is made on GitHub/GitLab a complete copy, of all or selected branches, of the repository is made. The copy will reside under a different account on GitHub/GitLab. Forking of a repository is of high relevance when working with a Git repository to which you do not have write access.
In the fork repository commits can be made to the default branch (
mainormaster), and to other branches.The commits that are made within the branches of the fork repository can be contributed back to the parent repository by means of pull or merge requests.
Demo - forking a famous repository
A demo with forking a famous repository.
Exercise - suggesting a change on a repository you do not own
This exercise is the typical case where you find something that could be improved in a repository and you suggest a change. Compared to other scenarios (like a wiki) you do not need to have permissions to suggest a change. Furthermore, your change will not overwrite anything done by others, until the change is reviewed and approved.
Exercise: Add a new recipe to somebody else’s cookbook
We work with this recipe book repository. This will be the upstream repository.
Exercise tasks:
Log in to GitHub.com and open the link above
Click on Issues and then click the button New issue to create a new issue in the upstream repository. In the issue, you describe the change you want to make. Example: “Title: avocado pasta. Content: I will add a recipe for pasta with avocado”. Take note of the issue number: you will need it later.
Click on Code To see the repository structure. Find a subfolder where you want to add your new recipe and click on the subfolder. For a pasta recipe you will visit the subfolder pasta
Click on Add file and then “+ Create new file”.
You will be asked to fork this repository to propose changes. Click on the green button Fork this repository
A file editor now opens and it will say “You’re making changes in a project you don’t have write access to. Submitting a change will write it to a new branch in your fork eglereanwebdev/data-stewards-recipe-book, so you can send a pull request.”
Give your new file a name and write the recipe
Click the green button “Commit changes…”. The commit window will pop up. Describe the change you did.
GitHub will redirect you to a comparison of the changes you did in your forked repository versus the upstream repository.
You can now open a pull request towards the upstream repository by clicking the green button Create pull request
In the page “Open a pull request” you will asked to give a title and explain what you did. Make sure you add “Closes #N” in the text, with
Nbeing the number of the issue you opened to explain what you were going to do. When ready, click the green button “Create pull request”The project owner will merge the pull requests OR will ask for changes.
(Optional) After few pull requests are merged, yuo can update your fork with the changes from others.
(Optional) Check that in your fork you can see changes from other people’s pull requests.
(Optional) In step 4, you could have also edited a file instead of adding a new file. You can look for typos and suggest improvements.
Advanced topics
Pull requests can be coupled with automated testing
We added an automated test here just for fun and so that you see that this is possible to do.
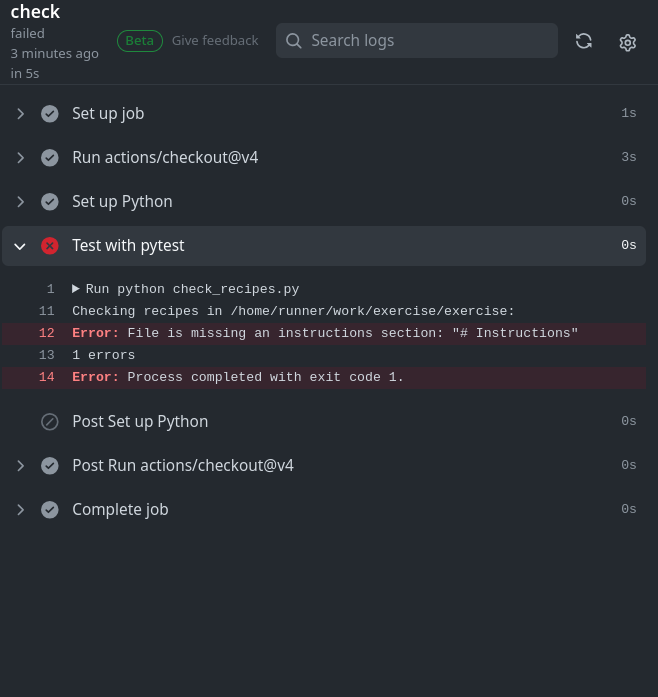
In this exercise, the test is silly. It will check whether the recipe contains both an ingredients and an instructions section.
In this example the test failed:
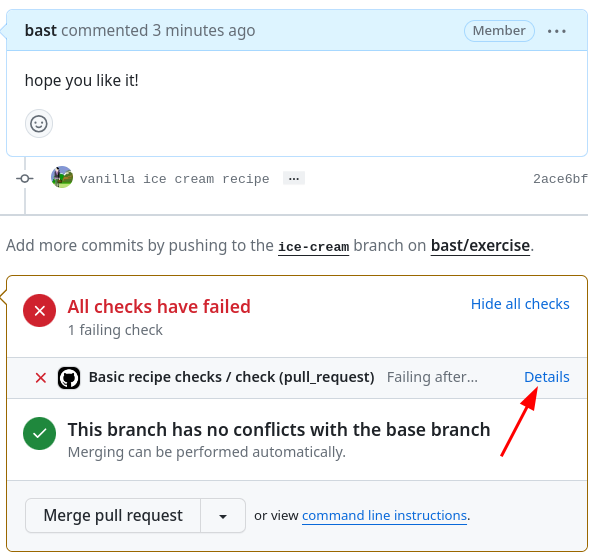
Click on the “Details” link to see the details of the failed test:
How can this be useful?
The project can define what kind of tests are expected to pass before a pull request can be merged.
The reviewer can see the results of the tests, without having to run them locally.
How does it work?
We added a GitHub Actions workflow to automatically run on each push or pull request towards the
mainbranch.
What tests or steps can you image for your project to run automatically with each pull request?
How to update your fork with changes from upstream
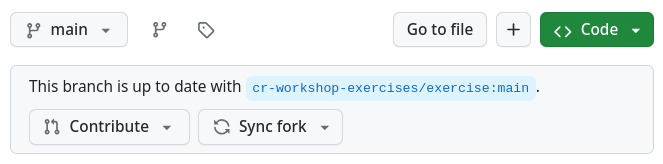
This used to be difficult but now it is two mouse clicks: Navigate to your fork and notice how GitHub tells you that your fork is behind. In my case, it is 9 commits behind upstream. To fix this, click on “Sync fork” and then “Update branch”:
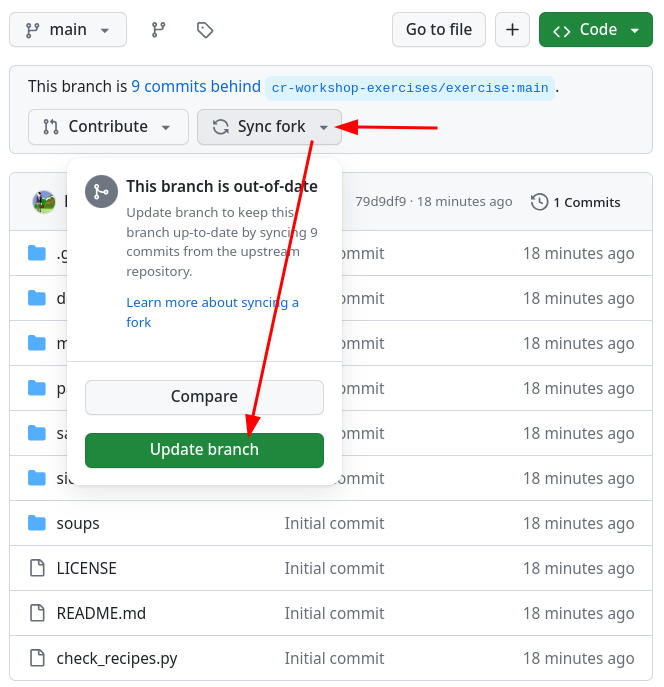
After the update my “branch is up to date” with the upstream repository:
How to approach other people’s repositories with ideas, changes, and requests
Contributing very minor changes
Clone or fork+clone repository
Create a branch
Commit and push change
Open a pull request or merge request
If you observe an issue and have an idea how to fix it
Open an issue in the repository you wish to contribute to
Describe the problem
If you have a suggestion on how to fix it, describe your suggestion
Possibly discuss and get feedback
If you are working on the fix, indicate it in the issue so that others know that somebody is working on it and who is working on it
Submit your fix as pull request or merge request which references/closes the issue
Motivation
Inform others about an observed problem
Make it clear whether this issue is up for grabs or already being worked on
If you have an idea for a new feature
Open an issue in the repository you wish to contribute to
In the issue, write a short proposal for your suggested change or new feature
Motivate why and how you wish to do this
Also indicate where you are unsure and where you would like feedback
Discuss and get feedback before you code
Once you start coding, indicate that you are working on it
Once you are done, submit your new feature as pull request or merge request which references/closes the issue/proposal
Motivation
Get agreement and feedback before writing 5000 lines of code which might be rejected
If we later wonder why something was done, we have the issue/proposal as reference and can read up on the reasoning behind a code change
Summary
This forking workflow lets you propose changes to repositories for which you have no write access.
This is the way that much modern open-source software works.
You can now contribute to any project you can view!