
Git refresher: Getting started with Git and GitHub
Overview
Exercises: 0 min
- What are the basics of Git?
- Learn the necessary prerequisites before attending a CodeRefinery workshop
Getting started with Git and GitHub
What you need to know
CodeRefinery workshops are geared towards researchers and students from different disciplines who already write some sort of code. The material is suitable for people with a wide range of technical experience, but it helps if participants have:
- Basic familiarity with the command line. No expertise is required, but many CodeRefinery lessons are based on the command line.
- Basic familiarity with using a text editor. Emacs and Vim are excellent choices if you know how to use them but Nano or Notepad on Windows are sufficient. An overview of text editors can be found here
- Basic familiarity with Git. CodeRefinery workshops start from scratch with Git, but the basics are covered quickly so it helps if you have touched Git before. The short overview below represents roughly what you need to know.
Why Git?
- Roll-back functionality - you can go back to a working version of your code
- Branching - you can work on several independent features at the same time
- Collaboration - you can avoid problems such as “Can you please send me the latest version?”, “Which version are you using?”, “I will just finish my work and then you can start with your changes.”.
- Reproducibility - you can indicate which version of your code you’ve used for a publication, and also pinpoint exactly when a bug was introduced.
What is Git?
- Git is a version control system which records snapshots and tracks the content of a folder as it changes over time.
- These snapshots are kept inside a sub-folder called .git.
- Recording snapshots is a two-step process in Git. We first focus (git add, we “stage” the change), then shoot (git commit):

Working with Git
It is easy to create repositories in Git:
$ mkdir my-project
$ cd my-project
$ git init
This creates an empty Git repository (a directory .git is created).
A useful Git command which should be used often is:
$ git status
It tells you the status of files in your repository, and often suggests a logical next step to do.
To make a commit, you first do the changes you want to a file, and then stage and commit it with a commit message:
# create/modify a file called my-file.txt
$ git add my-file.txt
$ git commit -m "useful commit message describing what I did"
The file my-file.txt is now tracked by Git.
You can list all commits using the command:
$ git log
If you now do further changes to my-file.txt, a useful command to see
how your modified file differs from the last committed version is:
$ git diff
Working with GitHub
All the Git commands above are local, and all snapshots are saved under .git.
To store your Git repository on another server, you use remotes.
You can push changes to the remote and pull from the remote.
Remotes are used to back up your own work and to collaborate with other people.
One option to host your repository on the web is GitHub. CodeRefinery does not in any way endorse the use of GitHub, and there are many commercial and open-source alternatives, but in CodeRefinery workshops we use GitHub because you are likely to have to use it for other software anyway.
Create a new repository on GitHub
- Login
- Click on “Repositories”
- Click on the green button “New”
On this page choose a project name (screenshot).
For the current purposes do not select “Initialize this repository with a README”.
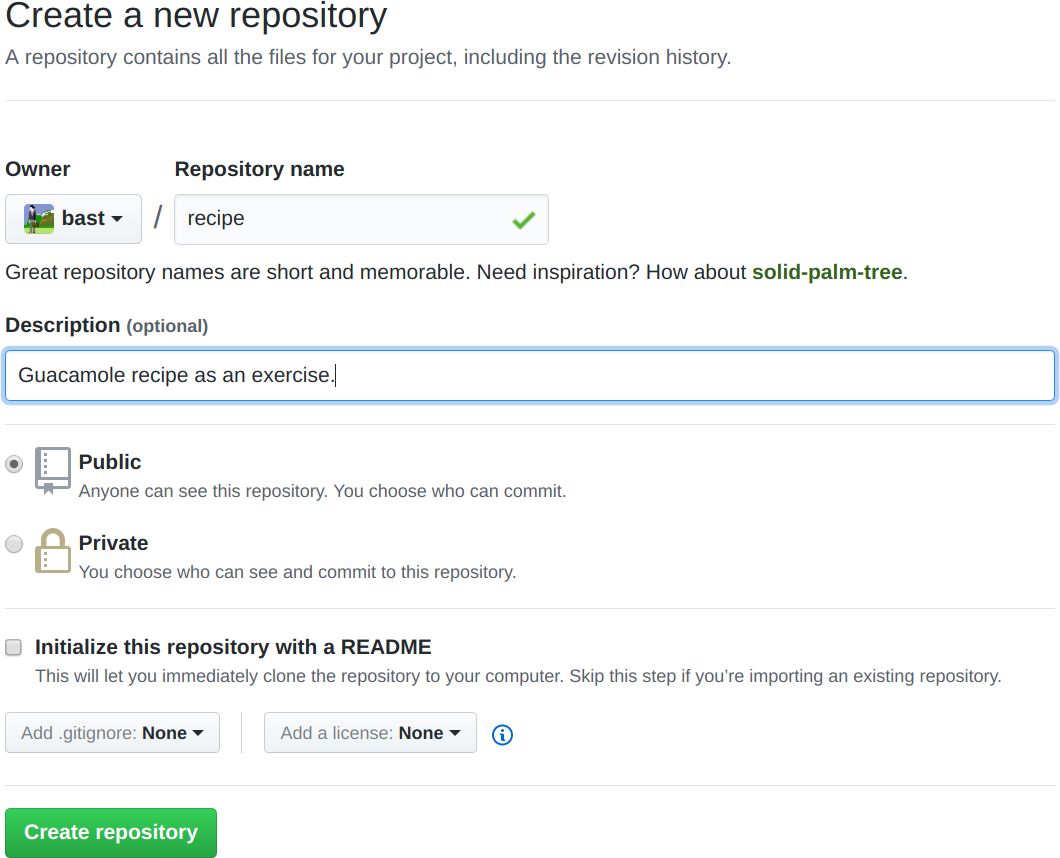
Once you click the green “Create repository”, you will see a page similar to:
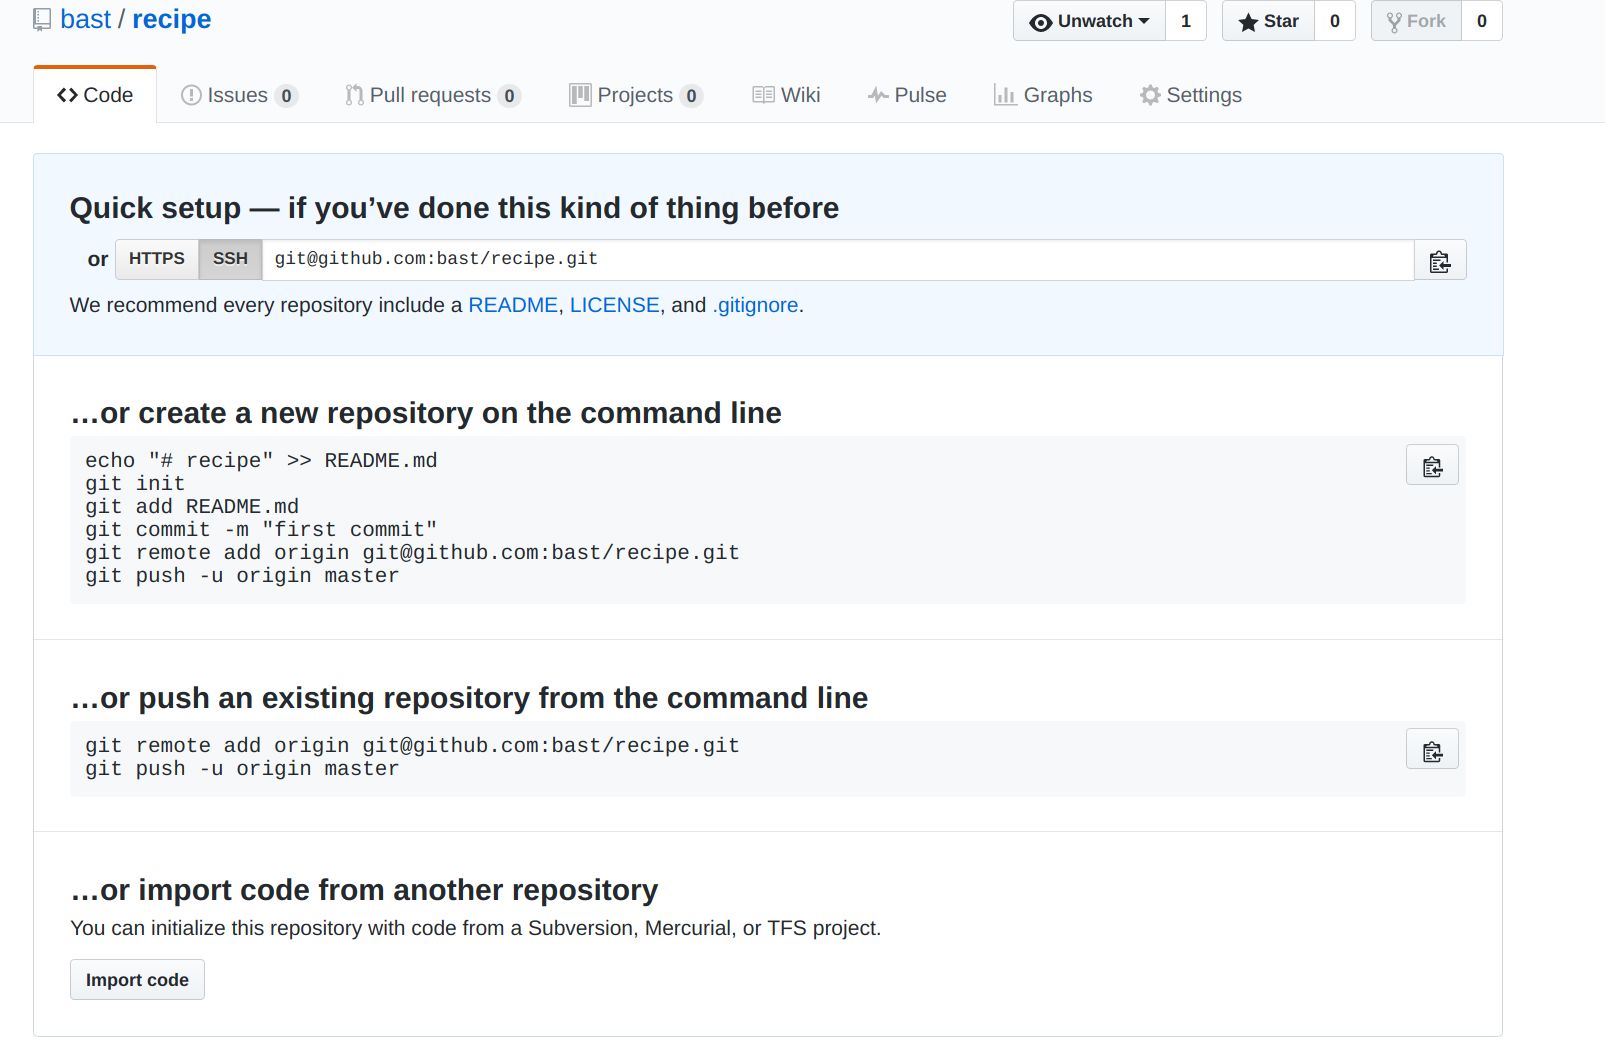
What this means is that we have now an empty project with either an HTTPS or an SSH address: click on the HTTPS and SSH buttons to see what happens.
To push changes to the project you will either need SSH keys for the SSH
address (preferred) or you will have to use your GitHub username and password when
using the HTTPS address.
Use the second option that GitHub suggests:
… or push an existing repository from the command line
- Go to your project repository on your computer.
- Check that you are in the right place with
git status. - Copy paste the two lines to the terminal and execute those, (replace the “user” part and possibly also the repository name):
$ git remote add origin https://github.com/user/my-project.git
$ git push -u origin master
Your commits should now be online.
Explore an existing repository on GitHub
Here we invite you to explore and visualize an existing Git repository on GitHub.
- The goal is to get a glimpse of the wider picture before going into the details during the workshop.
- Most of the Git commands you will learn can be done in the browser, which can be a more intuitive way to get started.
- When browsing a GitHub repository we are looking at two layers. It will become clear during the workshop what is in the Git layer and what is in the GitHub layer.
Have a look at this example repository which contains a few commits and branches with some simple code.
- Have a look at the repository. See which files it contains, and when they were last changed. The middle column is the commit message of the last change to a file and you can click it to see the changeset.
- Explore the commit history.
Note that the commits are identified by a unique hash codes (e.g.
7a6a2df). - Browse commit changesets by clicking the hashes or the commit message.
- Click on the Issues tab. Note that there are old closed issues.
- Note that there are branches (click “Insights” and “Network”).
- Inspect the merge commit when the branch
fix-sum-functionwas merged into themasterbranch. - Note the commit message of the commit on the
fix-sum-functionbranch. The “closes #1” string has a special meaning since it automatically closes an issue and links together the commit and the issue.
While some of these are GitHub features, it all can be done on other sites, or by yourself without GitHub at all.