Creating repositories using GitHub Desktop
We will practice creating a new repository using GitHub Desktop, committing changes to it, browsing the changes, creating branches, and more. This is practically the same as the previous episode, but we introduce some new concepts:
There are now two copies of your repository: that on your computer, and that on Github.
We introduce the concepts of pull and fetch to move code GitHub→local, and push to move code local→GitHub.
GitHub Desktop is a application that lets you manage files with Git. It is not the only way to use Git, but it is easy and integrated, so it’s a nice thing to teach.
One can share existing projects also using the web interface, so GitHub Desktop is not the only way to make an existing project available on GitHub.
In small groups it can be useful to do this side by side (in-person) or one learner shares their screen (video) and others can ask questions and give suggestions. In a larger group the instructor can demonstrate these and then participants can try on their own and then ask questions.
Step 1: Create an example spreadsheet
In this exercise, we will share a data file in CSV (comma-separated values) format and see how GitHub nicely displays it. First, we need to make some CSV file.
Either create a new CSV file:
Create a spreadsheet with Excel/LibreOffice or similar, containing some fantasy data
Export the spreadsheet to CSV format
If you don’t feel like creating a new CSV file, you can download an example here:
Right-click and “Save as…”
Make sure the file is actually in CSV format, not Excel/spreadsheet format.
Step 2: Initialize a repository with GitHub Desktop
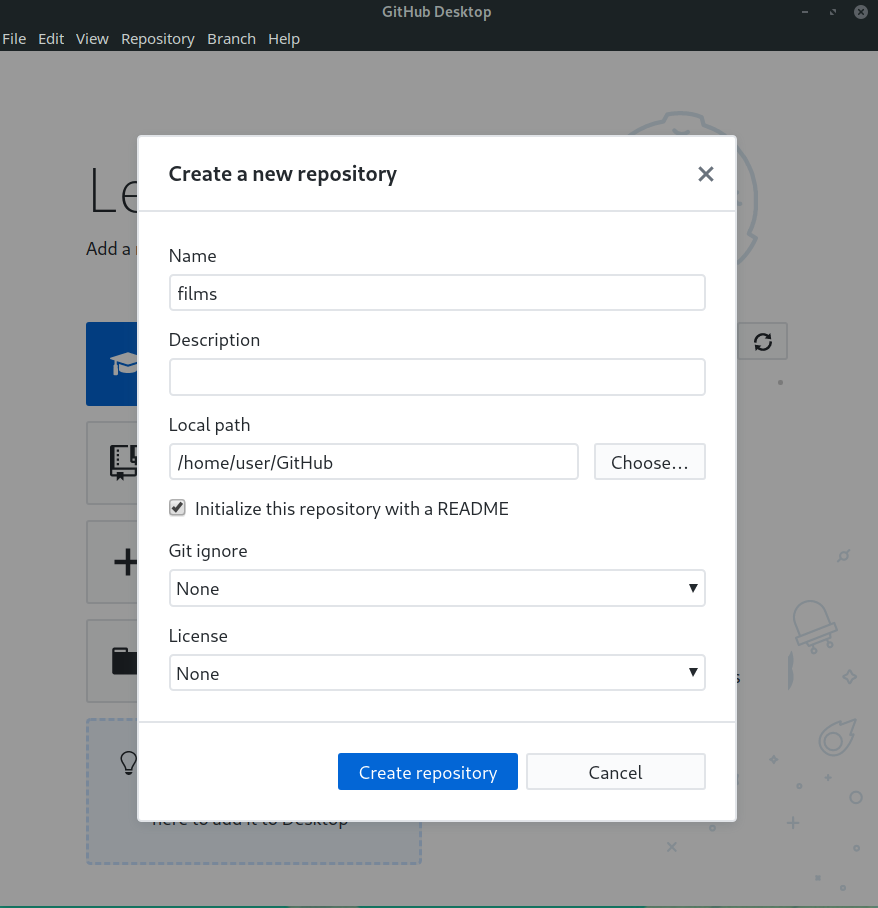
First, we make a new local repository. At this stage, the repository will only exist on our computer, not yet on GitHub.
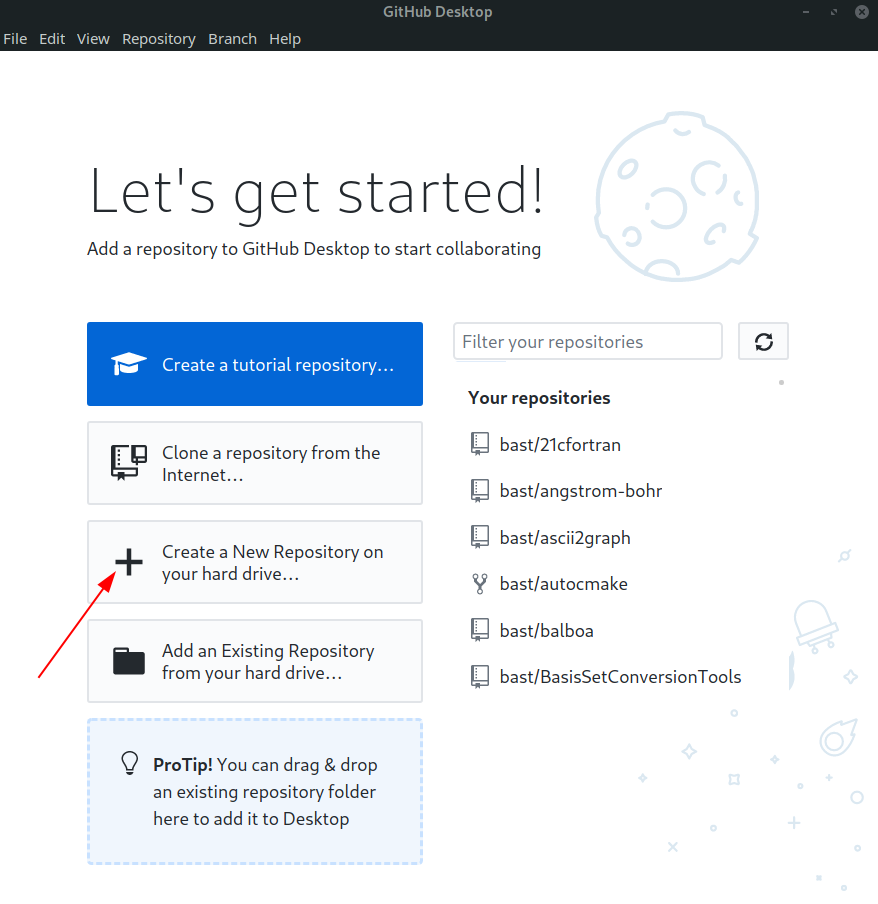
Start GitHub Desktop
Click on “+ Create a New Repository on your hard drive…”
Step 3: Commit the CSV data file
Now, we add the CSV to git. First, we put it in the git directory, then tell git to save it.
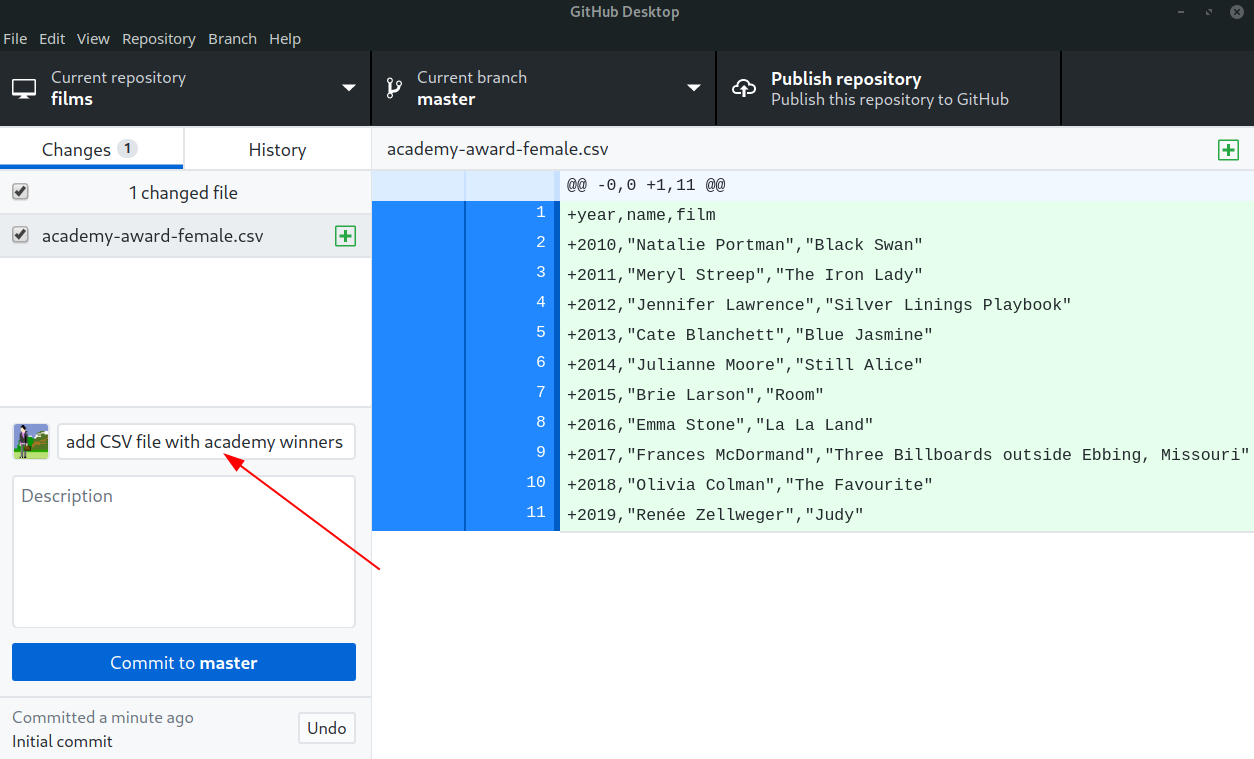
Copy your (own or downloaded) CSV file to the repository folder
Note how GitHub desktop changed and shows you the changes
Make a commit
Step 4: Publish the repository on GitHub
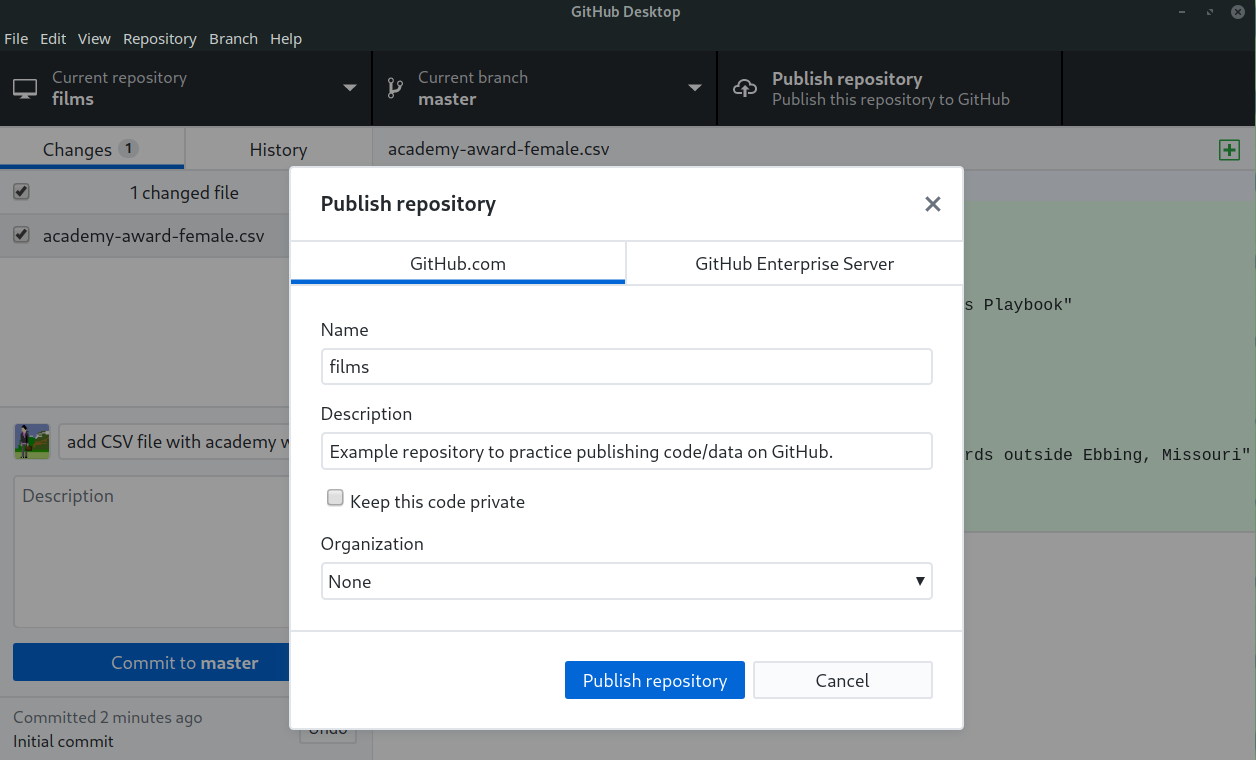
This is the step where we actually upload it to Github. Github Desktop lets us create a new repository on github.com without using the web browser. In this step, we also push the changes to the remote repository, though it happens without us seeing all the middle steps.
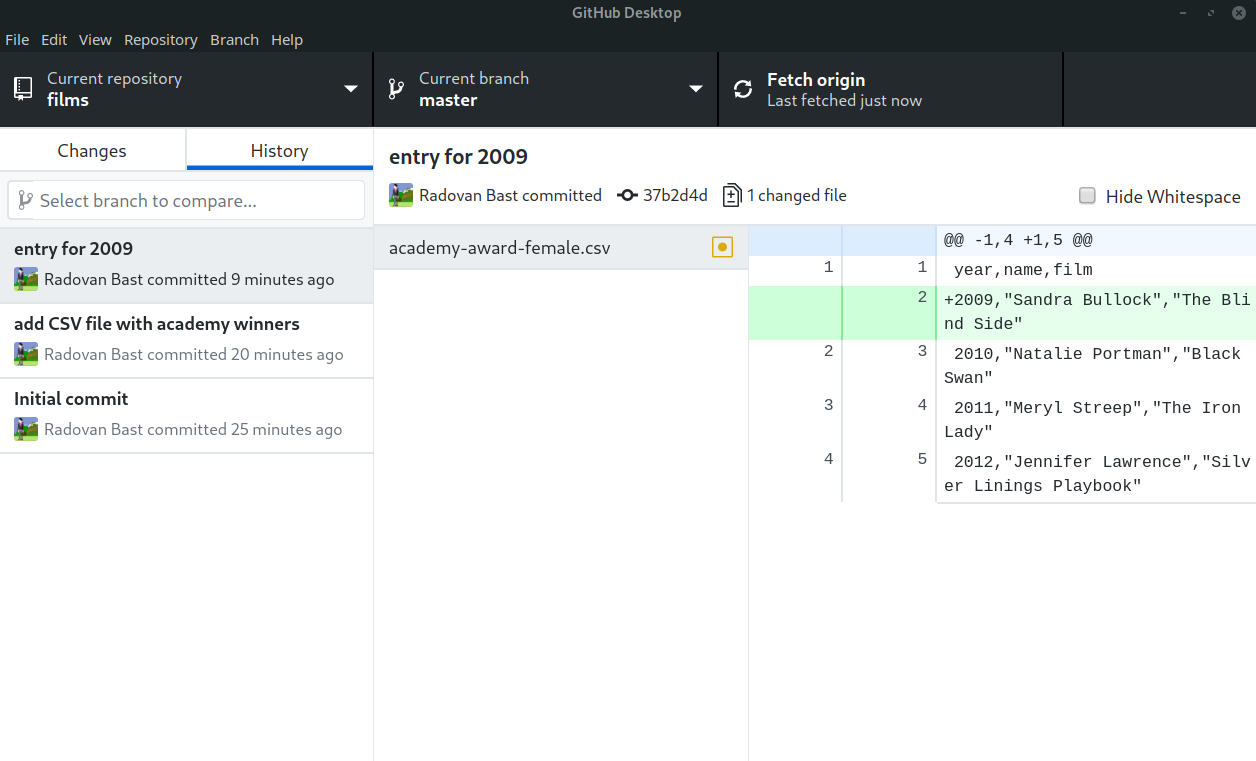
Browse the history (click “History”)
Don’t use the same name as the previous episode
You can choose between a private and a public repository
Click “Publish repository” (this only publishes the current branch)
After you have pushed, visit the repository via the website
Step 5: Create a branch, commit to it, and share it
This is pretty much the normal work: edit a file, commit it. But, in this case, we are going to commit it to a new branch. Why? We’ll see later.
Make a change to the CSV file directly on your computer, but do not commit yet
Observe the change you made in GitHub Desktop before committing
Create a new branch on GitHub Desktop
“Bring my changes to …” the new branch:
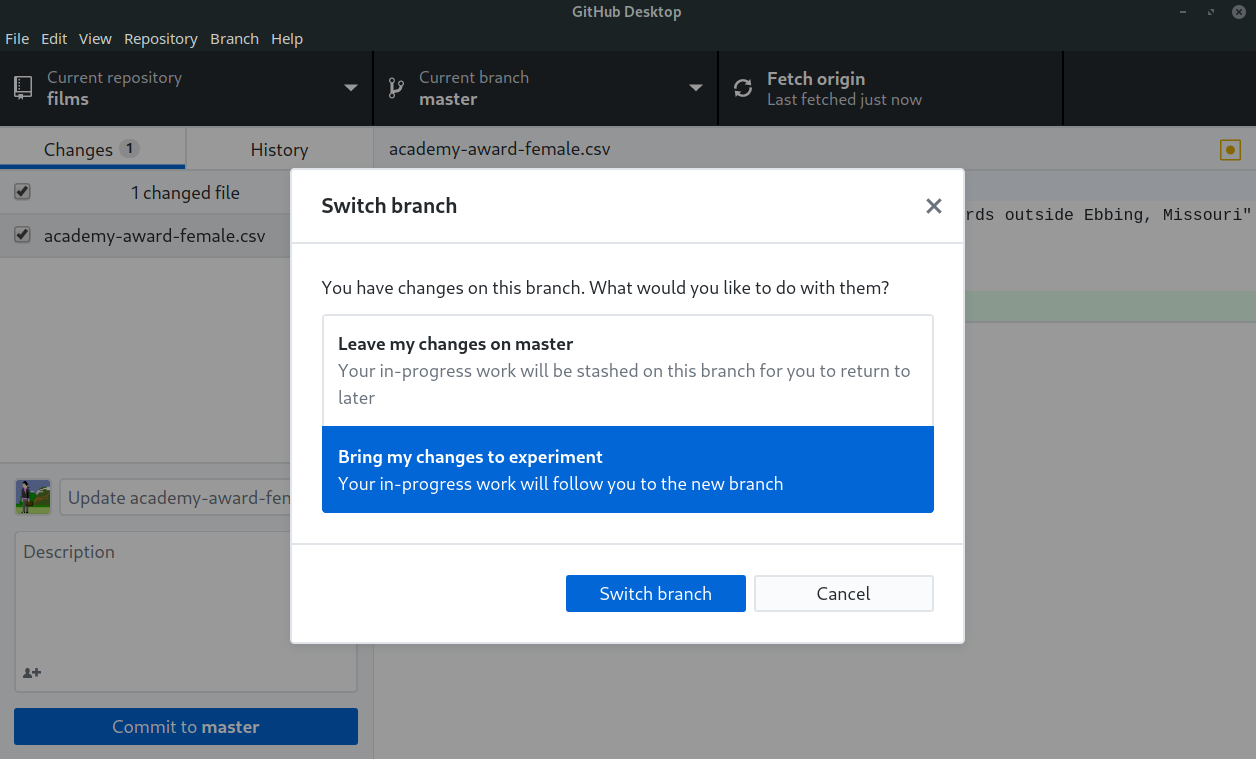
Commit to the new branch on GitHub Desktop
Publish the new branch to GitHub
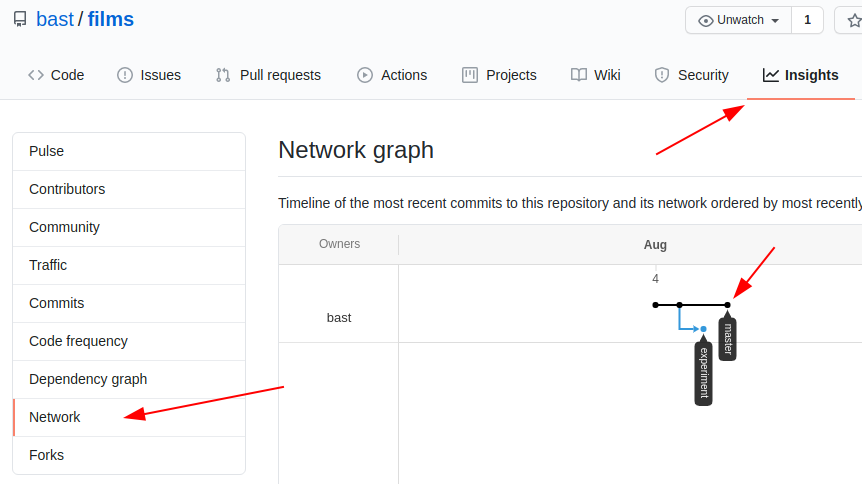
Browse your branches and changes on GitHub
Step 6: Fetch and pull changes from the web
Now we show how to fetch or pull code from Github→local.
Edit the file via the GitHub web interface and commit there to
masterSwitch to GitHub Desktop
Change current branch to
masterClick “Fetch origin”
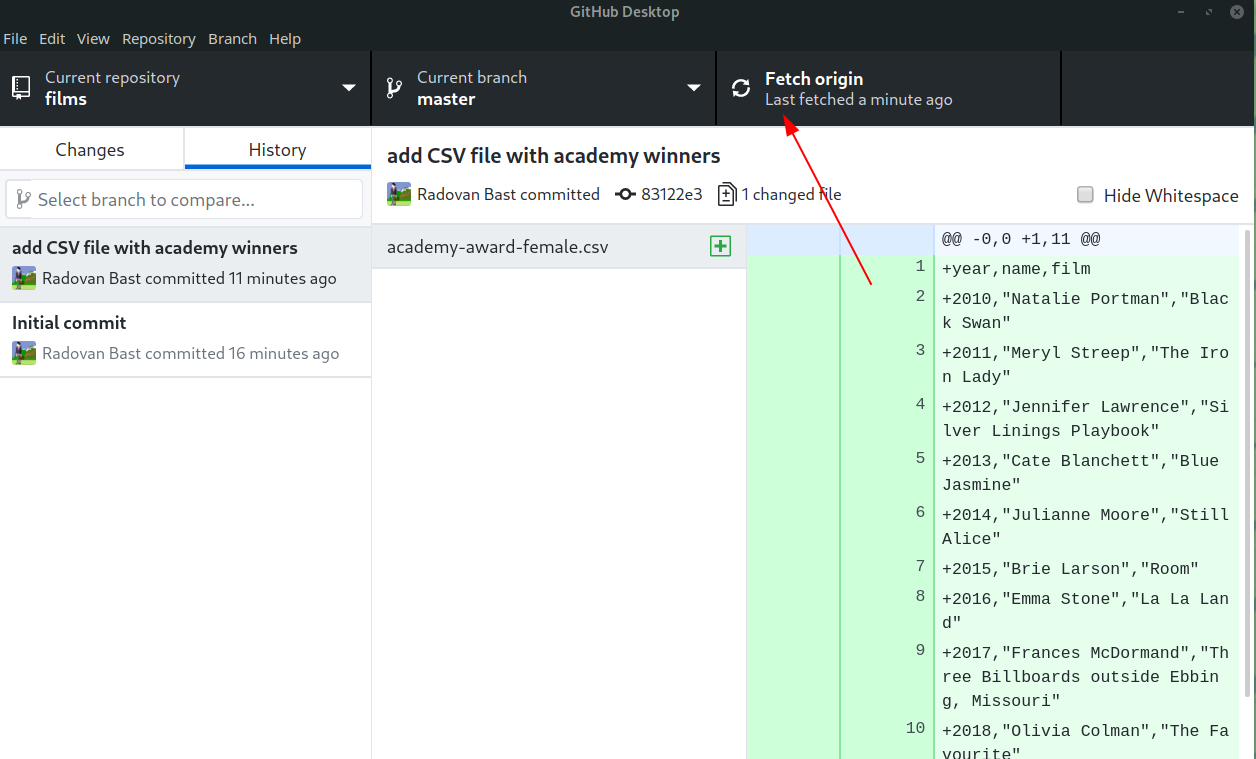
Before continuing compare the histories on your computer and the network on GitHub and discuss what fetch did:
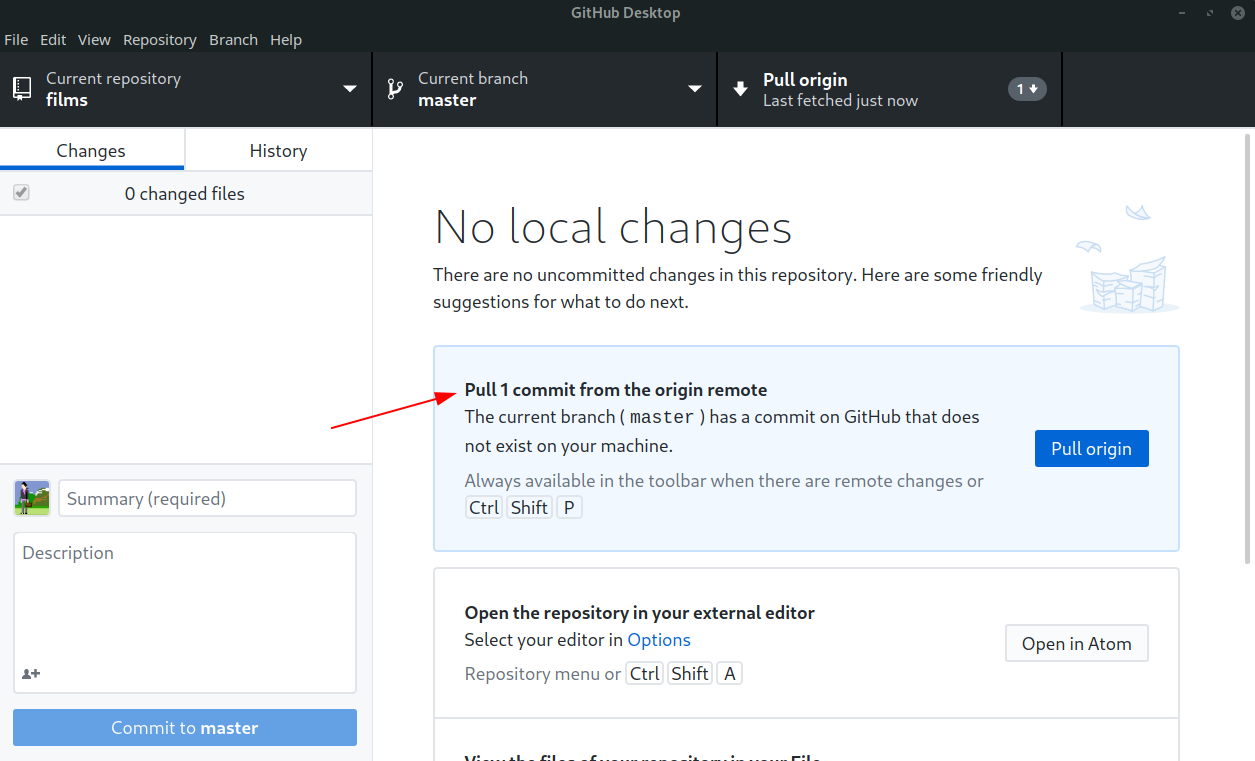
Click “Pull origin”
After pulling browse the “History” in GitHub Desktop
What’s the difference between fetch and pull? Fetch gets the changes, but doesn’t apply them locally. Pull = fetch + apply changes locally in your current repository (does a merge which we will discuss later).
Summary
With Github Desktop, we can do everything we can on the web, but it’s more natural. The most important concepts are that of remotes (links between repositories), pushing, and pulling.
We don’t cover it in this workshop, but you can eventually do all of
these things from the command line, for example git commit some_file.csv. Once you are doing many things, this can be faster.
Still, there’s almost always a place for applications like the GitHub Desktop
and other graphical user interfaces to
make things smoother.