Creating repositories using the web interface
We will practice creating a new repository using the web interface, committing changes to it, browsing the changes, creating branches, and more. This is everything you need to do basic file management, though you’ll probably want something faster to use. Still, it can be good for quick edits and contributions.
In small groups it can be useful to do this side by side (in-person) or one learner shares their screen (video) and others can ask questions and give suggestions. In a larger group the instructor can demonstrate these and then participants can try on their own and then ask questions.
Instructor note
In this episode we are all in the main room and do these steps together as follow-along with pauses with time for questions and answers, no breakout rooms yet.
Step 1: Create a repository with a README and a license
You start off by creating a repository from the web. In fact, we usually end up doing this from the web, no matter how you do your daily work. The important questions are who is the owner and what is the name of the repository.
Make sure that you are logged into GitHub.
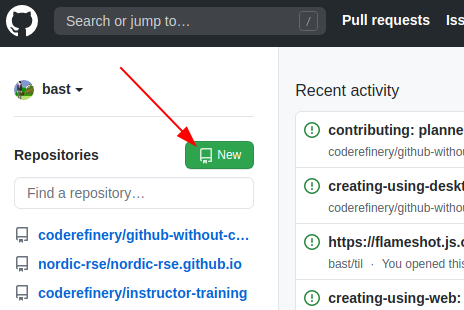
To create a repository we either click the green button “New” (top left corner):
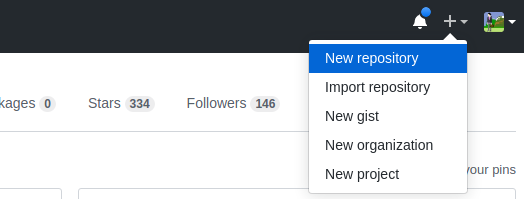
Or if you see your profile page, there is a “+” menu (top right corner):
Yet another way to create a new repository is to visit https://github.com/new directly.
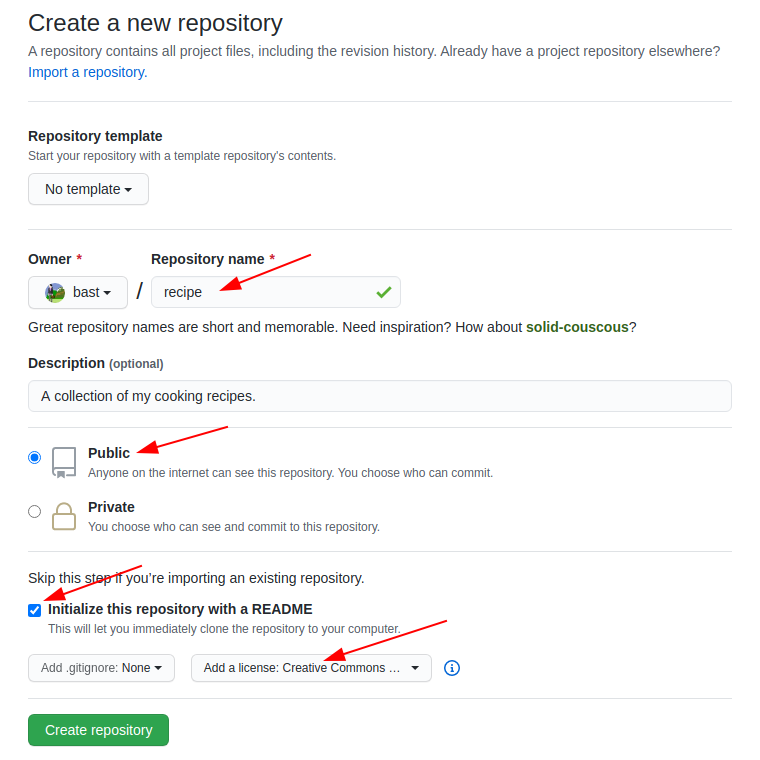
We then land at the following form. Please fill it out and set Initialize this repository with a README and choose a license. If you don’t find a suitable license, we will show later how you can add your own.
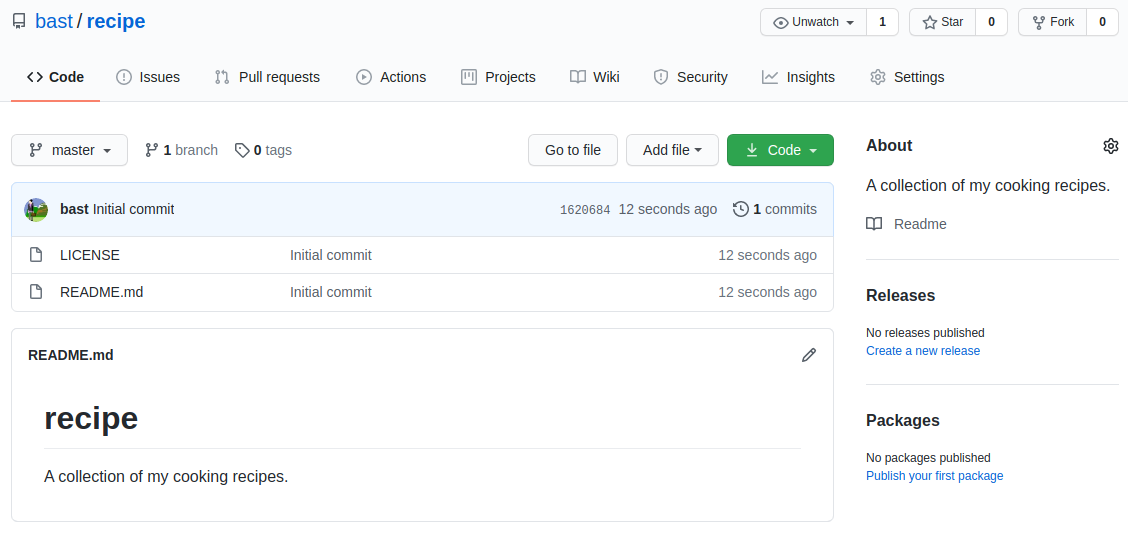
And now we have a repository with a README and LICENSE and one commit:
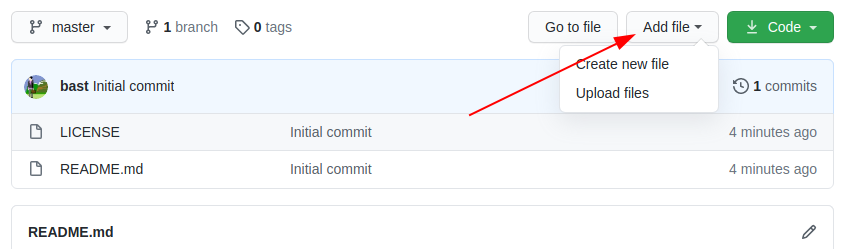
Step 2: Create a new file
We can easily add new files from the web interface.
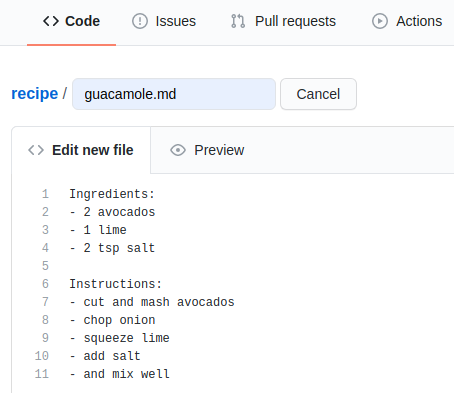
Create a file, e.g. guacamole.md (the “md” ending signals that this is in Markdown format):
In the new file you can share your favorite cooking recipe (or something else). You can also copy-paste this as a starting point:
Ingredients:
- 2 avocados
- 1 lime
- 2 tsp salt

Instructions:
- cut and mash avocados
- chop onion
- squeeze lime
- add salt
- and mix well
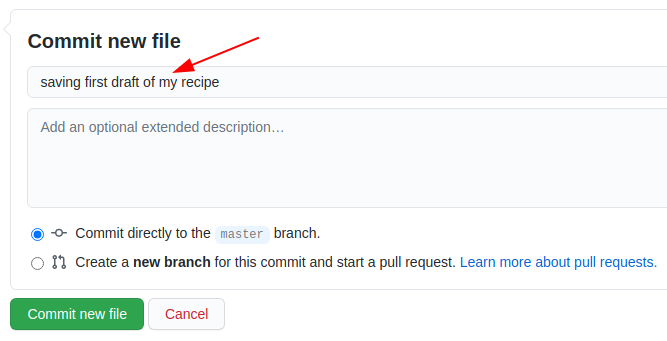
Then add a commit message and commit (save):
Step 3: Modify a file
We can also easily modify files from the web.
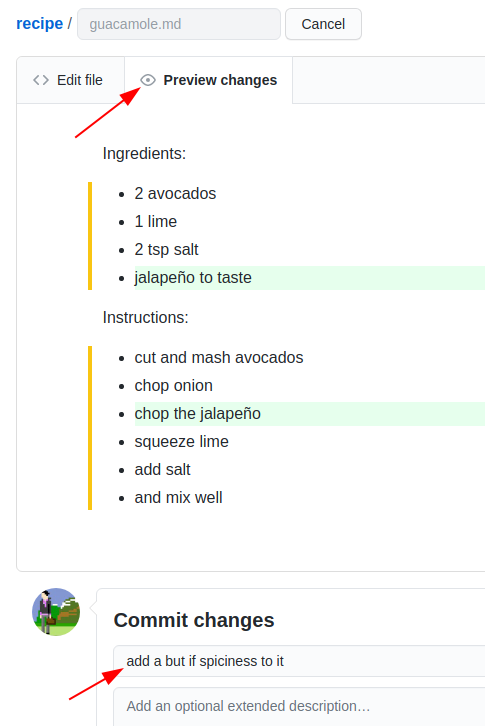
Now improve the recipe by adding an ingredient or an instruction step:
Click on the file.
Click the “pen” icon on top right (“edit this file”).
Make an improvement, write a commit message, commit:
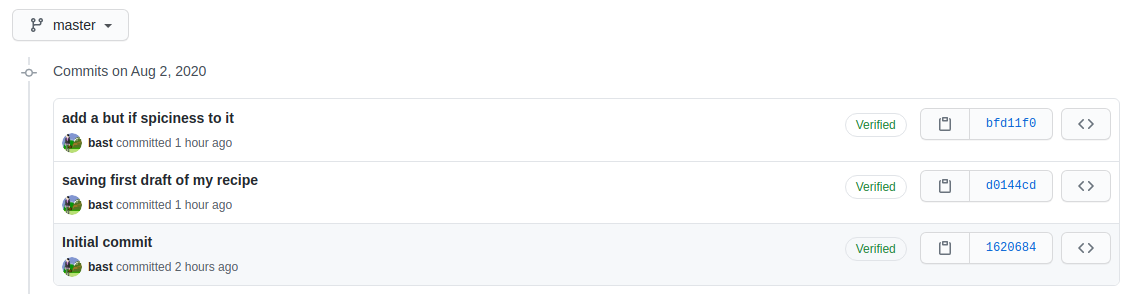
Once you have done that, browse your commits:
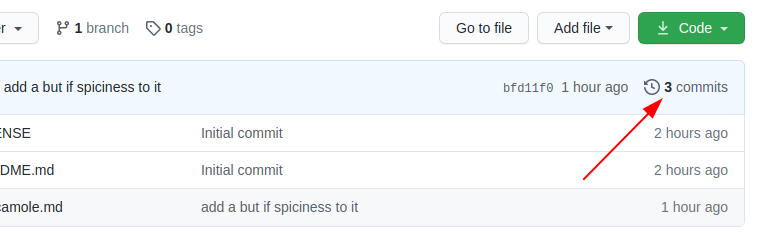
In my example I got:
Step 4: Create a new branch
A branch is a separate line of development. They are useful when you have multiple things going on at once and you don’t want them to get in the way of each other. It also allows collaboration, as we will learn in the next episode.
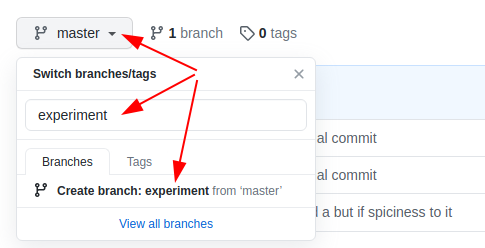
Create a new branch:
Modify your recipe on the newly created branch. Make sure you commit to the new branch:

Then switch back to the
masterbranch and browse your recipe there. Compare the file on both branches.
Step 5: How can we merge branches?
This is an optional step which the instructor may demonstrate and discuss.
We made a separate branch, separate from the main branch master.
What happens when we decide we like that change, and want to take it
into use? We will soon see the magic of Git.
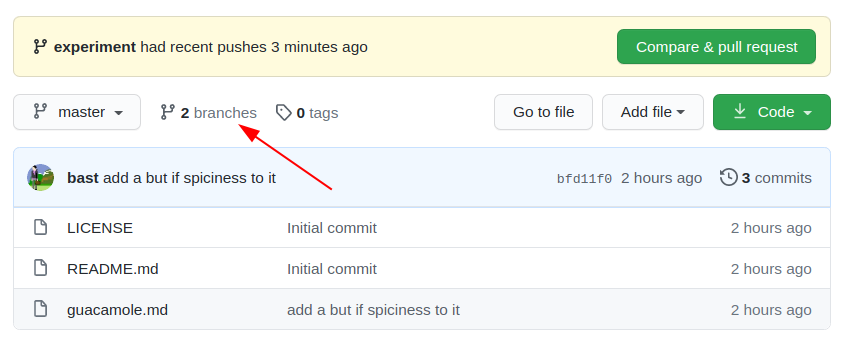
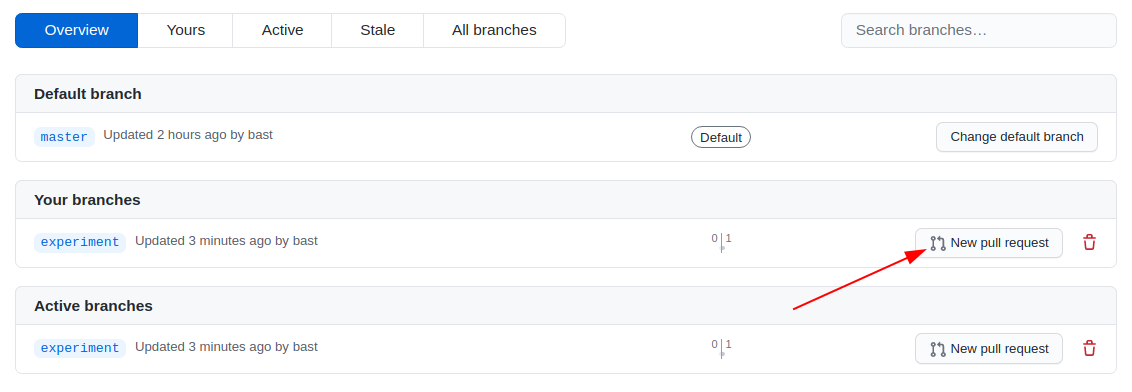
First browse to the overview of all branches:
Now to initiate a merge (request), click on “New pull request”:
Once a “pull request” (think of it as a change proposal) is open, it can be reviewed and merged. We will return to “pull requests” when we later discuss how to contribute changes.
Step 6 (Optional): Repository insights and settings
This is an optional step which the instructor may demonstrate and discuss.
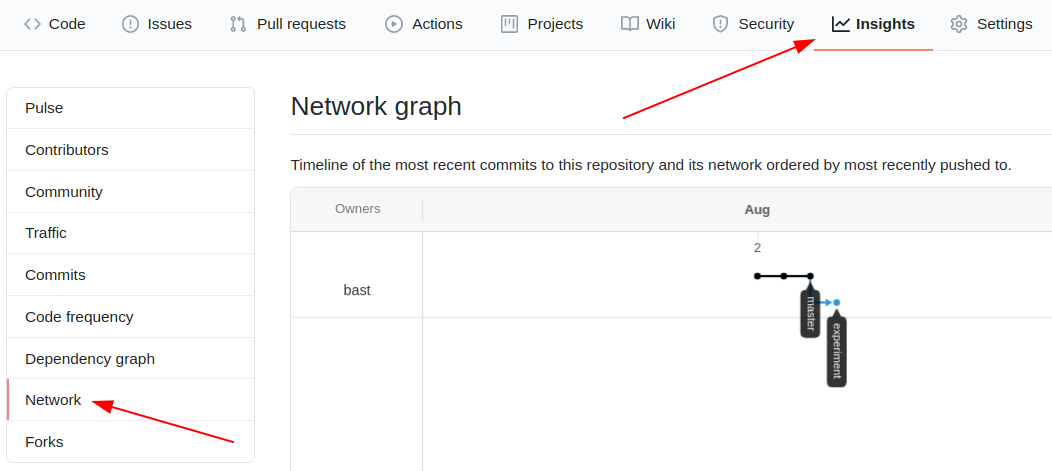
Github gives us many insights into our repository. Nothing here is really specific to Github (everything can be done with regular Git), but they make it especially easy to see. The network lets you see how all commits and branches relate.
Have a look at the network, hover over the dots in the graph (commits). The network view is the best way to get an overview of your branches and commits, and it never hurts to come back here and check:
Step 7 (Optional): Adding a license to an existing repository
This is an optional step which the instructor may demonstrate and discuss.
How to add a license to an existing repository:
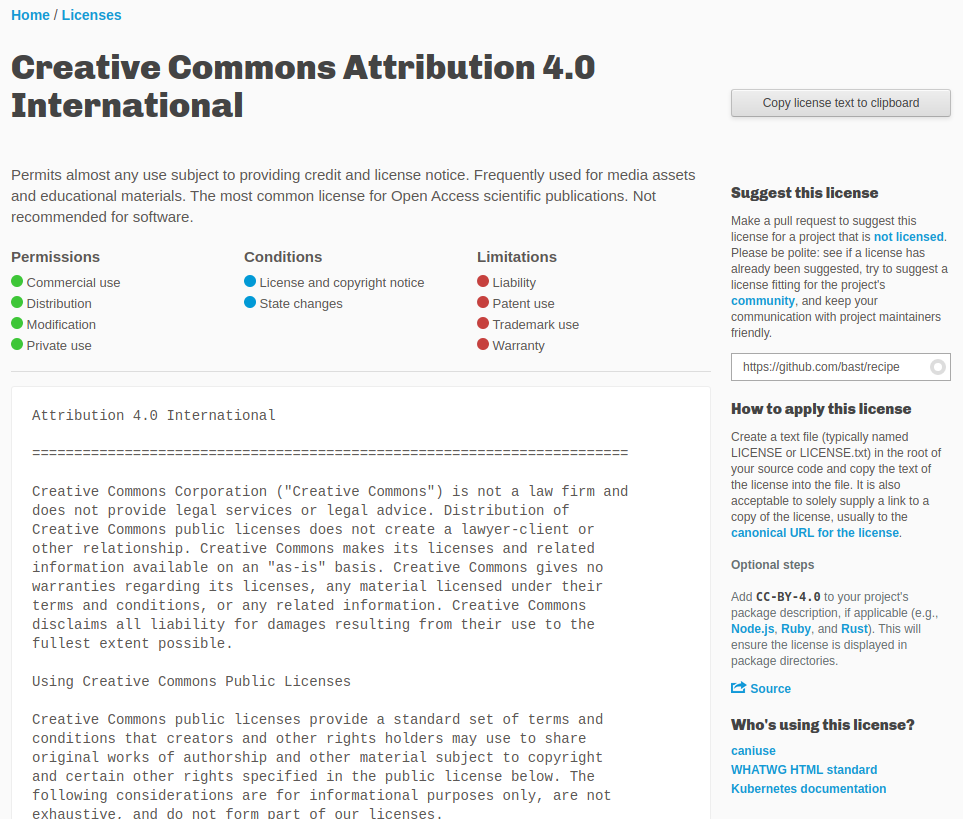
Visit https://choosealicense.com/ and let it guide you.
If you don’t find a suitable license, choose among https://choosealicense.com/appendix/.
Once you have chosen, click on the license name, and you can enter your GitHub repository URL (top right) which will open a pull request (change request) to the repository:
Summary
In this episode, we saw how we could do basic file management from the web. It’s not the best for making lots of new content, but it’s pretty convenient for quick edits. We will now see more advanced ways to do the same things - you can always check back on the web to see the effect.