Sharing notebooks
Objectives
Learn how to share notebooks with colleagues and the community?
Instructor note
5 min teaching
20 min exercises
Nudge your brain: When have you shared your code?
To yourself between two computers?
To a large audience eg. on a webpage?
Coding together with a colleague?
Different ways to share a notebook
You can enter a URL, GitHub repo or username, or GIST ID in nbviewer and view a rendered Jupyter notebook
Read the Docs can render Jupyter Notebooks via the nbsphinx package
Binder creates live notebooks based on a GitHub repository
EGI Notebooks (see also https://egi-notebooks.readthedocs.io)
JupyterLab supports sharing and collaborative editing of notebooks via Google Drive. Recently it also added support for Shared editing with collaborative notebook model.
JupyterLite creates a Jupyterlab environment in the browser and can be hosted as a GitHub page.
Notedown, Jupinx and DocOnce can take Markdown or Sphinx files and generate Jupyter Notebooks
Voilà allows you to convert a Jupyter Notebook into an interactive dashboard
The
jupyter nbconverttool can convert a (.ipynb) notebook file to:python code (
.pyfile)an HTML file
a LaTeX file
a PDF file
a slide-show in the browser
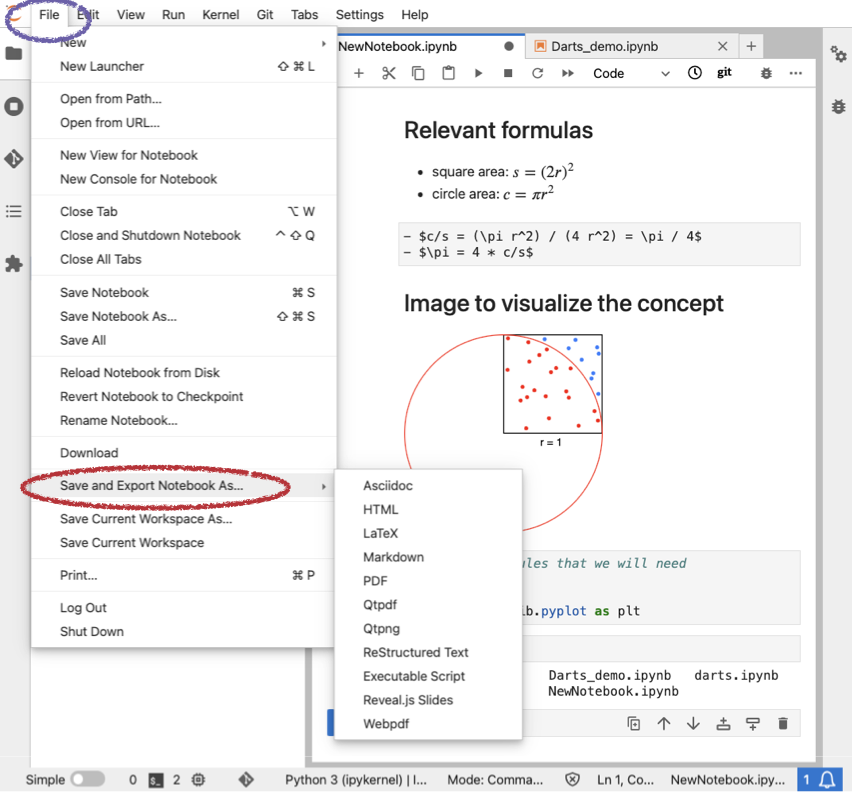
You can export Jupyter Notebooks to various formats. Some might need extra installations.
Commercial offers with free plans
These platforms can be used free of charge but have paid subscriptions for faster access to cloud resources:
CoCalc (formerly SageMathCloud) allows collaborative editing of notebooks in the cloud
Google’s Colaboratory lets you work on notebooks in the cloud, and you can read and write to notebook files on Drive
Microsoft Azure Notebooks also offers free notebooks in the cloud
Deepnote allows real-time collaboration
Sharing dynamic notebooks on Binder
Exercise (20 min): Making your notebooks reproducible by anyone via Binder
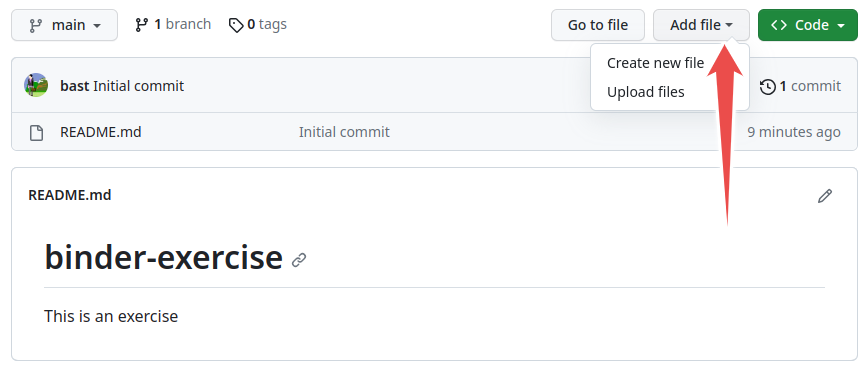
Create a new GitHub repository and click on “Add a README file”: https://github.com/new
This exercise can be done entirely through the GitHub web interface (but using the terminal is of course also OK). You can use the “Add file” button to upload files:
Screenshot of Binder web interface.
Upload the notebook which we have created earlier to this repository. If you got stuck earlier, you can download this notebook (right-click, “Save as …”). You can also try this with a different notebook.
Add also a
requirements.txtfile which contains (adapt this if your notebook has other dependencies):matplotlib==3.4.1
This exercise is for those who use Rmd files instead of Jupyter notebooks.
Upload or push your Rmd file to this GitHub repository.
Add a file
runtime.txtwhich specifies the R version you want to use:r-3.6-2020-10-13
Add a file
install.Rwhich lists the dependencies, for instance:install.packages(c("readr", "ggplot2"))
After you have done that, visit https://mybinder.org/v2/gh/USER/REPOSITORY/BRANCH?urlpath=rstudio (adapt “USER”, “REPOSITORY”, and “BRANCH”).
For more information, see this guide.
Visit https://mybinder.org:
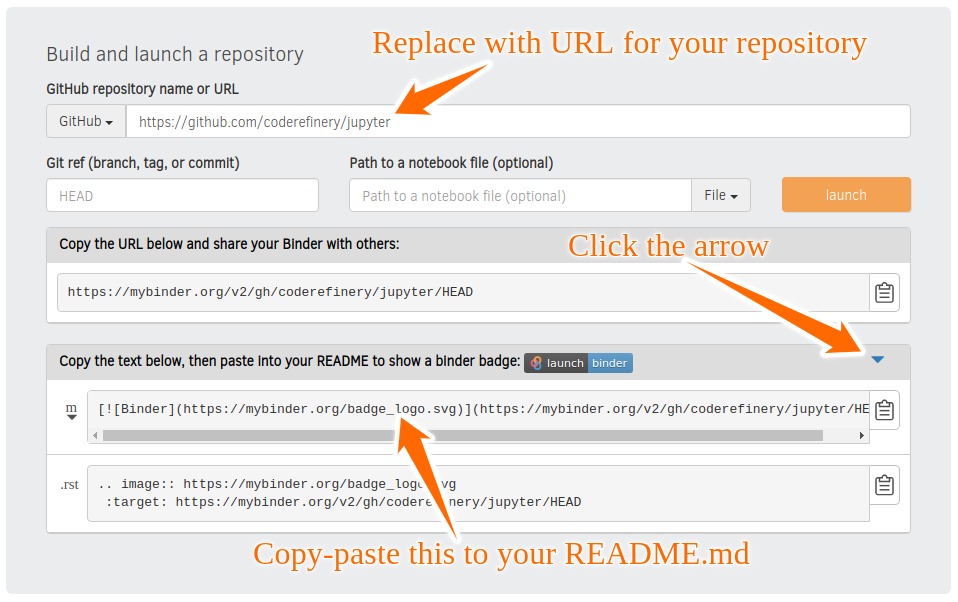
Screenshot of Binder web interface.
Copy-paste the markdown text for the mybinder badge into a README.md file in your notebook repository.
Check that your notebook repository now has a “launch binder” badge in your
README.mdfile on GitHub.Try clicking the button and see how your repository is launched on Binder (can take a minute or two). Your notebooks can now be expored and executed in the cloud.
Enjoy being fully reproducible! Even better would be to get a DOI to your notebook and point Binder to the DOI.
More examples with Binder:
Optional exercises
Importance of tracking dependencies
(Optional) Exercise: what happens without requirements.txt?
Let’s look at the same activity inequality repository.
Start the repository in Binder using this link.
fig3/fig3bc.ipynbis a Python notebook, so it works in Binder. Most others are in R, which also works in Binder. But how?Try to run the notebook. What happens?
Most likely the run breaks down immediately in the first cell:
%matplotlib inline
import pandas as pd
import matplotlib.pyplot as plt
import seaborn as sns
sns.set(style="whitegrid")
from itertools import cycle
We get a long list of
ModuleNotFoundErrormessages. This is because the required Python packages have not been installed and can not be imported. The missing packages include, at least,pandasandmatplotlibmentioned in the error message.To install the missing requirements, add a new code cell to the beginning of the notebook with the contents
!python3 -m pip install pandas matplotlib
and run the notebook again. What happens now?
Again, the run breaks due to missing packages. This time the culprit is the
seabornpackage. Modify the first cell to also install it with!python3 -m pip install pandas matplotlib seaborn
and try to run the notebook for the third time. Does it finally work? What could have been done differently by the developer?
A good way to make a notebook more usable is to create a
requirements.txtfile containing the necessary packages to run the notebook and add it next to the notebook in the repository.In this case, the
requirements.txtcould look like thispandas matplotlib seaborn
and to make sure the packages are installed, one could add a code cell to the beginning of original notebook with the line:
!python3 -m pip install -r requirements.txt
To make sure that the notebook will continue to work also in few months, you might want to specify also the version in the
requirements.txtfile.