Forking workflow
Objectives
Get a mental representation of what is happening on GitHub/GitLab.
Get comfortable with the forking workflow.
Instructor note
30 min teaching
30 min exercises
Forking layout

Forking workflow. Red is the central repository, where only owners have access. Green are forks on GitHub (copy for a single user to work on). Blue are local copies where contributors work on their own computer.
In the forking layout, again we call one repository the “central” repository but people push to forks (their own copies of the repository on GitHub/GitLab/Bitbucket).
Features:
Anybody can propose contributions without asking for advance permission (to public projects).
Maintainer still has full control over what is merged.
Contributors now have more than one remote to work with.
This is used by almost all large (and small) open-source projects these days. Real life examples:
Discussion: Why do we create a fork and not only a clone?
It is not easy to show my changes on my computer to somebody else.
The maintainer cannot pull from my laptop.
The cloud provider is a trusted place to pull from and allows review before pulling.
Backup.
Working with multiple remotes
In the forking layout described above we work with multiple remotes, in this case two remotes: One remote refers to the “central” repository, and the other remote refers to the fork.
There is nothing special about the name
origin. Theoriginis an alias/placeholder (think of “sticky note” referring to an URL).We can name these aliases as we like.
We can add and remove remotes:
$ git remote add upstream https://github.com/project/project.git
$ git remote rm upstream

$ git remote add group-repo https://example.com/exciting-project.git
$ git remote rm group-repo

$ git remote add upstream https://github.com/project/project.git
$ git remote add downstream https://github.com/userX/project.git
To see all remotes:
$ git remote --verbose
Warning
We will work with a new repository for this exercise!
For this exercise we will fork a different repository compared to earlier today. Please step out of the repository and check that you fork the forking-workflow-exercise.
Exercise
We are working on combining the steps into one exercise.
Exercise preparation
Exercise preparation
Maintainer (team lead):
Create an exercise repository by generating from a template using this template: https://github.com/coderefinery/template-forking-workflow-exercise called
forking-workflow-exerciseIn this case we do not add collaborators to the repository (this is the point of this example).
Share the link to the newly created repository with your group.
Learners in exercise team: Fork the newly created repository (not the “coderefinery” one) and then clone your fork.
The instructors are the maintainers. All watchers are collaborators.
We create(d) these the day before hopefully. Choose only one to work with:
Not recorded: https://github.com/cr-workshop-exercises/forking-workflow-exercise (this will not be shown on stream or recorded in our videos, but is be public on the internet until it is deleted)
Recorded: https://github.com/cr-workshop-exercises/forking-workflow-exercise-recorded (this will be shown on stream and recorded, your username and comments may appear in the recorded video on YouTube)
Here we don’t need your GitHub usernames because the point of this exercise is to show that we can collaborate without granting write permissions.
Learners following on their own: Fork one of these two repositories and then clone your fork to your computer.
Exercise: Part 1 - creating a pull request
Distributed-1: Fork a repository and create a pull request
As an example we will collaboratively develop a cookbook for taco recipes, inspired by tacofancy.
Objectives:
Learn how to fork, modify the fork, and open a pull request towards the central repository.
Learn how to update your fork with changes that others have already made to the forked repository.
Exercise:
Maintainer prepares an exercise repository (see above; this will take 5-10 minutes).
Learners work on steps A-F (15-20 minutes).
There are two optional steps after step E for those who want more.
After step E you take a break or help others. Please ask questions both during group work and in the collaborative document.
We will review the pull requests together and then update forks.
Before and after each action you take, run the following informational
commands. Carefully observe what happens, especially in git graph:
git graph- almost every time. As a reminder, to definegit graphuse:$ git config --global alias.graph "log --all --graph --decorate --oneline"
git status- when you modify files.
Step A: Fork and clone
First fork the exercise repository (please carefully check with your exercise group which repository you should fork).
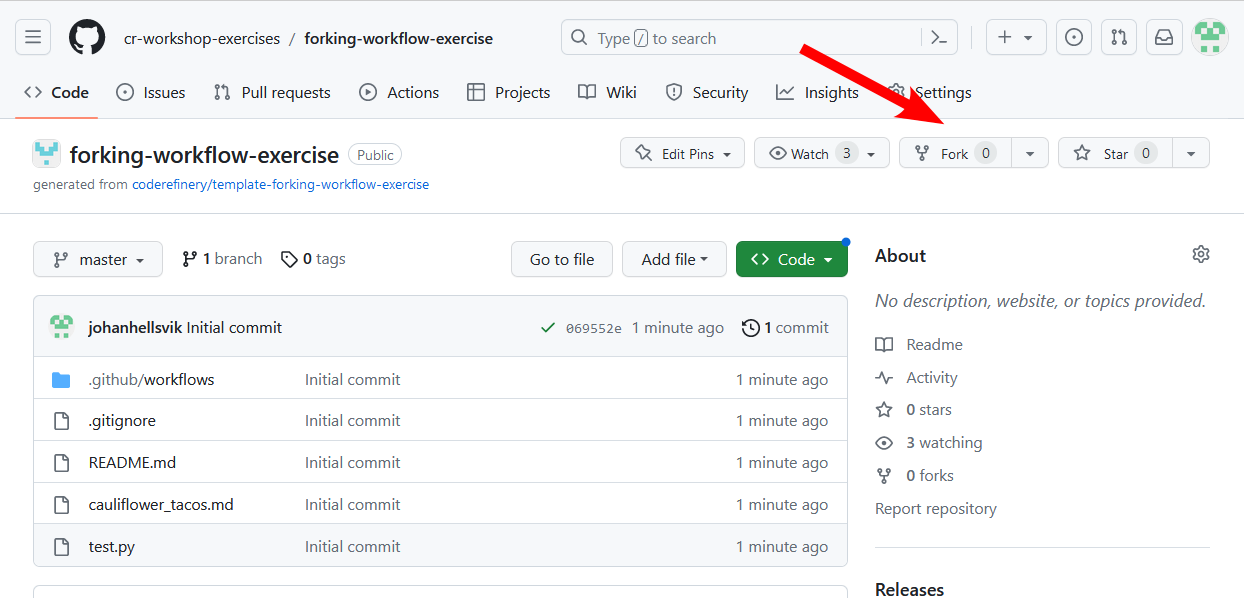
How to fork.
Then clone your fork to your computer. The repository URL
should include your username. Clone using the SSH path you get from
the webpage, not the https URL from the web browser. The URL should start with
git@github.com:. Otherwise, you won’t be able to push later.
Pictorial representation of this step
Here is a pictorial representation of this part:

Forking followed by cloning.
This is how it looks after we fork:

central
fork
A fork is basically a (bare) clone.
The forked repo and the fork are in principle independent repositories.
When forking we copy all commits, all branches.
After we clone the fork we have three in principle independent repositories:
central
fork

local
Step B: Open an “issue” as a change proposal
Before we start any coding, open a new “Issue” on the central repository as a “proposal” where you describe your idea for a recipe with the possibility to collect feedback from others. After creating this issue note the issue number. We will later refer to this issue number.
Discuss why it can be useful to open an issue before starting the actual coding.
Step C: Modify and commit
Before we do any modification, we create a new branch and switch to it: this is a good reflex and a good practice. Choose a branch name which is descriptive of its content. For example:
$ git branch myname-feature    # describes both who it belongs to and the purpose
$ git switch myname-feature
On the new branch create a new file which will hold your recipe,
for instance traditional_coderefinery_tacos.md (but change the name). You can get inspired
here. Hopefully we all use different
file names, otherwise we will experience conflicts later (which is also interesting!).
There is also a file called test.py which will automatically verify whether your recipe contains the string
“taco” (case insensitive). This is there to slowly introduce us to automated testing.
Once you are happy with your recipe, commit the change and in your commit message reference the issue which you have opened earlier with “this is my commit message; closes #N” (use a more descriptive message and replace N by the actual issue number from step B).

Step D: Push your changes to the fork
Now push your new branch to your fork. Your branch is probably called something else than “myname-feature”. Also verify where “origin” points to.
$ git push origin myname-feature
If you get a password request for https://github.com when you try to push
Probably you cloned with the HTTPS URL (see git remote -v to
confirm). You can change this to SSH by going to the repository page,
clicking “Code”, copying the SSH URL (starts with git@github.com:),
and then updating the URL with:
$ git remote set-url origin REPOSITORY-URL

Step E: Open a pull request
Then file a pull request from the branch on your fork towards the main branch on the central repository.

Step F: View your pull request
Go to the central repository, and list all pull requests and view your your pull request. Remember that the pull request is created on the original repostory.
Wait here until we integrate all pull requests into the central repo together.
Observe how the issues automatically close after the pull requests are merged (provided the commit messages contain the right keywords).
(optional) Distributed-2: Send a conflicting pull request
If you complete parts A-E much earlier than others, try to open another pull request where you anticipate a conflict with your first pull request.
(optional) Distributed-3: Making changes to your pull request after it has been opened.
You can do that by pushing additional commits to the same branch where you opened the pull request from. Observe how they end up added to your pull request.
Exercise: Part 2 - code review and merging changes
We do this step together. The instructor shows a submitted pull request, discusses what features to look at, and how to discuss and review.
At the same time, maintainers can review open pull requests from their exercises groups.
(optional) Distributed-4: Squash merge a pull request
If you complete this exercise much earlier than others, create a new pull request with two or more commits.
Then, when reviewing the change as maintainer, accept these with “Squash and merge” and later compare the source and target repositories/branches how they differ after the small commits got squashed into one.
Exercise: Part 3 - Updating forks
We do this part after the contributions from all participants have been integrated.
Once this is done, practice to update your fork with the merged changes from others and verify that you got the files created by other participants.
Make sure that the contributions from other participants are not only on your local repository but really also end up in your fork.
On GitHub it is possible to update the fork by pressing a button (see screenshot below):
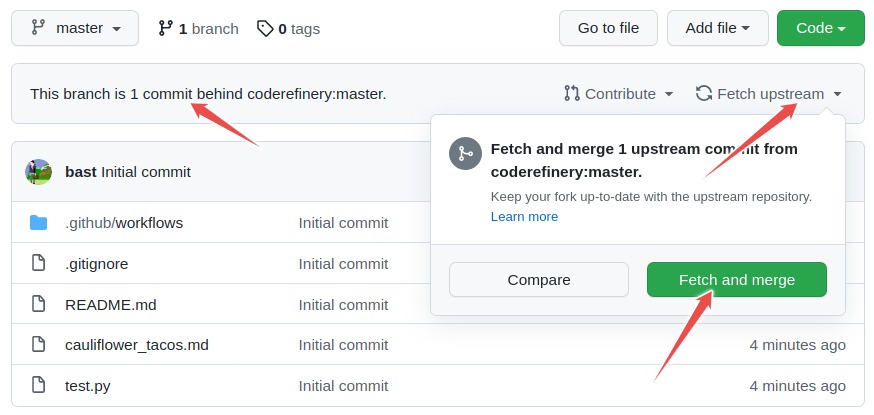
Updating the fork via GitHub web interface.
Updating the fork using the command line
Remotes are aliases. We can use the URLs a remote directly.
instead of aliases like origin or upstream.
Here we pull from the central repo and push to our fork:
$ git switch main
$ git pull CENTRAL-REPOSITORY-URL main
$ git push FORK-URL main
Here is a pictorial representation of this part:

Pull followed by push to a different remote.
Updating the fork using the command line (longer version)
Below is a step by step recipe with pictorial representations which hopefully makes clear what happens in each step.
$ git remote add central CENTRAL-REPOSITORY-URL
$ git fetch central

central

fork

local
$ git switch main
$ git merge central/main
central
fork

local
$ git push origin main
central

fork

local

Luke Skywalker: You know, I did feel something. I could almost see the remote.
Ben Kenobi: That’s good. You’ve taken your first step into a larger world.
[from Star Wars Episode IV - A New Hope]
Discussion: Always create a feature branch
For each pull request create a new branch. Motivation:
Limits the risk that commits get accidentally appended to an open pull request (remember: pull requests are from branch to branch, not from commit to branch).
History-rewrite (rebased and/or squashed commits) on the central repository does not lead to a diverging branch on the fork.