Collaborating within the same repository
In this episode, we will learn how to collaborate within the same repository. We will learn how to cross-reference issues and pull requests, how to review pull requests, and how to use draft pull requests.
This exercise will form a good basis for collaboration that is suitable for most research groups.
Note
When you read or hear pull request, please think of a change proposal.
Exercise
In this exercise, we will contribute to a repository via a pull request. This means that you propose some change, and then it can be discussed and accepted (sometimes after requesting further improvements).
Exercise preparation
First, we need to get access to some repository to which we will contribute.
Form not too large groups (4-5 persons).
Each group needs to appoint someone who will host the shared GitHub repository: the maintainer. This is typically the exercise lead (if available). Everyone else is a collaborator.
The maintainer (one person per group) generates a new repository called
centralized-workflow-exercisefrom the template https://github.com/coderefinery/recipe-book-template (There is no need to tick “Include all branches” for this exercise):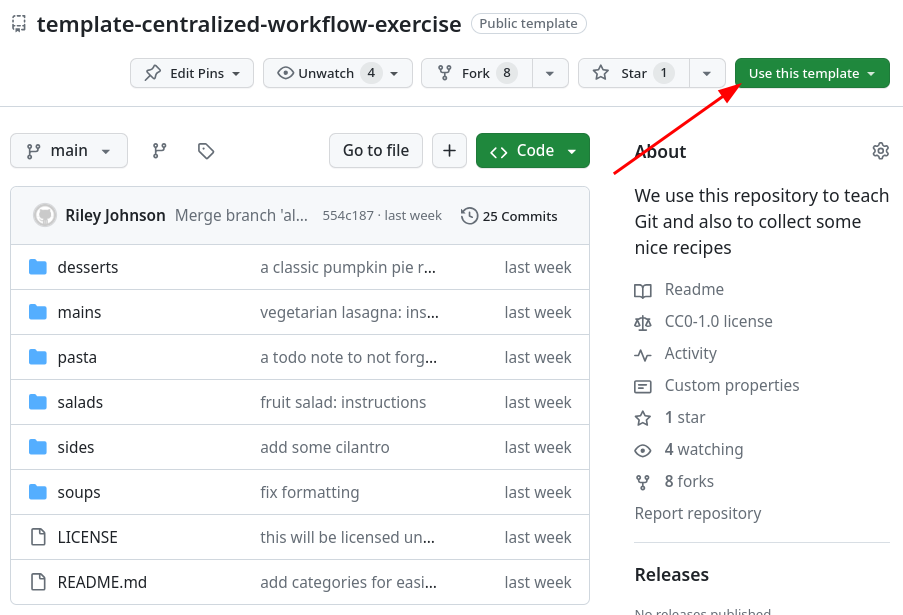
Then everyone in your group needs their GitHub account to be added as collaborator to the exercise repository:
Collaborators give their GitHub usernames to their chosen maintainer.
Maintainer gives the other group members the newly created GitHub repository URL.
Maintainer adds participants as collaborators to their project (Settings -> Collaborators -> Manage access -> Add people).
The instructors are the maintainers. All watchers are collaborators. This exercise is only possible during our livestream courses. The preparation typically happens already 1-2 days before.
If you have not requested access
If you have not yet requested access, could you please open an issue in this repository. Wait a minute for staff to add you, then wait for the invite email to arrive and accept the invitation from the email and “unwatch” repositories (below).
Choose only one to work with (you must have requested access already, see above)
Not recorded: https://github.com/cr-workshop-exercises/centralized-workflow-exercise (this will not be shown on stream or recorded in our videos, but is public on the internet until it is deleted)
Recorded: https://github.com/cr-workshop-exercises/centralized-workflow-exercise-recorded (this will be shown on stream and recorded, your username and comments may appear in the recorded video on YouTube)
Don’t forget to accept the invitation
Alternatively check the inbox for the email account you registered with GitHub. GitHub emails you an invitation link, but if you don’t receive it you can go to your GitHub notifications in the top right corner. The maintainer can also “copy invite link” and share it within the group.
Watching and unwatching repositories
Now that you are a collaborator, you get notified about new issues and pull requests via email.
If you do not wish this, you can “unwatch” a repository (top of the project page).
However, we recommend watching repositories you are interested in. You can learn things from experts just by watching the activity that come through a popular project.
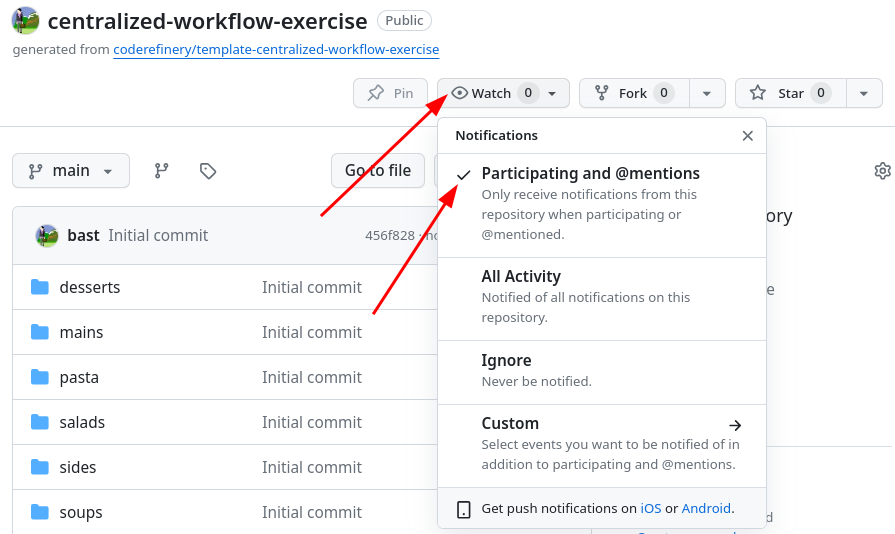
Unwatch a repository by clicking “Watch” in the repository view, then “Participating and @mentions” - this way, you will get notifications about your own interactions.
Solution and hints
(1) Opening an issue
This is done through the GitHub web interface. For example, you could give the name of the recipe you want to add (so that others don’t add the same one). It is the “Issues” tab.
(2) Create a new branch.
If on GitHub, you can make the branch in the web interface (Recording changes). If working locally, you need to follow Cloning a Git repository and working locally.
(3) Make a change adding the recipe
Add a new file with the recipe in it. Commit the file. In the commit message, include the note about the issue number, saying that this will close that issue (right below here we show how).
Cross-referencing issues and pull requests
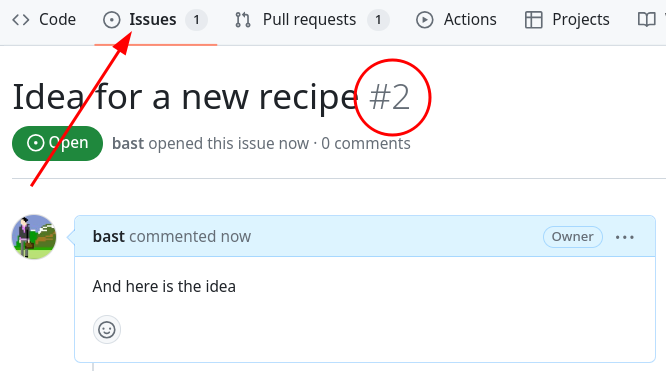
Each issue and each pull request gets a number and you can cross-reference them.
When you open an issue, note down the issue number (in this case it is #2):
You can reference this issue number in a commit message or in a pull request, like in this commit message:
this is the new recipe; fixes #2
If you forget to do that in your commit message, you can also reference the issue
in the pull request description. And instead of fixes you can also use closes or resolves
or fix or close or resolve (case insensitive).
Here are all the keywords that GitHub recognizes: https://help.github.com/en/articles/closing-issues-using-keywords
Then observe what happens in the issue once your commit gets merged: it will automatically close the issue and create a link between the issue and the commit. This is very useful for tracking what changes were made in response to which issue and to know from when until when precisely the issue was open.
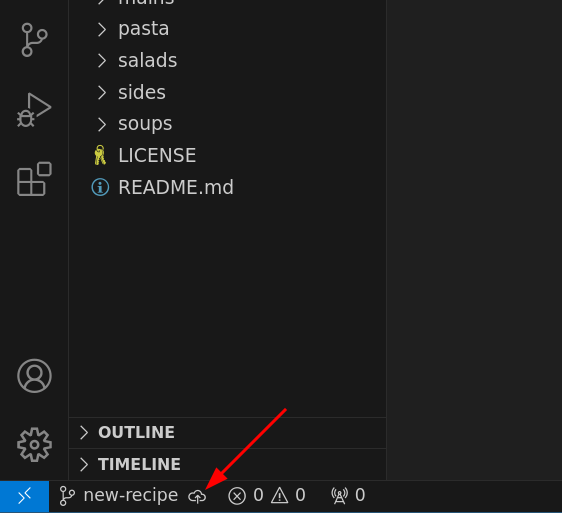
(4) Push to GitHub as a new branch
This is only necessary if you created the changes locally. If you created the changes directly on GitHub, you can skip this step.
Push the branch to the repository. You should end up with a branch visible in the GitHub web view (if you are unsure how, see Cloning a Git repository and working locally).
In VS Code, you can “publish the branch” to the remote repository by clicking the cloud icon in the bottom left corner of the window:
If you have a local branch my-branch and you want to push it to the remote
and make it visible there, first verify what your remote is:
$ git remote --verbose

origin	git@github.com:USER/centralized-workflow-exercise.git (fetch)
origin	git@github.com:USER/centralized-workflow-exercise.git (push)
In this case the remote is called origin and refers to the address
git@github.com:USER/centralized-workflow-exercise.git. Both can be used
interchangeably. Make sure it points to the right repository, ideally a
repository that you can write to.
Now that you have a remote, you can push your branch to it:
$ git push origin my-branch
This will create a new branch on the remote repository with the same name as your local branch.
You can also do this:
$ git push --set-upstream origin my-branch
This will connect the local branch and the remote branch so that in the future
you can just type git push and git pull without specifying the branch name
(but this depends on your Git configuration).
Troubleshooting
If you don’t have a remote yet, you can add it with (adjust ADDRESS to your repository address):
$ git remote add origin ADDRESS
ADDRESS is the part that you copy from here:

If the remote points to the wrong place, you can change it with:
$ git remote set-url origin NEWADDRESS
(5) Open a pull request towards the main branch
This is done through the GitHub web interface. We saw this in a previous lesson.
(6) Reviewing pull requests
You review through the GitHub web interface.
Checklist for reviewing a pull request:
Be kind, on the other side is a human who has put effort into this.
Be constructive: if you see a problem, suggest a solution.
Towards which branch is this directed?
Is the title descriptive?
Is the description informative?
Scroll down to see commits.
Scroll down to see the changes.
If you get incredibly many changes, also consider the license or copyright and ask where all that code is coming from.
Again, be kind and constructive.
Later we will learn how to suggest changes directly in the pull request.
If someone is new, it’s often nice to say something encouraging in the comments before merging (even if it’s just “thanks”). If all is good and there’s not much else to say, you could merge directly.
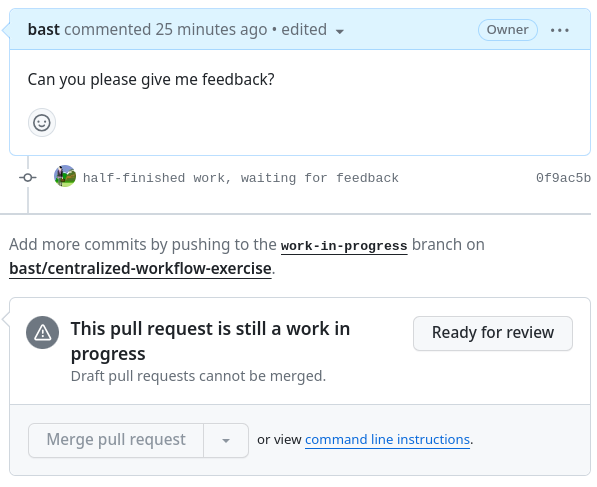
(7) Draft pull requests
Try to create a draft pull request:
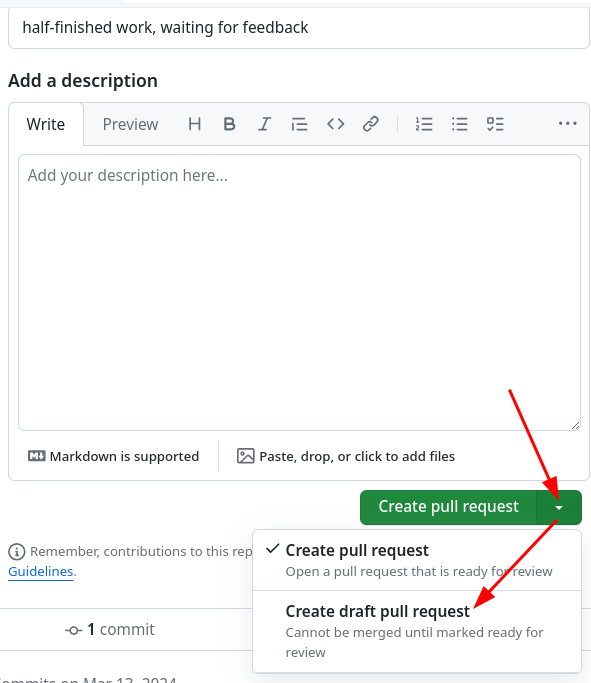
Verify that the draft pull request cannot be merged until it is marked as ready for review:
Draft pull requests can be useful for:
Feedback: You can open a pull request early to get feedback on your work without signaling that it is ready to merge.
Information: They can help communicating to others that a change is coming up and in progress.
What is a protected branch? And how to modify it?
A protected branch on GitHub or GitLab is a branch that cannot (accidentally) deleted or force-pushed to. It is also possible to require that a branch cannot be directly pushed to or modified, but that changes must be submitted via a pull request.
To protect a branch in your own repository, go to “Settings” -> “Branches”.
Summary
We used all the same pieces that we’ve learned previously.
But we successfully contributed to a collaborative project!
The pull request allowed us to contribute without changing directly: this is very good when it’s not mainly our project.
Let’s clarify typical questions
What is the difference between git pull and a pull request?
git pullis a command that fetches changes from a remote repository and merges them into the current branch.Pull request: change proposal. It might have been named this way because after you accept a pull request, internally it git pulls the changes from the branch containing the change proposal.
What is the difference between a pull request and an issue?
Pull request is a mechanism to suggest and review changes.
An issue is a place where we note and discuss problems or ideas.
Both get a number and they can reference each other but that’s all they have in common.
What is the practical difference between branch + pull and fork + pull?
The practical difference between branch + pull and fork + pull lies in how collaboration is structured in a Git-based workflow.
Branch + Pull (Single Repository Contribution) : Used when contributing to a repository where you have direct write access.
Process:
Clone the main repository.
Create a new branch in the same repository.
Make changes and commit them.
Push the branch to the same repository.
Open a Pull Request from your branch to the main branch.
Fork + Pull (External Contribution): Used when contributing to a repository where you do not have write access.
Process:
Fork the repository (create your own copy under your GitHub account).
Clone your forked repository locally.
Create a new branch in your fork.
Make changes and commit them.
Push the branch to your fork.
Open a Pull Request from your fork to the original repository.