Recording changes
The first and most basic task to do in Git is record changes using commits. In this part, we will record changes in two ways: on a new branch (which supports multiple lines of work at once), and directly on the “main” branch (which happens to be the default branch here).
Objectives
Record new changes to our own copy of the project.
Understand adding changes in two separate branches.
See how to compare different versions.
Background
In the previous episode we have browsed an existing repository and saw commits and branches.
Each commit is a snapshot of the entire project at a certain point in time and has a unique identifier (hash) .
A branch is a line of development, and the
mainbranch ormasterbranch are often the default branch in Git.A branch in Git is like a sticky note that is attached to a commit. When we add new commits to a branch, the sticky note moves to the new commit.
Tags are a way to mark a specific commit as important, for example a release version. They are also like a sticky note, but they don’t move when new commits are added.
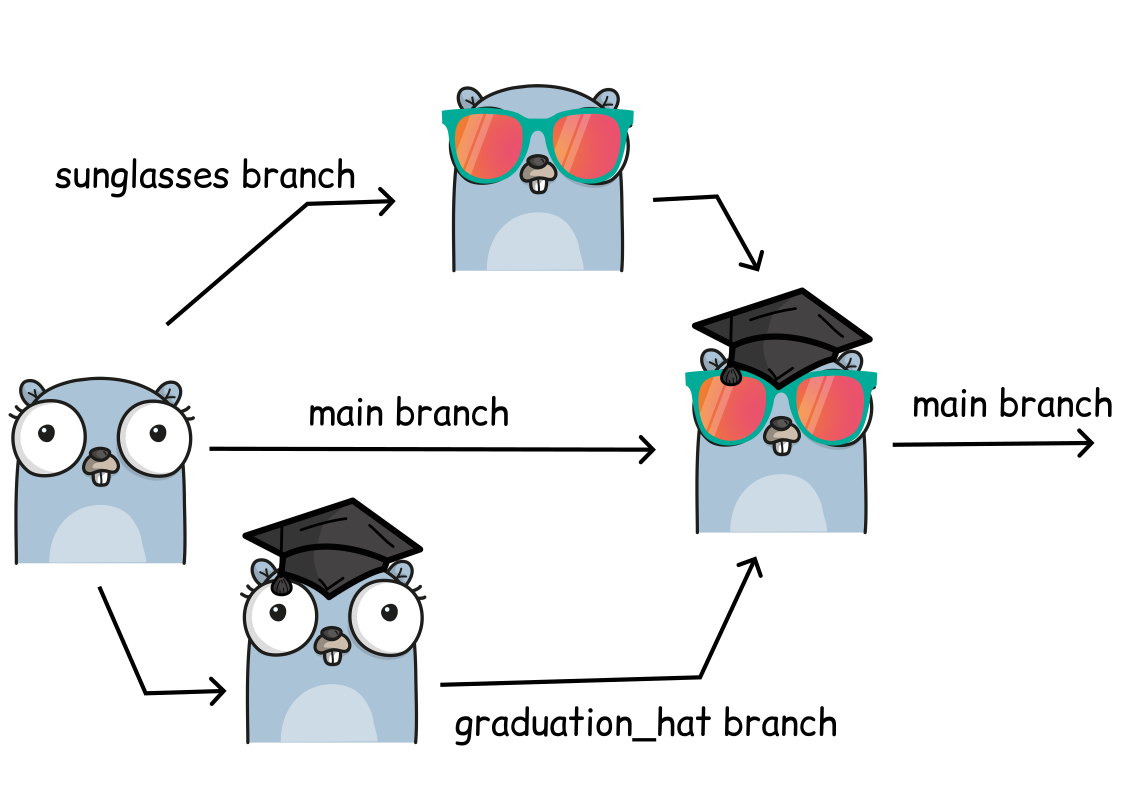
What if two people, at the same time, make two different changes? Git can merge them together easily. Image created using https://gopherize.me/ (inspiration).
Exercise
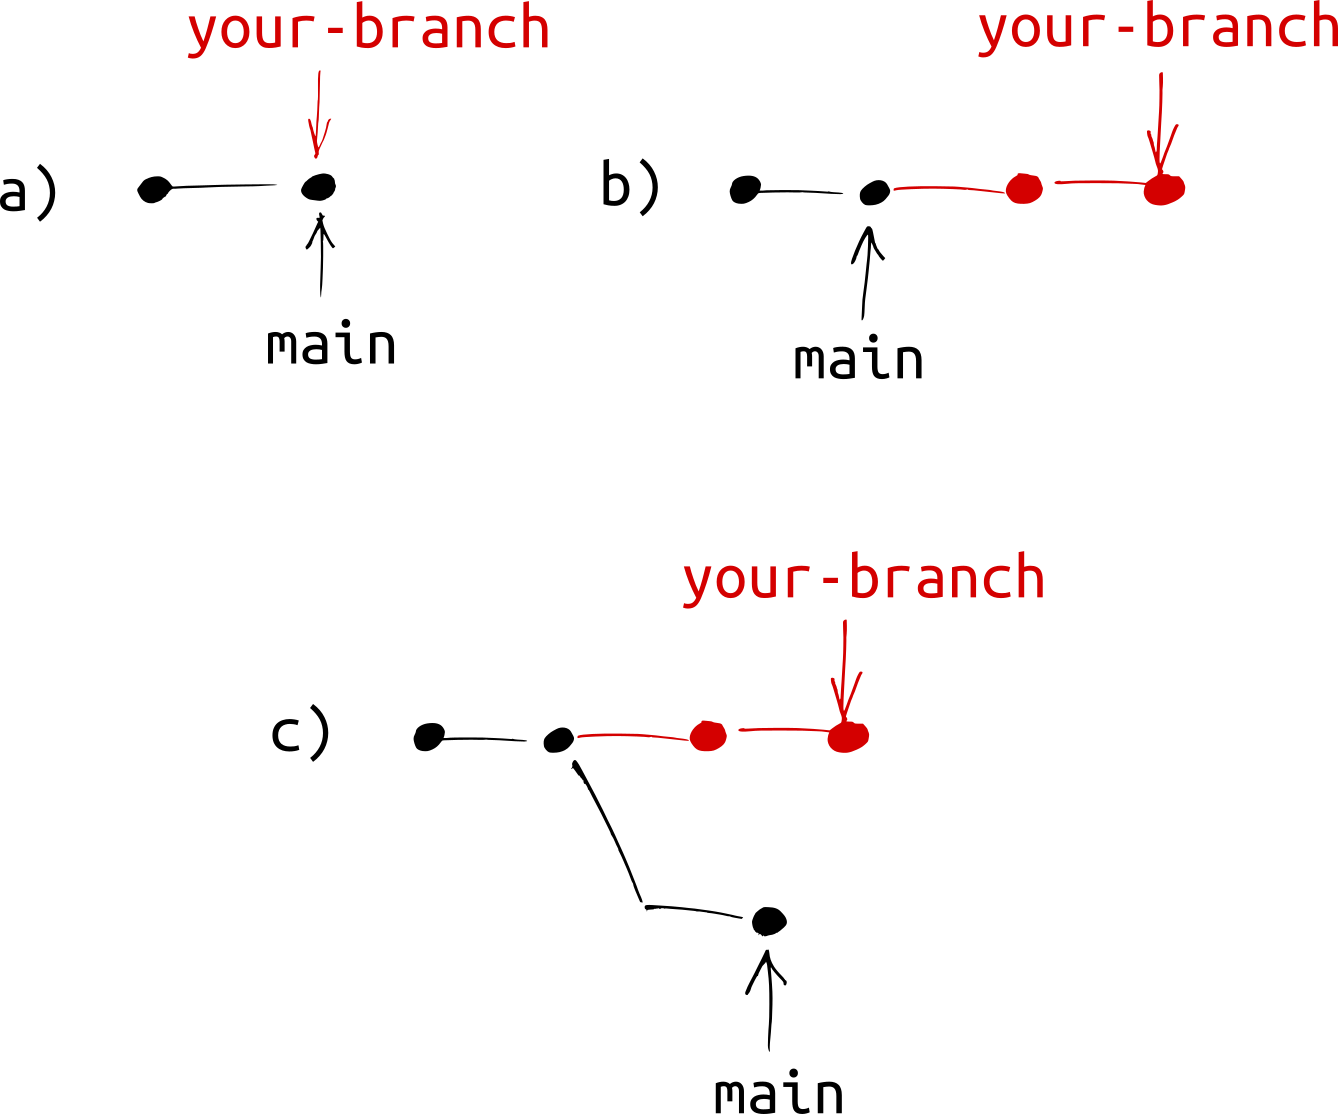
Illustration of what we want to achieve in this exercise.
We offer four different paths of how to do this exercise. For the CodeRefinery workshop day 1, we use and demonstrate the GitHub path only and recommend you do that (you can get experience with the other paths on day 2).
Exercise: Practice creating commits and branches (20 min)
Make sure that you now work on your fork of the recipe-book repository (
USER/recipe-book, notcr-workshop-exercises/recipe-book)First create a new branch and then add a recipe to the branch and commit the change.
In a new commit, modify the recipe you just added.
Switch to the
mainbranch and modify a recipe there.Browse the network and locate the commits that you just created (“Insights” -> “Network”).
Compare the branch that you created with the
mainbranch. Can you find an easy way to see the differences?Can you find a way to compare versions between two arbitrary commits in the repository?
Try to rename the branch that you created and then browse the network again.
Try to create a tag for one of the commits that you created (on GitHub, create a “release”).
The solution below goes over most of the answers, and you are encouraged to use it when the hints aren’t enough - this is by design.
Solution and walk-through
(1) Make sure you are on your fork
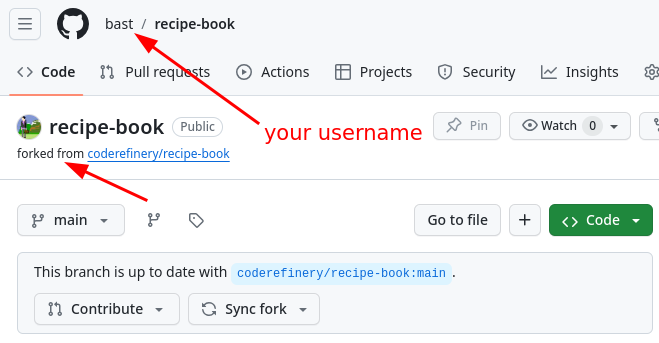
You want to see your username in the URL and you want to see the “forked from …” part.
(2) Create a branch and add a recipe to the branch
A recipe template is below. This format is called “Markdown”, but it doesn’t matter right now. You don’t have to use this particular template.
# Recipe name

## Ingredients

- Ingredient 1
- Ingredient 2


## Instructions

- Step 1
- Step 2
There is a main branch that is default. We want to create a
different branch for our new commit, because we will merge it later.
Commit is the verb to describe recording more changes, and also the
name of the thing you make. A commit is identified by something such as
554c187.
Where it says “main” at the top left, click, enter a new branch name
new-recipe, click on the offer to create the new branch (“Create branch new-recipe from main”).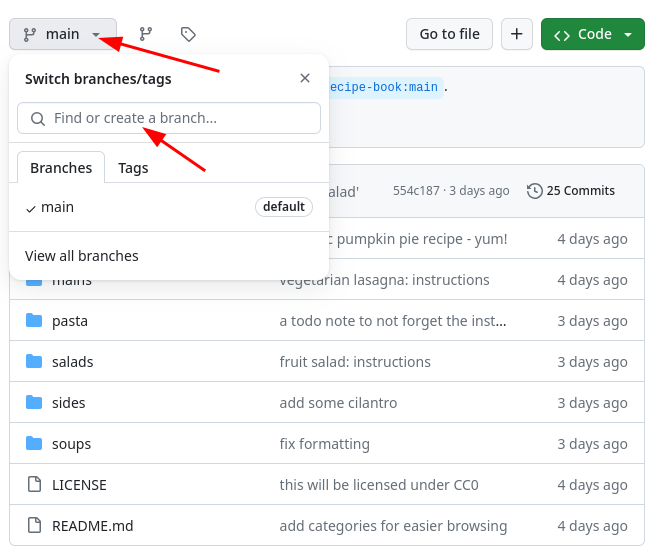
Change to some sub-directory, for example
sides.Make sure you are still on the
new-recipebranch (it should say it at the top), and click “Add file” → “Create new file” from the upper right.Enter a filename where it says “Name your file…”, with a
.mdat the end. Example:mixed-nuts.md.Enter the recipe. You can use the template above.
Click “Commit changes”
Enter a commit message. Then click “Commit changes”.
You should appear back at the file browser view, and see your new recipe there.
Make sure that you are on the main branch.
Version control button on left sidebar → Three dots in upper right of source control → Branch → Create branch.
VS Code automatically switches to the new branch.
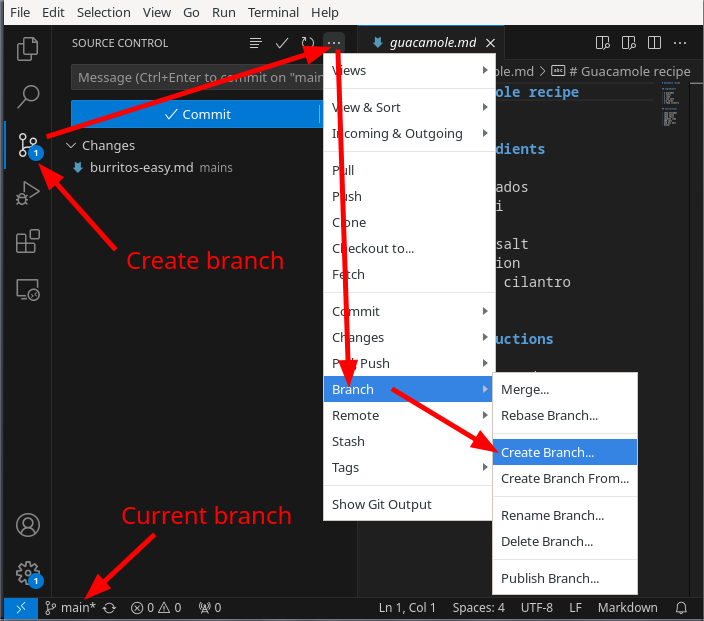
Creating a new branch in VS Code.
Create a new file, for example
sides/mixed-nuts.md.In the version control sidebar, click the
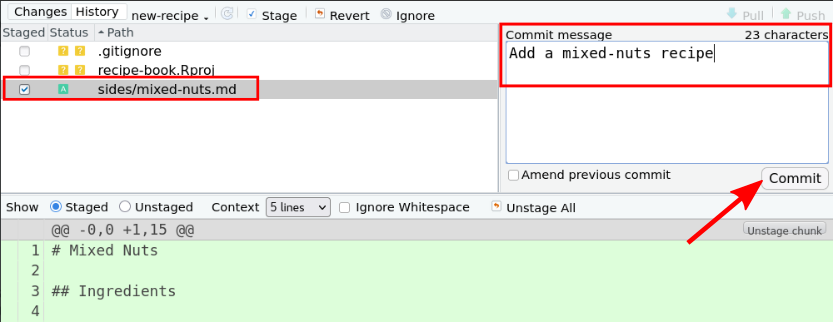
+sign to add the file for the next commit.Enter a brief message and click “Commit”.
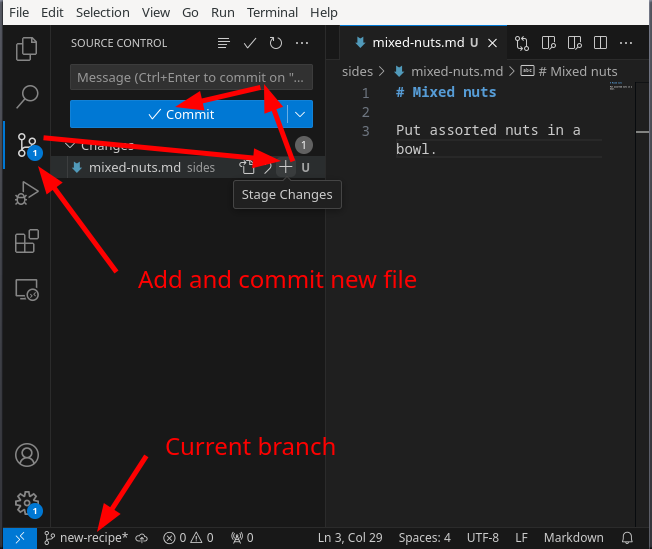
Committing a new file in VS Code.
Create a new branch called new-recipe from main and switch to it:
$ git switch --create new-recipe main
Then create the new file. Finally add and commit the file:
$ git add sides/mixed-nuts.md
$ git commit -m "Add mixed nuts recipe"
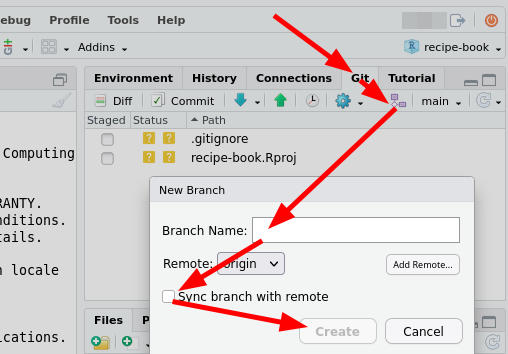
In the Git tab of the Environment panel (upper right), click New Branch.
In the pop-up fill in the branch name, e.g. “new-recipe”, untick the box in front of Sync branch with remote to avoid the branch to be pushed to GitHub right away.
Click Create and RStudio will automatically switch to the new branch.
Create a new file, for example
sides/mixed-nuts.md. Remember to save any changes to your file before committing.In the Git tab in the Environment panel (upper right) check the box in front of the file you just created, then click Commit in the tab menu-bar to open the Git Changes window.
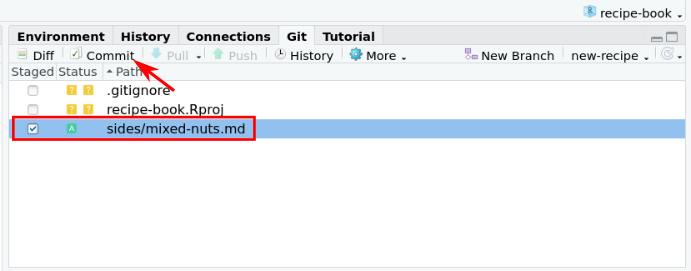
In the Changes window, check that your new file is selected (ticked), write a short commit message, and finally click “Commit”
(3) Modify the recipe with a new commit
This is similar to before, but we click on the existing file to modify.
Click on your new recipe, for example
mixed-nuts.md.Click the edit button, the pencil icon at top-right.
Follow the “Commit changes” instructions as in the previous step.
Repeat as in the previous step.
Modify the file. Then commit the new change:
$ git add sides/mixed-nuts.md
$ git commit -m "Short summary of the change"
Make sure to replace “Short summary of the change” with a meaningful commit message.
Make some changes to the recipe you created in the step above. Then follow the same instructions as above starting from step 5.
(4) Switch to the main branch and modify a recipe there
Go back to the main repository page (your user’s page).
In the branch switch view (top left above the file view), switch to
main.Modify another recipe that already exists, following the pattern from above. Don’t modify the one you just created (but it shouldn’t even be visible on the
mainbranch).
Use the branch selector at the bottom to switch back to the main branch. Repeat the same steps as above.
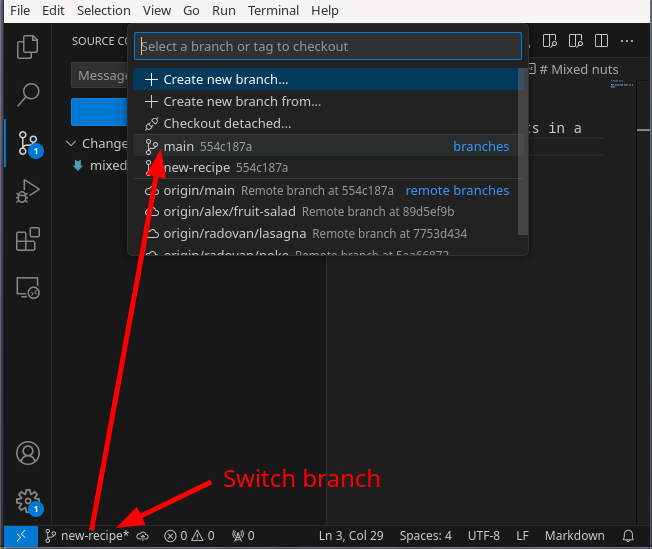
Switching branch via selector at bottom.
First switch to the main branch:
$ git switch main
Then modify a file. Finally git add and then commit the change:
$ git commit -m "Short summary of the change"
In the Git tab of the Environment panel (upper right), click your current branch name, here “new-recipe” and then choose the “main” branch.

Modify another recipe and commit your changes.
(5) Browse the commits you just made
Let’s look at what we did. Now, the main and new-recipe branches
have diverged: both have some modifications. Try to find the commits
you created.
Insights tab → Network view (just like we have done before).
This requires an extension. Opening the VS Code terminal lets you use the command line method.
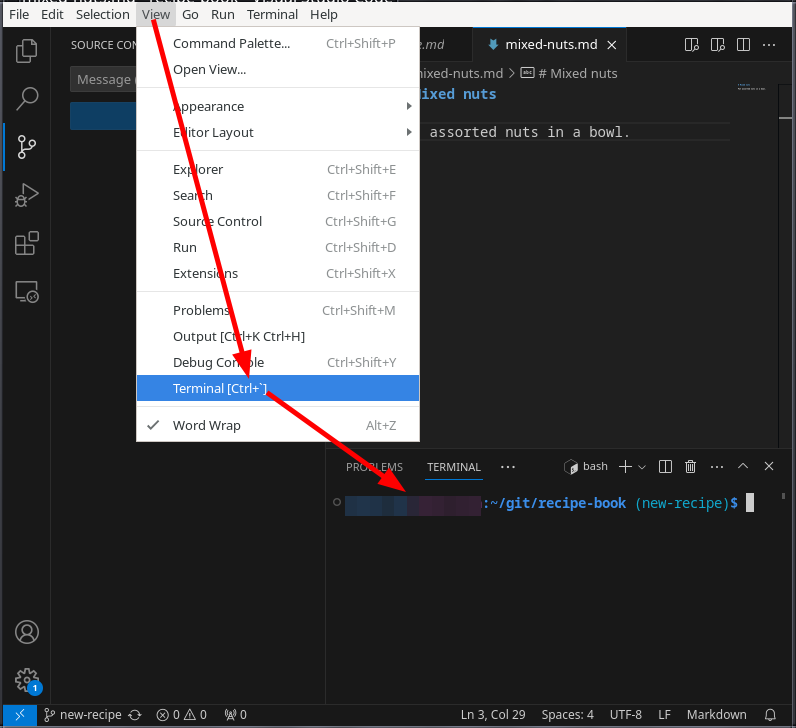
View → Terminal will open a terminal at bottom. This is a normal command line interface and very useful for work. (Note the git-aware prompt that shows the current branch. This requires other setup.)
$ git graph
$ git log --graph --oneline --decorate --all  # If you didn't define git graph yet.
In my case I got:
* b4de93b (HEAD -> main) add spring onion to poke
| * dc5d6f0 (origin/new-recipe, new-recipe) adding chocolate to the mixed nuts recipe
| * b4035e3 add mixed nuts recipe
|/
*   554c187 (origin/main, origin/HEAD) Merge branch 'alex/fruit-salad'
|\
| * 89d5ef9 fruit salad: instructions
| * 3bd2468 fruit salad: ingredients
* | 8bcb766 a todo note to not forget the instructions
|/
* b950c5c just fixing capitalization
* d18035e fix formatting
* 7051cca add some cilantro
* ae19e81 add categories for easier browsing
* a6fe629 we also need salad
* 30b89c4 document what this is about
*   fd12dc1 Merge branch 'radovan/lasagna'
|\
| * 7753d43 vegetarian lasagna: instructions
| * aa0473e vegetarian lasagna: ingredients
* |   1e5a24a Merge branch 'radovan/poke'
|\ \
| * | 5aa6687 oh no! forgot onion - adding
| * | cc84e4f working on a poke recipe
| |/
* | 9500901 a classic pumpkin pie recipe - yum!
* | 34ce939 drafting a recipe for a pasta, so far only ingredients
* | 28e5f26 recipe for a mushroom soup
|/
* a550963 reduce amount of salt
* f2d6d58 don't forget to enjoy
* 1fde064 add half an onion
* 4c1873e drafting a guacamole recipe
* 2992443 this will be licensed under CC0
* 084a1ea starting with an almost empty readme
Open the history window like you did during the previous lesson.
Select “(All branches)” in the branch selector drop-down menu to see all the commits on all branches.
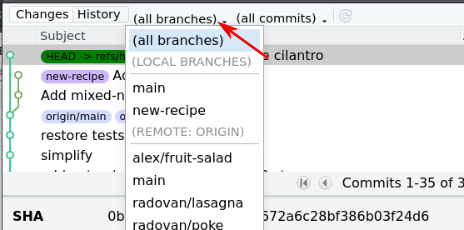
NOTE: If you don’t see the branch selector when you first open the History window, try to switch from the History view to the Changes view and back.
(6) Compare the branches
Comparing changes is an important thing we need to do. When using the GitHub view only, this may not be so common, but we’ll show it so that it makes sense later on.
A nice way to compare braches is to add /compare to the URL of the repository,
for example (replace USER):
https://github.com/USER/recipe-book/compare
This seems to require an extension. We recommend you use the command line method.
$ git diff main new-recipe
Try also the other way around:
$ git diff new-recipe main
Try also this if you only want to see the file names that are different:
$ git diff --name-only main new-recipe
This doesn’t seem possible in RStudio without an add-in. We recommend that you use the Terminal in RStudio and follow the “Command line” path instructions.
(7) Compare two arbitrary commits
This is similar to above, but not only between branches.
Following the /compare-trick above, one can compare commits on GitHub by
adjusting the following URL:
https://github.com/USER/recipe-book/compare/VERSION1..VERSION2
Replace USER with your username and VERSION1 and VERSION2 with a commit hash or branch name.
Please try it out.
Again, we recommend using the Command Line method.
First try this to get a short overview of the commits:
$ git log --oneline
Then try to compare any two commit identifiers with git diff.
Again, this doesn’t seem possible in RStudio without an add-in. We recommend that you use the Terminal in RStudio and follow the “Command line” path instructions.
(8) Renaming a branch
Branch button → View all branches → three dots at right side → Rename branch.
Version control sidebar → Three dots (same as in step 2) → Branch → Rename branch. Make sure you are on the right branch before you start.
Renaming the current branch:
$ git branch -m better-recipe
Renaming a different branch:
$ git branch -m new-recipe better-recipe
Again, this doesn’t seem possible in RStudio without an add-in. We recommend that you use the Terminal in RStudio and follow the “Command line” path instructions.
(9) Creating a tag
Tags are a way to mark a specific commit as important, for example a release version. They are also like a sticky note, but they don’t move when new commits are added.
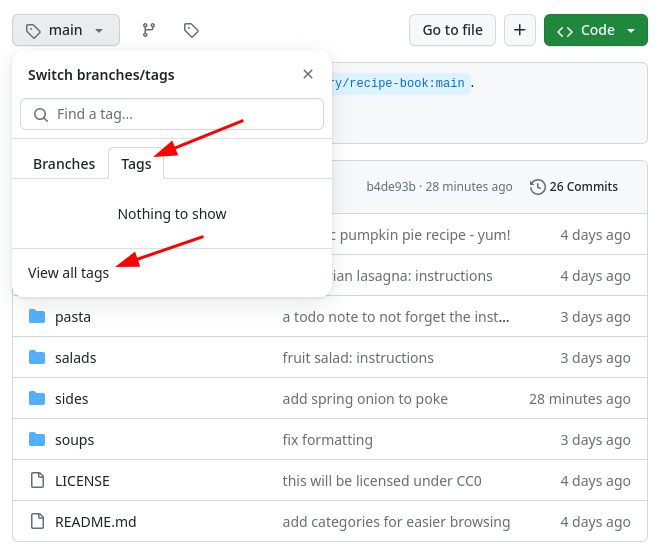
Click on the branch switcher, and then on “Tags”, then on “View all tags”, then “Create a new release”:
What GitHub calls releases are actually tags in Git with additional metadata. For the purpose of this exercise we can use them interchangeably.
Version control sidebar → Three dots (same as in step 2) → Tags → Create tag. Make sure you are on the expected commit before you do this.
Creating a tag:
$ git tag -a v1.0 -m "New manuscript version of my recipe for the pre-print"
Again, this doesn’t seem possible in RStudio without an add-in. We recommend that you use the Terminal in RStudio and follow the “Command line” path instructions.
Discussion
In this part, we saw how we can make changes to our files. With branches, we can track several lines of work at once, and can compare their differences.
You could commit directly to
mainif there is only one single line of work and it’s only you.You could commit to branches if there are multiple lines of work at once, and you don’t want them to interfere with each other.
Tags are useful to mark a specific commit as important, for example a release version.
In Git, commits form a so-called “graph”. Branches are tags in Git function like sticky notes that stick to specific commits. What this means for us is that it does not cost any significant disk space to create new branches.
Not all files should be added to Git. For example, temporary files or files with sensitive information or files which are generated as part of the build process should not be added to Git. For this we use
.gitignore(more about this later: What to avoid).Unsure on which branch you are or what state the repository is in? On the command line, use
git statusfrequently to get a quick overview.