Basics
Objectives
Learn to create Git repositories and make commits.
Get a grasp of the structure of a repository.
Learn how to inspect the project history.
Learn how to write useful commit log messages.
Instructor note
35 min teaching/type-along
40 min exercise
What is Git, and what is a Git repository?
Git is a version control system: can record/save snapshots and track the content of a folder as it changes over time.
Every time we commit a snapshot, Git records a snapshot of the entire project, saves it, and assigns it a version.
These snapshots are kept inside a sub-folder called
.git.If we remove
.git, we remove the repository and history (but keep the working directory!).The directory
.gituses relative paths - you can move the whole repository somewhere else and it will still work.Git doesn’t do anything unless you ask it to (it does not record anything automatically).
Multiple interfaces to Git exist (command line, graphical interfaces, web interfaces).
Recording a snapshot with Git
Git takes snapshots only if we request it.
We will record changes in two steps (we will later explain why this is a recommended practice).
Example (we don’t need to type yet):
$ git add FILE.txt
$ git commit

$ git add FILE.txt ANOTHERFILE.txt
$ git commit
We first focus (
git add, we “stage” the change), then record (git commit):

Git staging and committing.
Question for the more advanced participants
What do you think will be the outcome if you stage a file and then edit it and stage it again, do this several times and at the end perform a commit? Think of focusing several scenes and pressing the shutter at the end.
Configuring Git command line
Before we start using Git on the command line, we need to configure Git. This is also part of the installation instructions but we need to make sure we all have set name, email address, editor, and default branch:
$ git config --global user.name "Your Name"
$ git config --global user.email yourname@example.com
$ git config --global core.editor nano
$ git config --global init.defaultBranch main
Verify with:
$ git config --list
Instructor note
Instructors, give learners enough time to do the above configuration steps.
Type-along: Tracking a guacamole recipe with Git
We will learn how to initialize a Git repository, how to track changes, and how to make delicious guacamole! (Inspiration for this example based on a suggestion by B. Smith in a discussion in the Carpentries mailing list)
The motivation for taking a cooking recipe instead of a program is that everybody can relate to cooking but not everybody may be able to relate to a program written in e.g. Python or another specific language.
Instructor note
Instructors, please encourage now that participants type along.
Note
It is possible to go through this lesson in the command line or in the browser (on GitHub).
We recommend to start with the command line but later to also try in the browser.
If you get really stuck in the command line, try following in the browser and later you can try to return to the command line.
Creating a repository
One of the basic principles of Git is that it is easy to create repositories:
$ mkdir recipe
$ cd recipe
$ git init -b main
That’s it! With git init -b main have now created an empty Git repository
where main is the default branch (more about branches later).
We will use git status a lot to check out what is going on:
$ git status

On branch main

No commits yet

nothing to commit (create/copy files and use "git add" to track)
We will make sense of this information during this workshop.
First log into GitHub, then follow the screenshots and descriptions below.
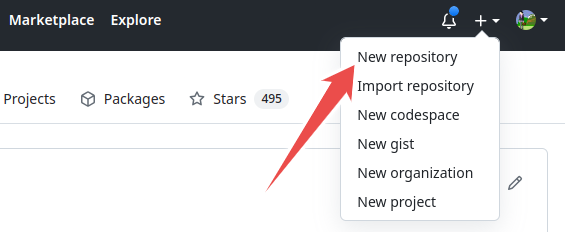
Click on the “plus” symbol on top right, then on “New repository”.
Another way to create a new repository is to visit https://github.com/new directly.
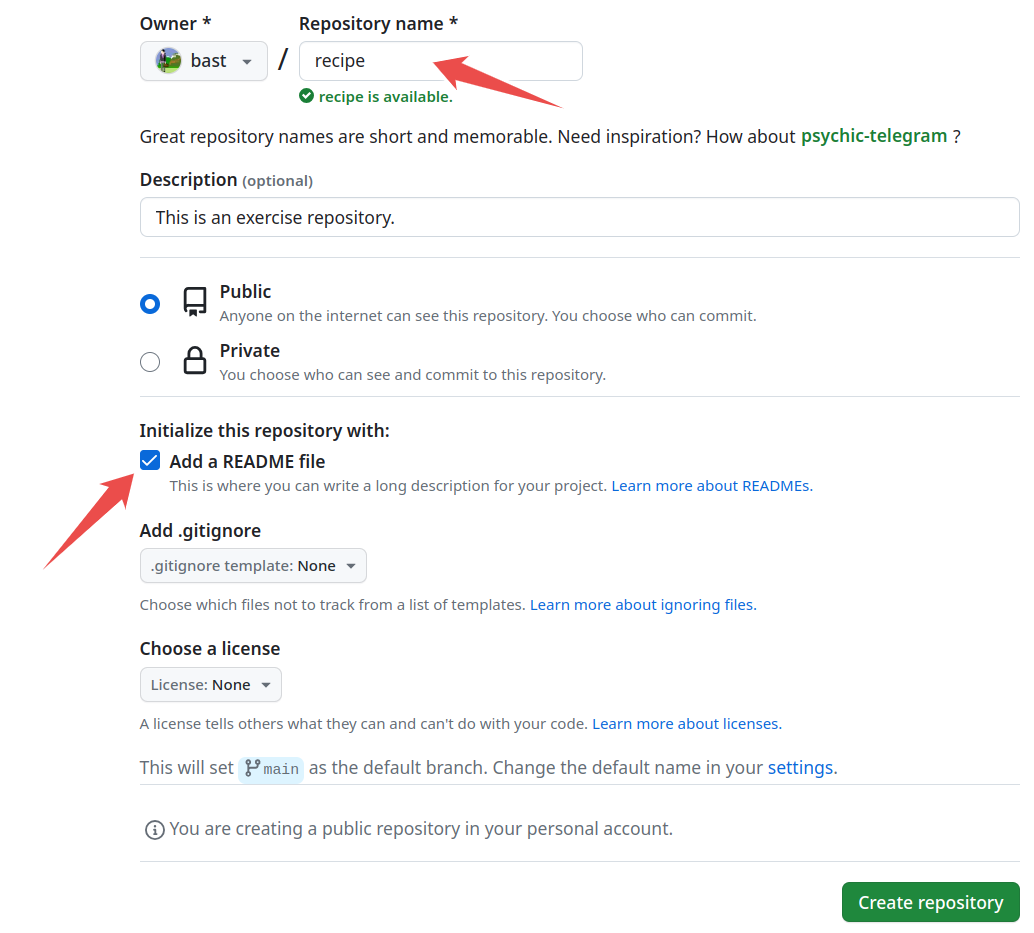
Choose a repository name, add a short description, check “Add a README file”, finally “Create repository”.
After you have clicked “Create repository” you should see a repository overview with one file (README.md) and one commit.
Adding files and committing changes
Let us now create two files.
One file is called ingredients.txt and contains:
* 2 avocados
* 1 chili
* 1 lime
* 2 tsp salt
The second file is called instructions.txt and contains:
* chop avocados
* chop onion
* chop chili
* squeeze lime
* add salt
* and mix well
As mentioned above, in Git you can always check the status of files in your repository using
git status. It is always a safe command to run and in general a good idea to
do when you are trying to figure out what to do next:
$ git status

On branch main

No commits yet

Untracked files:
  (use "git add <file>..." to include in what will be committed)
    ingredients.txt
    instructions.txt

nothing added to commit but untracked files present (use "git add" to track)
The two files are untracked in the repository (directory). You want to add the files (focus the camera) to the list of files tracked by Git. Git does not track any files automatically and you need make a conscious decision to add a file. Let’s do what Git hints at, and add the files, one by one:
$ git add ingredients.txt
$ git status

On branch main

No commits yet

Changes to be committed:
  (use "git rm --cached <file>..." to unstage)
    new file:   ingredients.txt

Untracked files:
  (use "git add <file>..." to include in what will be committed)
    instructions.txt
Now this change is staged and ready to be committed. Let us now commit the change to the repository:
$ git commit -m "adding ingredients"

[main (root-commit) f146d25] adding ingredients
 1 file changed, 4 insertions(+)
 create mode 100644 ingredients.txt
Right after we query the status to get this useful command into our muscle memory:
$ git status
Now stage and commit also the other file:
$ git add instructions.txt
$ git commit -m "adding instructions"
We will add a third file to the repository, README.md, containing:
# recipe

This is an exercise repository.
Now stage and commit also the README.md file:
$ git add README.md
$ git commit -m "adding README"
What does the -m flag mean? Let us check the help page for that command:
$ git help commit
You should see a very long help page as the tool is very versatile (press q to quit). Do not worry about this now but keep in mind that you can always read the help files when in doubt. Searching online can also be useful, but choosing search terms to find relevant information takes some practice and discussions in some online threads may be confusing. Note that help pages also work when you don’t have a network connection!
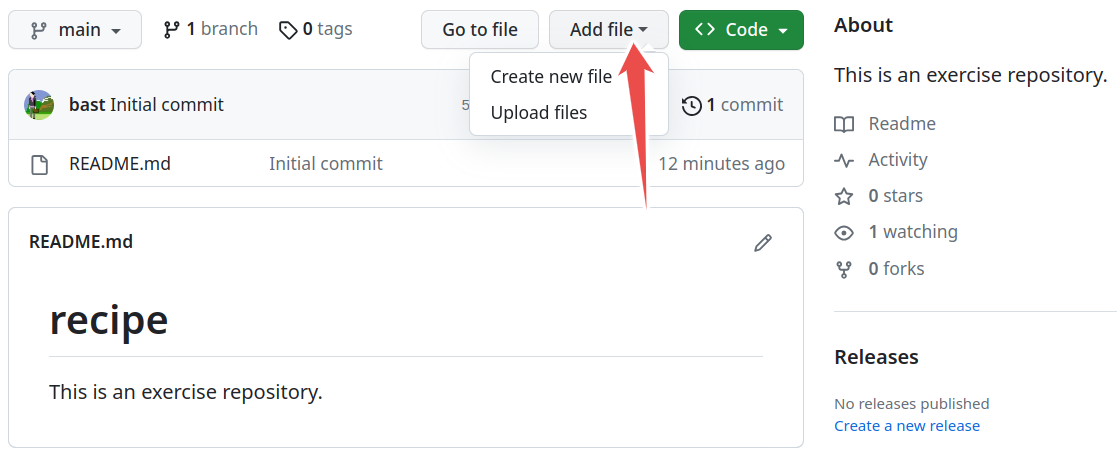
Click on “Add file”, then “Create new file”.
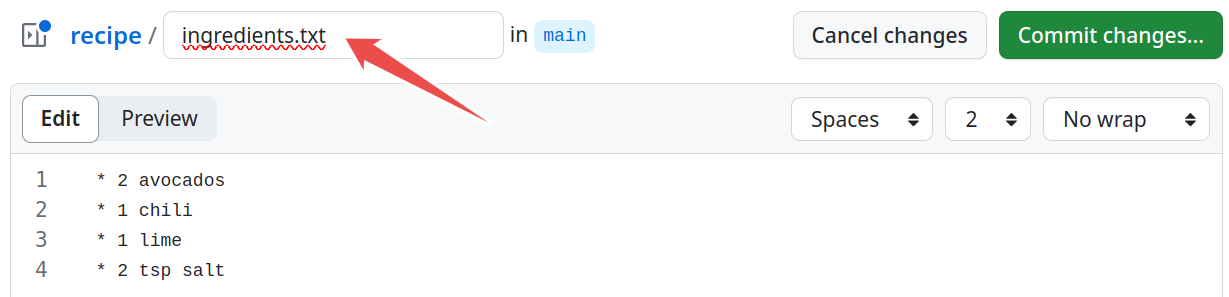
Edit the file and specify the file name.
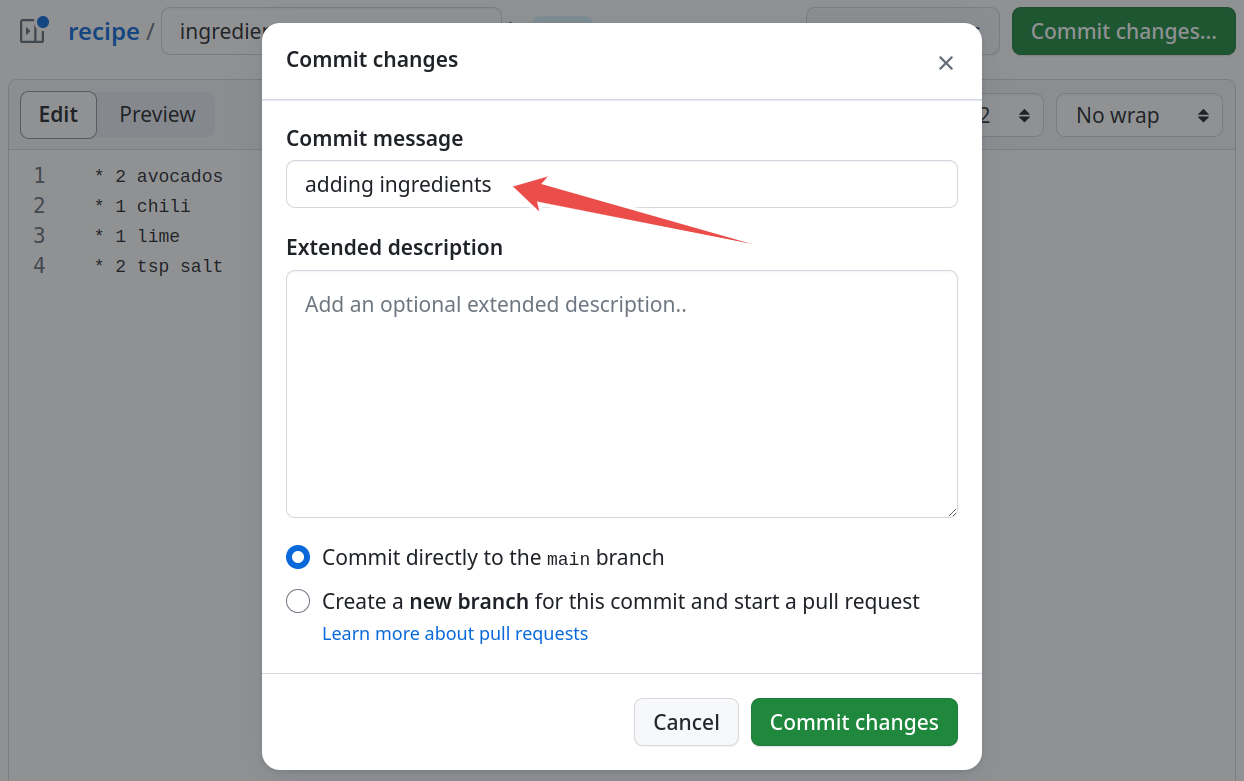
Before you commit the change, adjust the commit message.
After you have added ingredients.txt, add also instructions.txt in a similar
way.
We have added two files, each in one commit. However, we ended up with
three files and three commits since README.md was automatically committed
when we created the repository on GitHub.
Exercise: Record changes
Basic-1: Record changes
Add 1/2 onion to ingredients.txt and also the instruction
to “enjoy!” to instructions.txt.
After modifying the files, do not stage the changes yet (do not git add
yet).
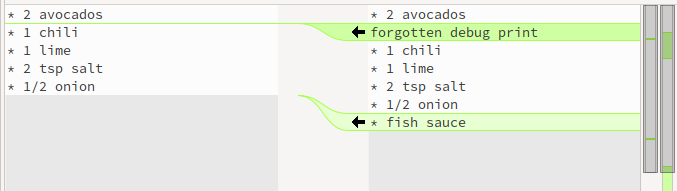
When you are done editing the files, try git diff:
$ git diff
You will see (can you identify in there the two added lines?):
diff --git a/ingredients.txt b/ingredients.txt
index 4422a31..ba8854f 100644
--- a/ingredients.txt
+++ b/ingredients.txt
@@ -2,3 +2,4 @@
 * 1 chili
 * 1 lime
 * 2 tsp salt
+* 1/2 onion
diff --git a/instructions.txt b/instructions.txt
index 7811273..2b11074 100644
--- a/instructions.txt
+++ b/instructions.txt
@@ -4,3 +4,4 @@
 * squeeze lime
 * add salt
 * and mix well
+* enjoy!
Now first stage and commit each change separately (what happens when we leave out the -m flag?):
$ git add ingredients.txt
$ git commit -m "add half an onion"
$ git add instructions.txt
$ git commit                   # <-- we have left out -m "..."
When you leave out the -m flag, Git should open an editor where you can edit
your commit message. This message will be associated and stored with the
changes you made. This message is your chance to explain what you’ve done and
convince others (and your future self) that the changes you made were
justified. Write a message and save and close the file.
When you are done committing the changes, experiment with these commands:
$ git log
$ git log --stat
$ git log --oneline
We can make modifications to a file by clicking on the file and then the pen symbol:
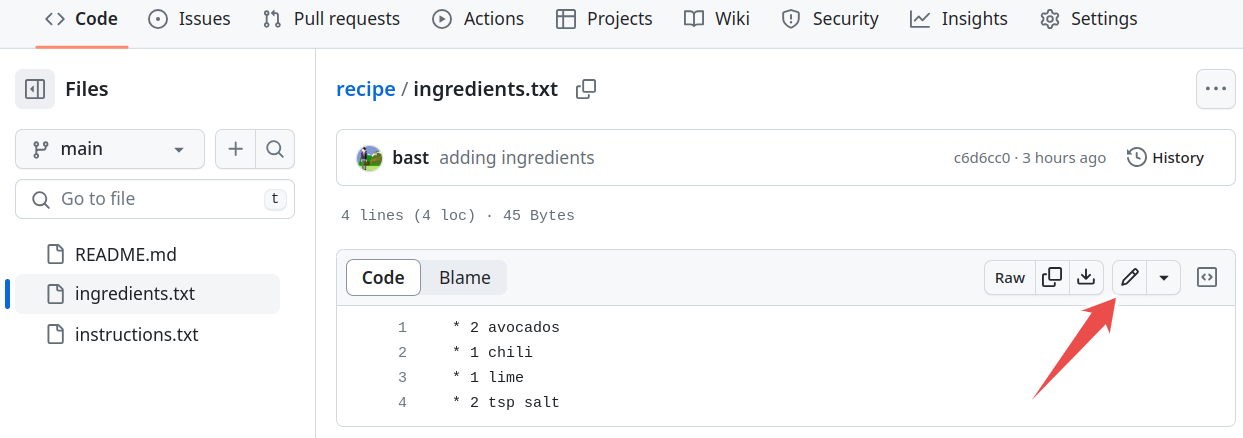
By clicking on the pen symbol we can switch to edit mode.
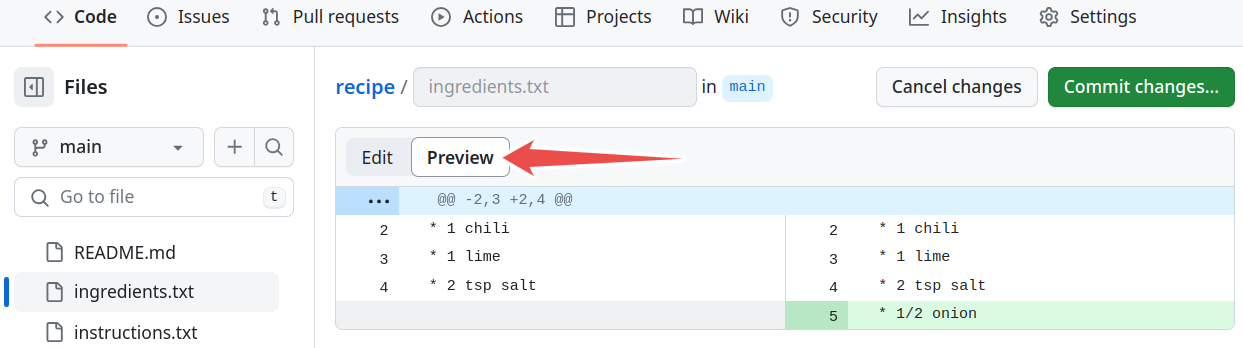
Before committing the change, click on “Preview”.
Our goal is to arrive at two new commits:
“add half an onion” (modifying
ingredients.txt)“don’t forget to enjoy” (modifying
instructions.txt)
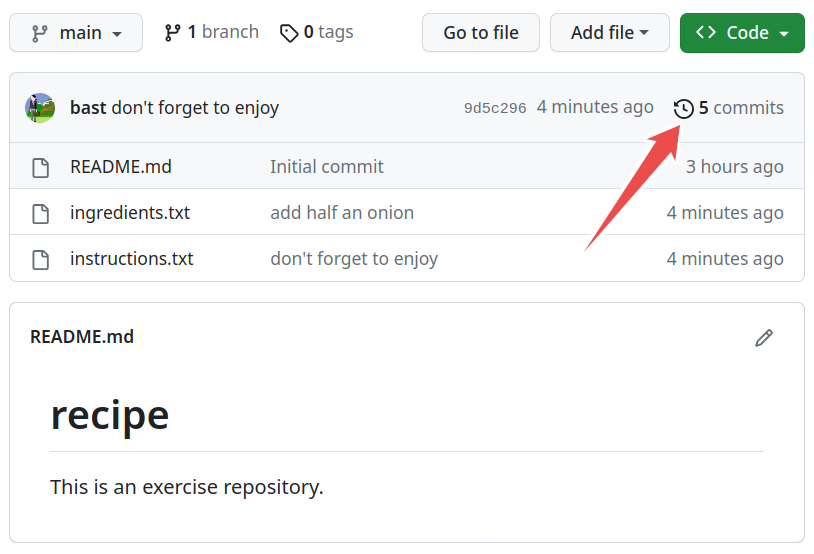
When you are done committing the changes, try to browse commit history on GitHub.
Git history and log
If you haven’t yet, please try now git log:
$ git log

commit e7cf023efe382340e5284c278c6ae2c087dd3ff7 (HEAD -> main)
Author: Radovan Bast <bast@users.noreply.github.com>
Date:   Sun Sep 17 19:12:47 2023 +0200

    don't forget to enjoy

commit 79161b6e67c62ad4688a58c1e54183334611a390
Author: Radovan Bast <bast@users.noreply.github.com>
Date:   Sun Sep 17 19:12:32 2023 +0200

    add half an onion

commit a3394e39535343c4dae3bb4f703741a31aa8b78a
Author: Radovan Bast <bast@users.noreply.github.com>
Date:   Sun Sep 17 18:47:14 2023 +0200

    adding README

commit 369624674e63de48055a65bf63055bd59c985d22
Author: Radovan Bast <bast@users.noreply.github.com>
Date:   Sun Sep 17 18:46:58 2023 +0200

    adding instructions

commit f146d25b94569a15e94d7f0da6f15d7554f76c49
Author: Radovan Bast <bast@users.noreply.github.com>
Date:   Sun Sep 17 18:35:52 2023 +0200

    adding ingredients

We can browse the development and access each state that we have committed.
The long hashes uniquely label a state of the code.
They are not just integers counting 1, 2, 3, 4, … (why?).
Output is in reverse chronological order, i.e. newest commits on top.
We will use them when comparing versions and when going back in time.
git log --onelineonly shows the first 7 characters of the commit hash and is good to get an overview.If the first characters of the hash are unique it is not necessary to type the entire hash.
git log --statis nice to show which files have been modified.
Optional exercises: Comparing changes
(optional) Basic-2: Comparing and showing commits
Have a look at specific commits with
git show HASH.Inspect differences between commit hashes with
git diff HASH1 HASH2.
Have a look at specific commits.
Inspect differences between commits.
Use the screenshots under “Git history and log”.
(optional) Basic-3: Visual diff tools
This exercise is only relevant for the command line. In the browser, the preview is already side-by-side and “visual”.
Make further modifications and experiment with
git difftool(requires installing one of the visual diff tools):
On Windows or Linux:
$ git difftool --tool=meld HASH
On macOS:
$ git difftool --tool=opendiff HASH
Git difftool using meld.
You probably want to use the same visual diff tool every time and you can configure Git for that:
$ git config --global diff.tool meld
(optional) Basic-4: Browser and command line
You have noticed that it is possible to work either in the command line or in the browser. It could help to deepen the understanding trying to do the above steps in both.
If you have managed to do the above in the command line, try now in the browser.
If you got stuck in the command line and move to the browser, try now to trouble-shoot the command line Git.
Writing useful commit messages
Using git log --oneline or browsing a repository on the web, we better
understand that the first line of the commit message is very important.
Good example:
increase threshold alpha to 2.0

the motivation for this change is
to enable ...
...
this is based on a discussion in #123
Convention: one line summarizing the commit, then one empty line, then paragraph(s) with more details in free form, if necessary.
Why something was changed is more important than what has changed.
Cross-reference to issues and discussions if possible/relevant.
Bad commit messages: “fix”, “oops”, “save work”
Bad examples: http://whatthecommit.com
Write commit messages in English that will be understood 15 years from now by someone else than you. Or by your future you.
Many projects start out as projects “just for me” and end up to be successful projects that are developed by 50 people over decades.
Commits with multiple authors are possible.
Good references:
Note
A great way to learn how to write commit messages and to get inspired by their style choices: browse repositories of codes that you use/like:
Some examples (but there are so many good examples):
ggplot2, compare with their release notes
Flask, compare with their release notes
When designing commit message styles consider also these:
How will you easily generate a changelog or release notes?
During code review, you can help each other improving commit messages.
But remember: it is better to make any commit, than no commit. Especially in small projects. Let not the perfect be the enemy of the good enough.
Ignoring files and paths with .gitignore
Discussion
Should we add and track all files in a project?
How about generated files?
Why is it considered a bad idea to commit compiled binaries to version control?
What types of generated files do you know?
Compiled and generated files are not committed to version control. There are many reasons for this:
These files can make it more difficult to run on different platforms.
These files are automatically generated and thus do not contribute in any meaningful way.
When tracking generated files you could see differences in the code although you haven’t touched the code.
For this we use .gitignore files. Example:
# ignore compiled python 2 files
*.pyc
# ignore compiled python 3 files
__pycache__
An example taken from the official Git documentation:
# ignore objects and archives, anywhere in the tree.
*.[oa]
# ignore generated html files,
*.html
# except foo.html which is maintained by hand
!foo.html
# ignore everything under build directory
build/
.gitignoreshould be part of the repository because we want to make sure that all developers see the same behavior.All files should be either tracked or ignored.
.gitignoreuses something called a shell glob syntax for determining file patterns to ignore. You can read more about the syntax in the documentation.You can have
.gitignorefiles in lower level directories and they affect the paths below.
Graphical user interfaces
We have seen how to make commits in the command line and via the GitHub website. But it is also possible to work from within a Git graphical user interface (GUI):
Summary
Now we know how to save snapshots:
$ git add FILE(S)
$ git commit
And this is what we do as we program.
Every state is then saved and later we will learn how to go back to these “checkpoints” and how to undo things.
$ git init -b main  # initialize new repository (main is default branch)
$ git add           # add files or stage file(s)
$ git commit        # commit staged file(s)
$ git status        # see what is going on
$ git log           # see history
$ git diff          # show unstaged/uncommitted modifications
$ git show          # show the change for a specific commit
$ git mv            # move/rename tracked files
$ git rm            # remove tracked files
Git is not ideal for large binary files (for this consider git-annex).
Basic-5: Test your understanding
Which command(s) below would save the changes of myfile.txt
to an existing local Git repository?
$ git commit -m "my recent changes"
$ git init myfile.txt
$ git commit -m "my recent changes"
$ git add myfile.txt
$ git commit -m "my recent changes"
$ git commit -m myfile.txt "my recent changes"
Solution
Would only create a commit if files have already been staged.
Would try to create a new repository in a folder “myfile.txt”.
Is correct: first add the file to the staging area, then commit.
Would try to commit a file “my recent changes” with the message myfile.txt.
Keypoints
It takes only one command to initialize a Git repository:
git init -b main.Commits should be used to tell a story.
Git uses the .git folder to store the snapshots.
Don’t be afraid to stage and commit often. Better too often than not often enough.