Instructor technical setup, online
See also
This is online-specific instructor tech setup. For general, see Instructor technical setup which also applies here.
The information in this is currently specific to Zoom teaching and livestream teaching.
Final checklist
See the list in Instructor technical setup, which includes points for online.
Audio
Audio quality, and balance between instructors, is absolutely critical to good online work, especially teaching. Consider the following:
Can you adjust your microphone volume from very low to higher-than-needed? Make sure your dynamic range is larger than “barely working”, so that you have some room to adjust for later.
Do you have a high-quality headset? A headset with microphone is the most reliable, but if you can get a desktop setup working well, that can be good too. Always have a high-quality headset for backup anyway.
If you have a bluetooth headset, consider:
Bluetooth headsets have significant latency compared to wired or purpose-built wireless protocols like gaming headsets have.
The microphone might not have enough bandwidth (if it’s part of the same headset).
Bluetooth 5 is much better in both latency and quality.
Consider investing (or getting your work to invest in) some high-quality headset or desktop audio gear.
“Ducking” is when the first words are silenced/quieted by noise cancellation, until it detects speaking. To avoid this, don’t use “high” noise cancellation (as low as possible is better, reduce environmental noise / use headset mic instead). If you need high cancellation because of background noise, switch to your headset.
Set your microphone’s hardware volume to something relatively high - and control via the software.
Screen sharing
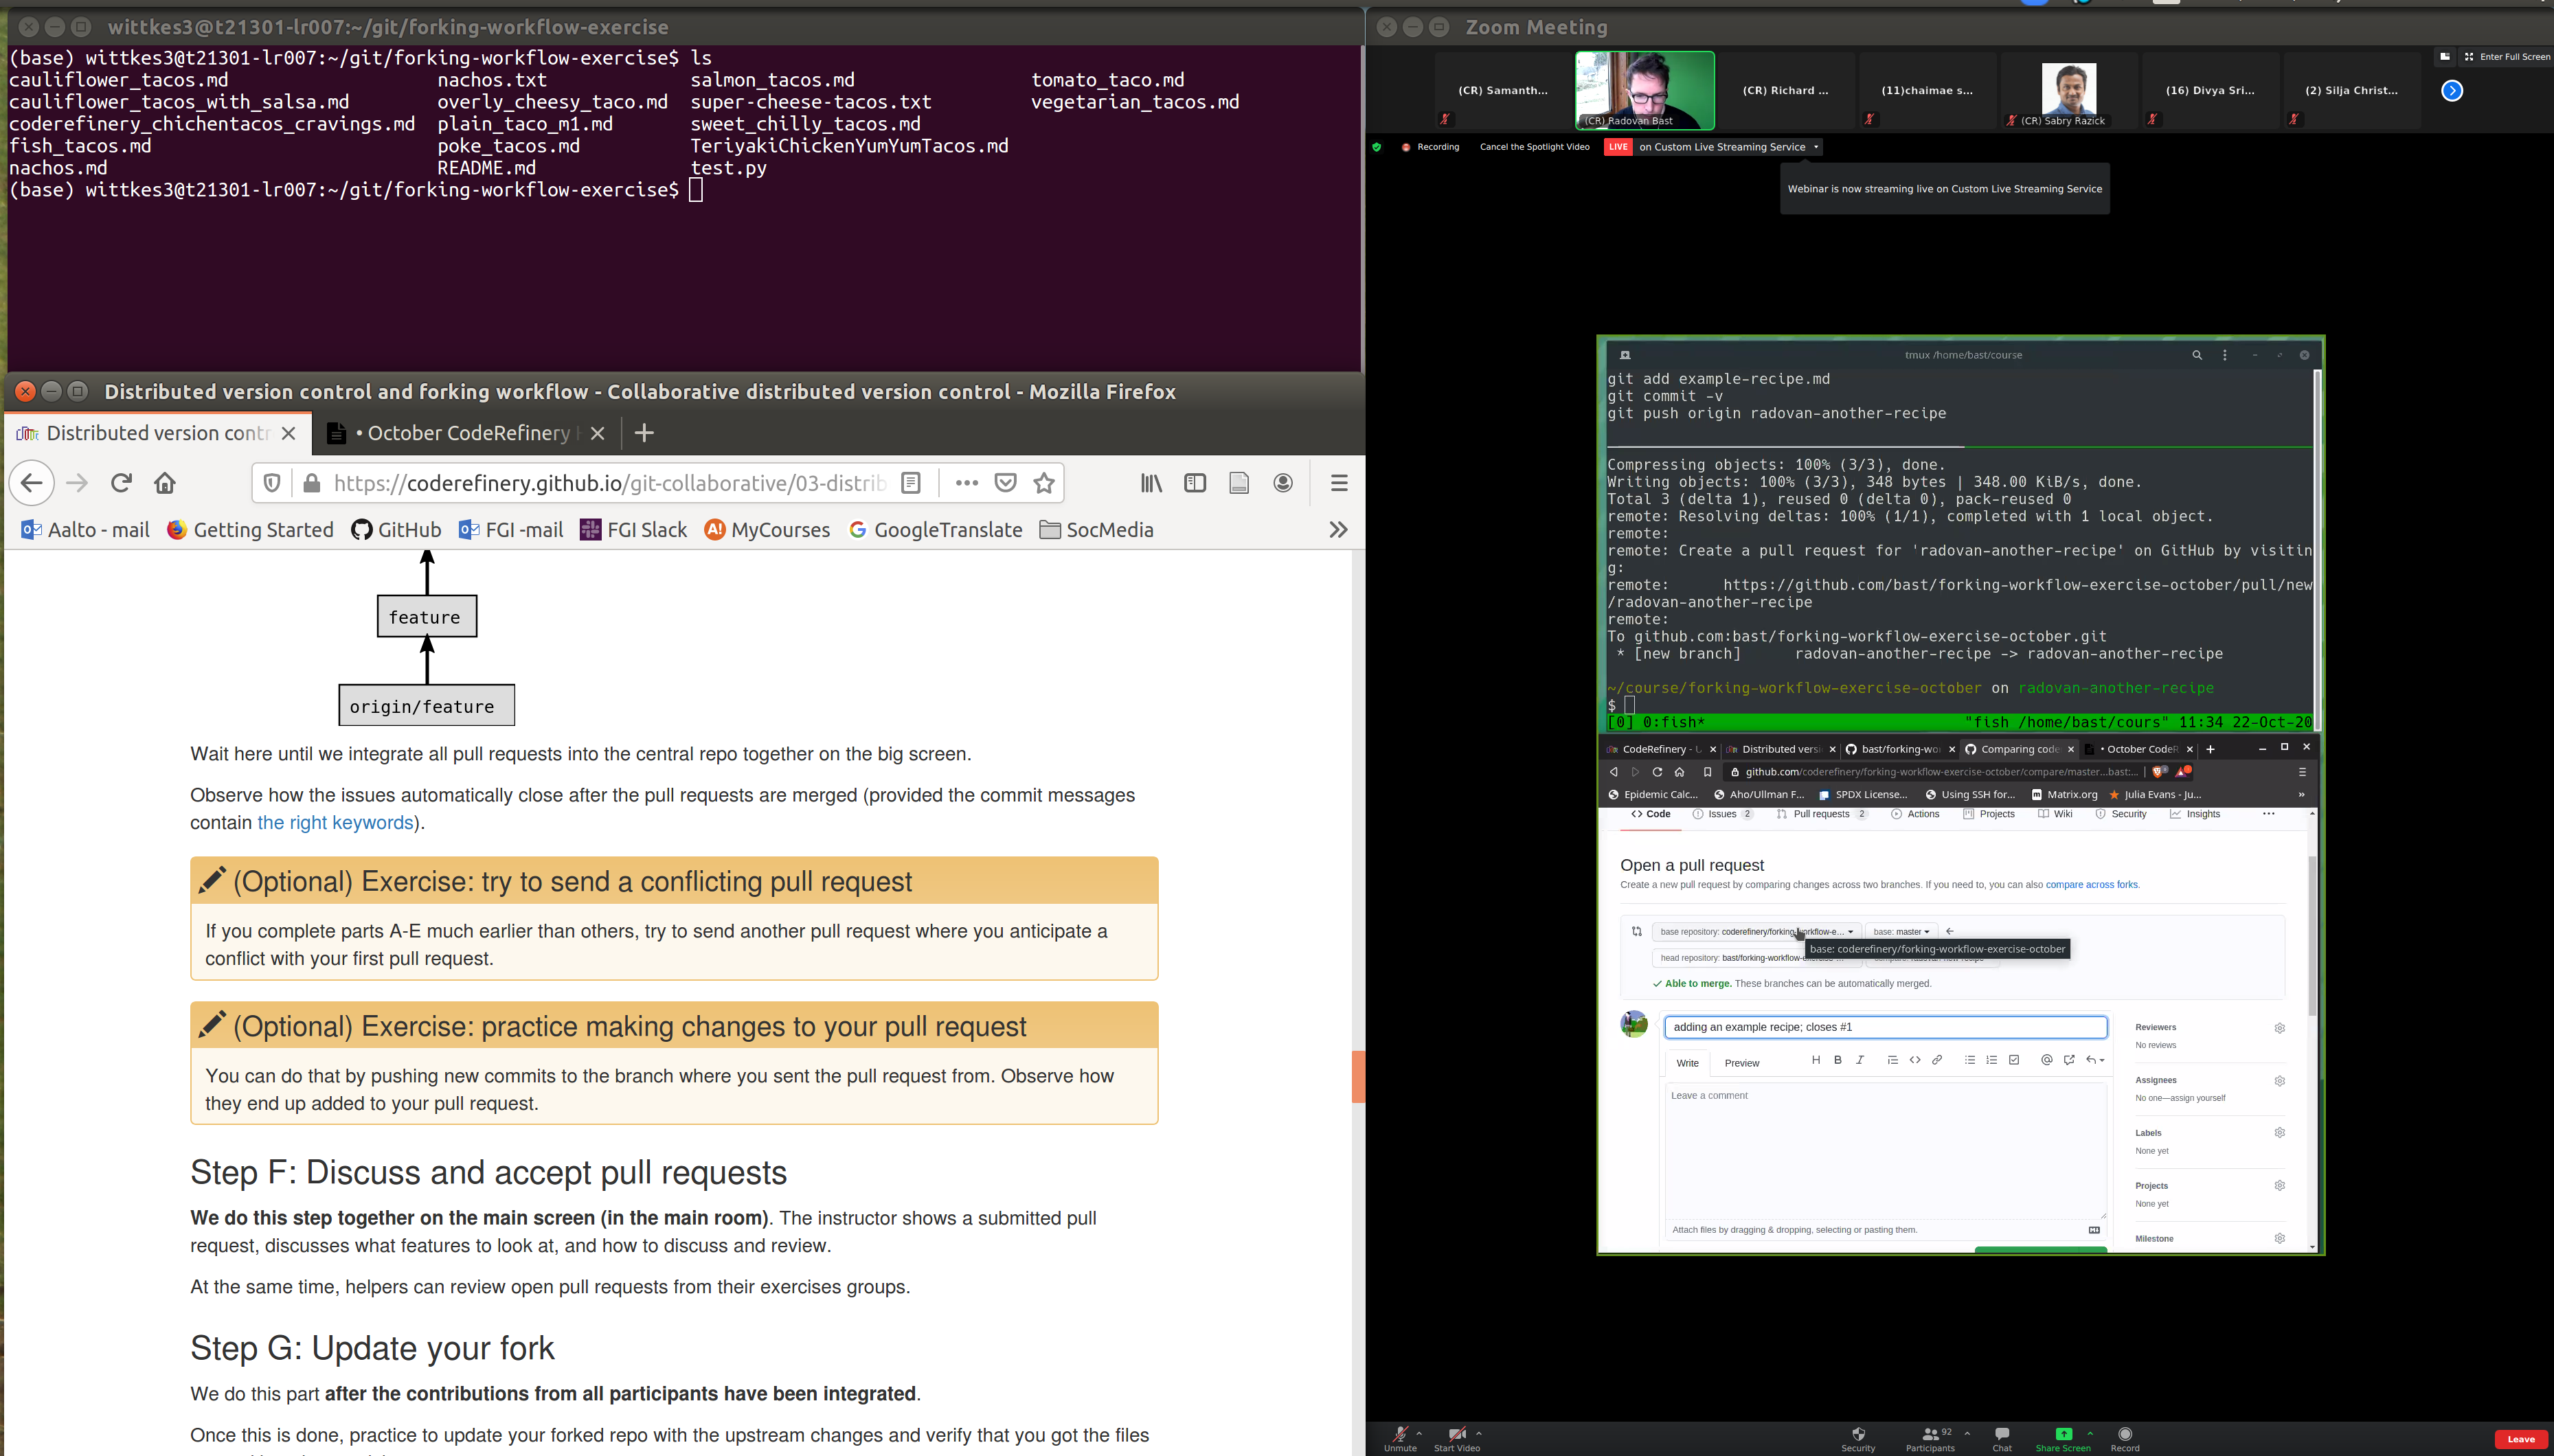
You have to assume the smallest screen from learners and plan for that. You should share a portrait screen: either a portion of your screen, or one window in portrait mode. See the examples below.
Learners have a small screen, and need room for their own terminals and web browser open, too. A big screen or multiple monitors is the special case.
Sharing a 1920x1080 screen is not a good idea: you need to make all the text size large so that learners can scale it down to have room to do their work. Pixels are wasted. Instead, force yourself to save space by using a normal font size but sharing less of your screen.
Zoom now has a “share portion of screen” (Screen sharing → Advanced → Share a portion of the screen).
For livestreaming, our aspect ration is 840×1080 (portrait). This is a bit less than half your screen. This is 43% of the width of your screen and the full height, for a standard FullHD screen.
When streaming/recording: Never stop sharing a screen, ask someone else to take it over. There is a chance that the view goes to “gallery view” in the recording or stream, which makes video editing harder or disrupts learner privacy.
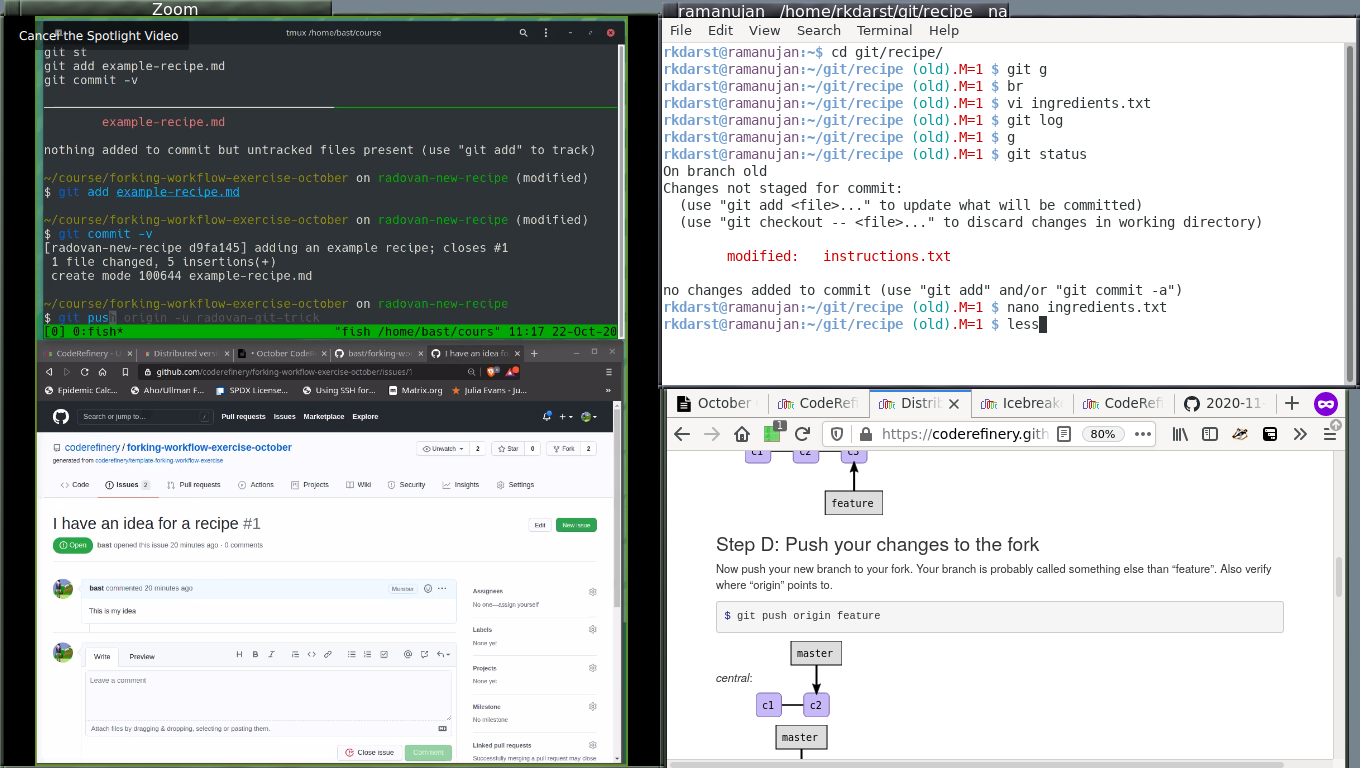
Screen share examples
These are layouts of the actual screen or portion of screen being shared:
S1: A FullHD 1920x1080 screen shared.
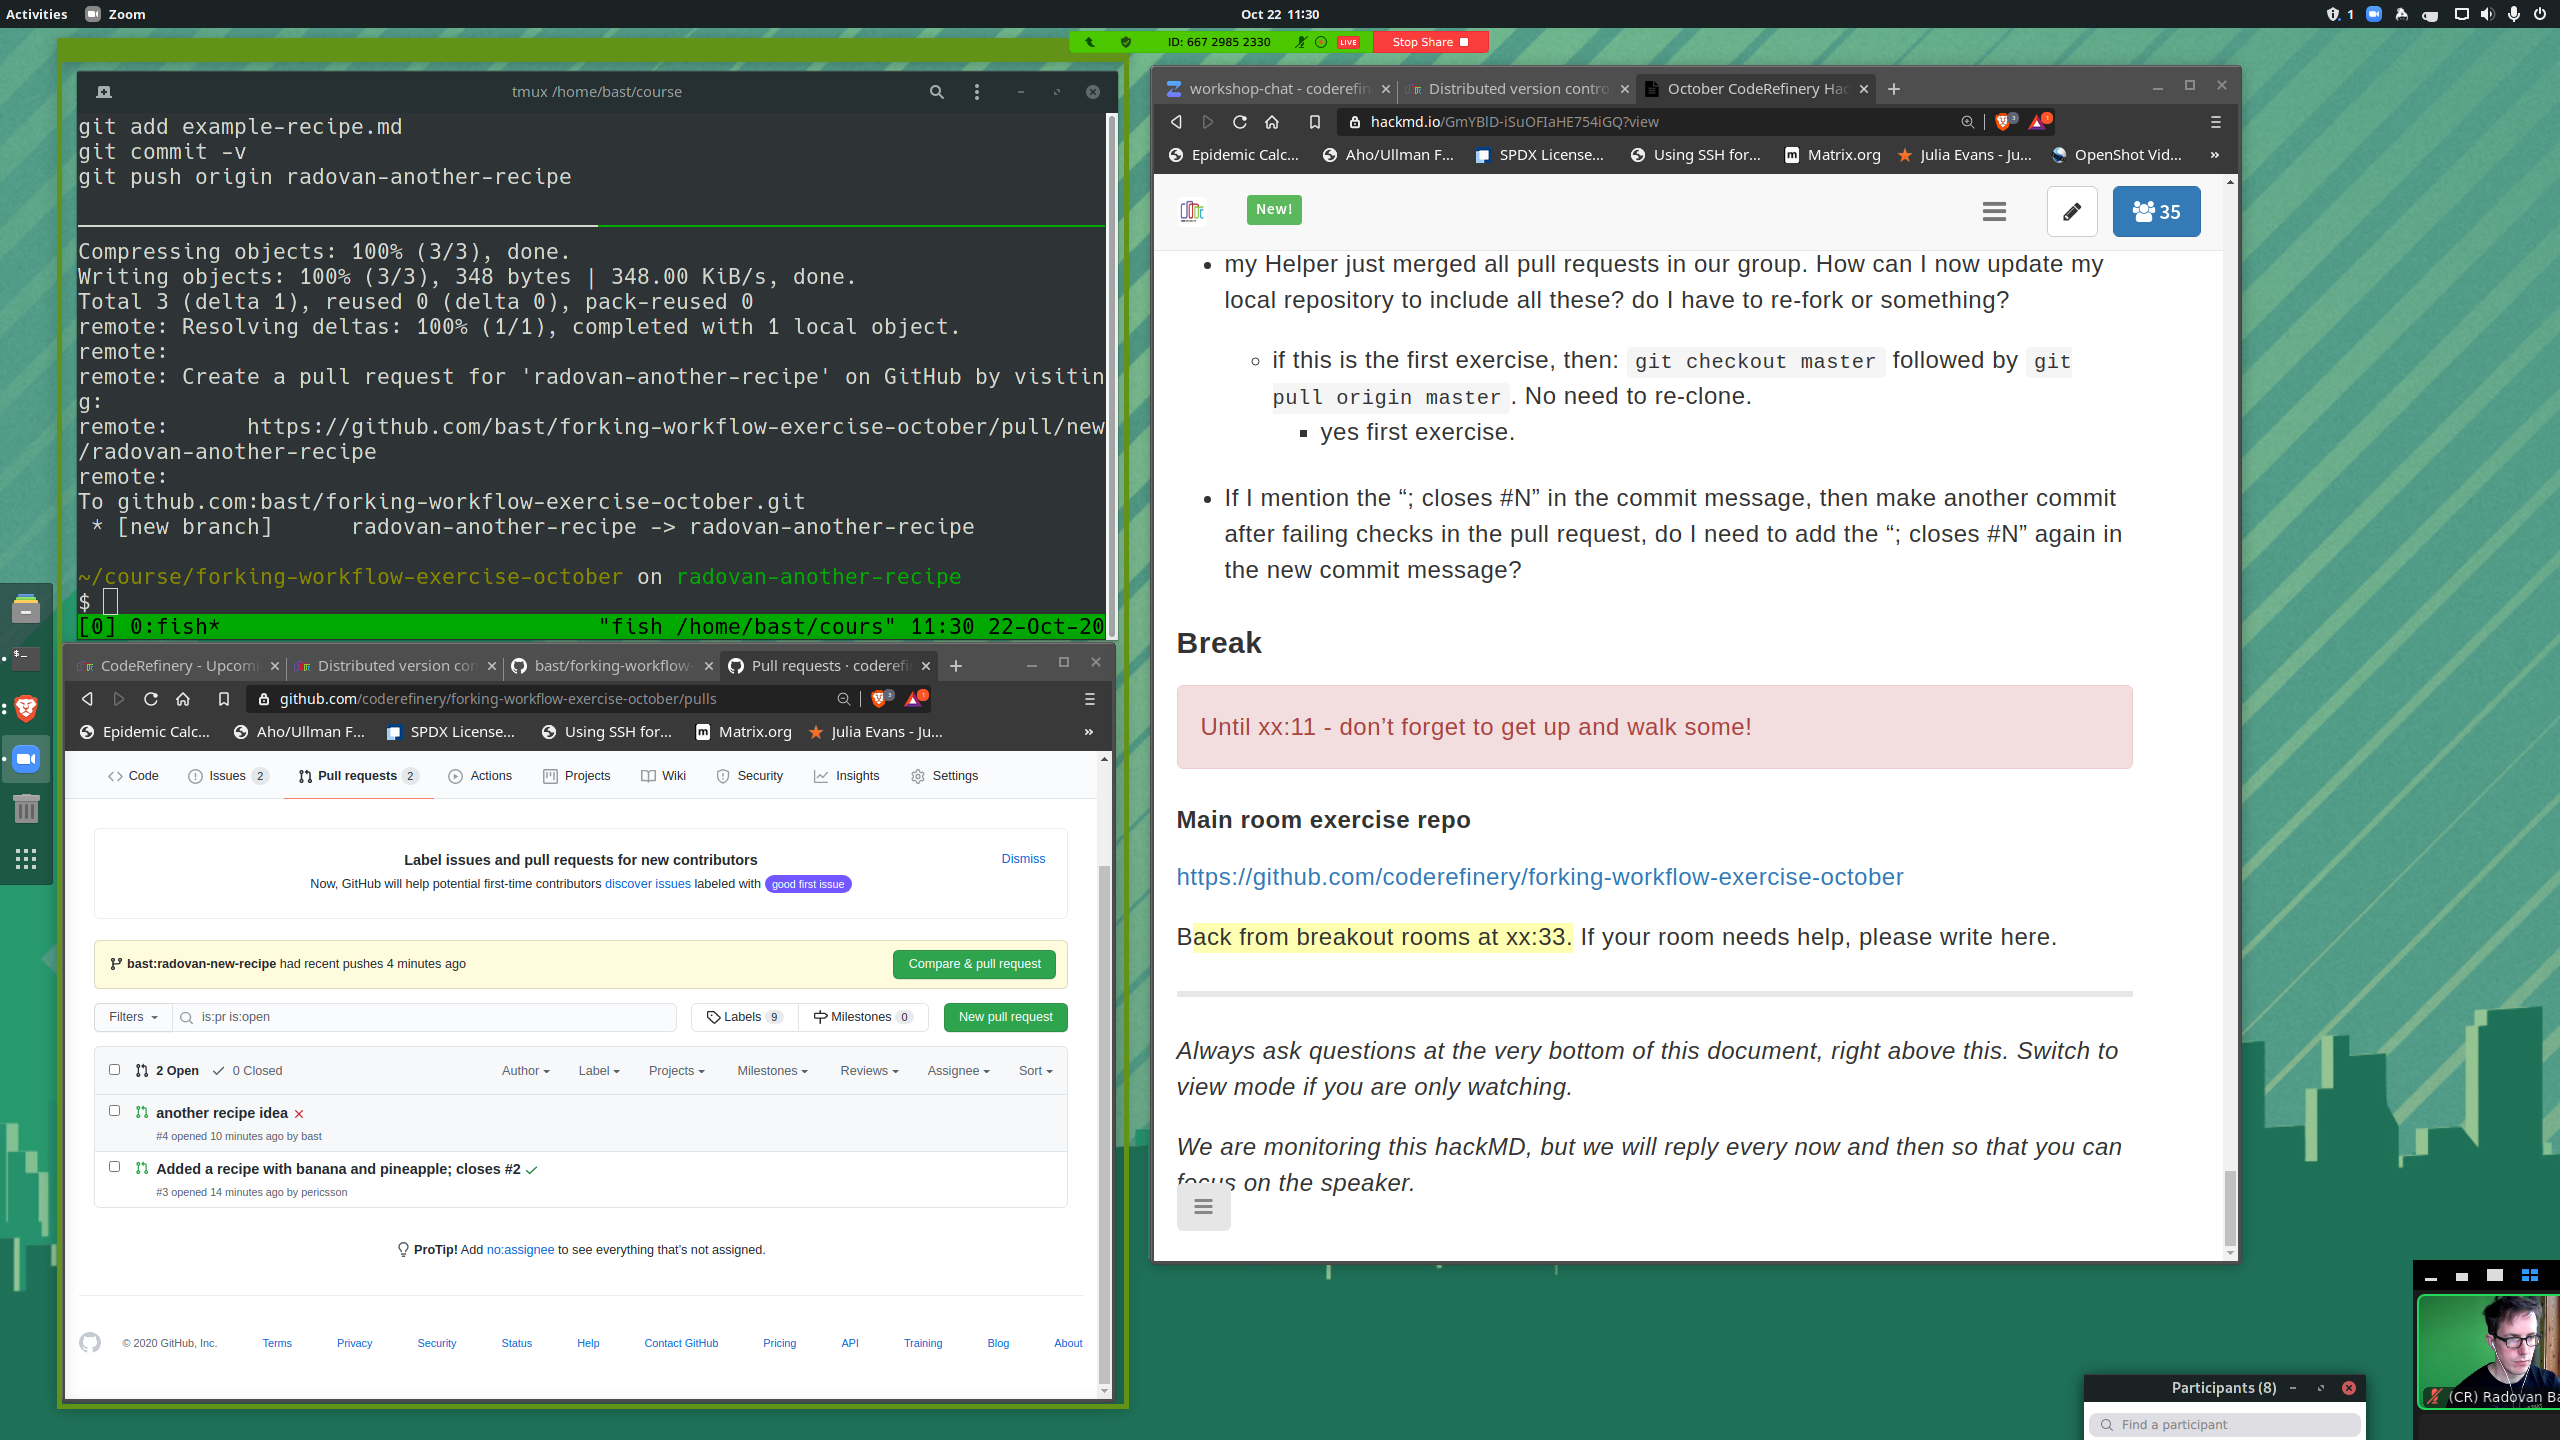
S2: A vertical screen layout shared. Note the extra shell history at the top. The web browser is at the bottom, because the Zoom toolbar can cover the bottom bit.
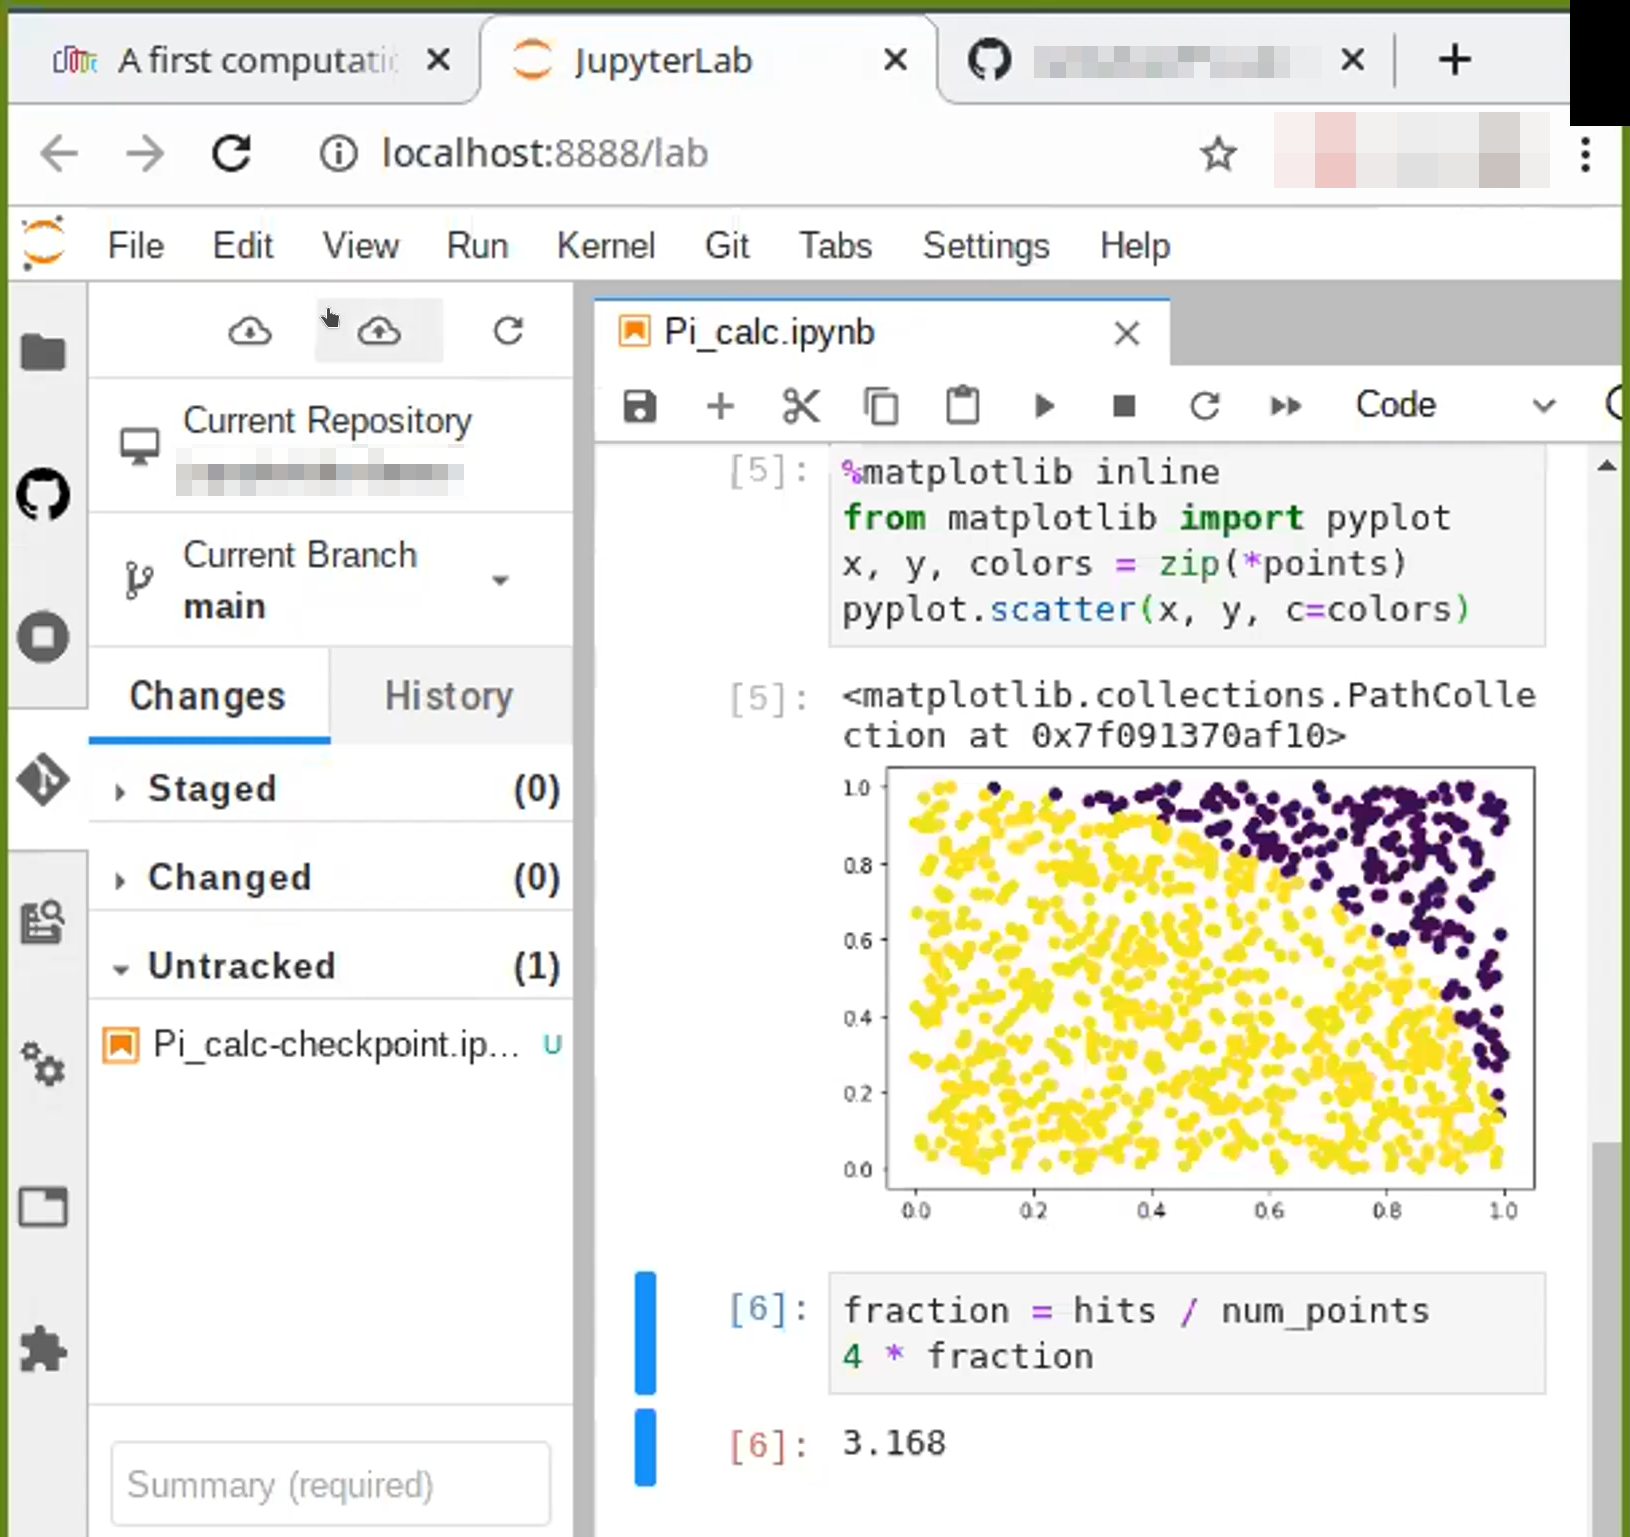
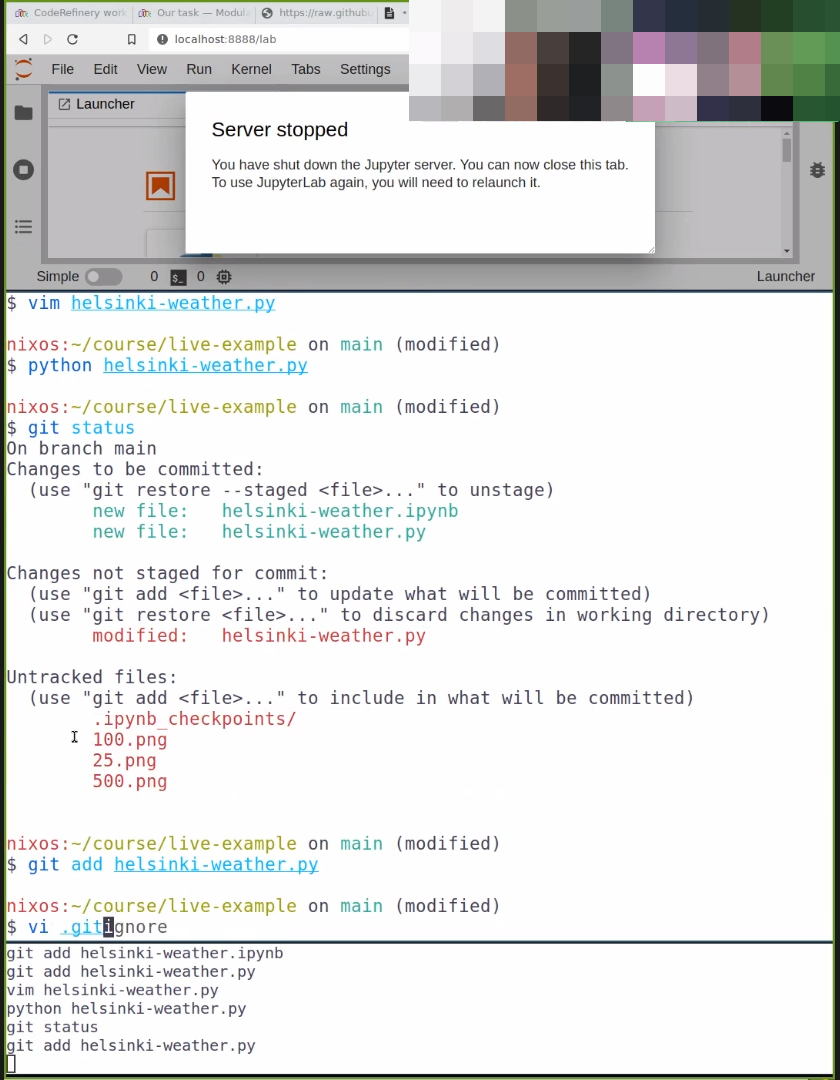
S3: A sort-of GUI (Jupyter) shared vertically.
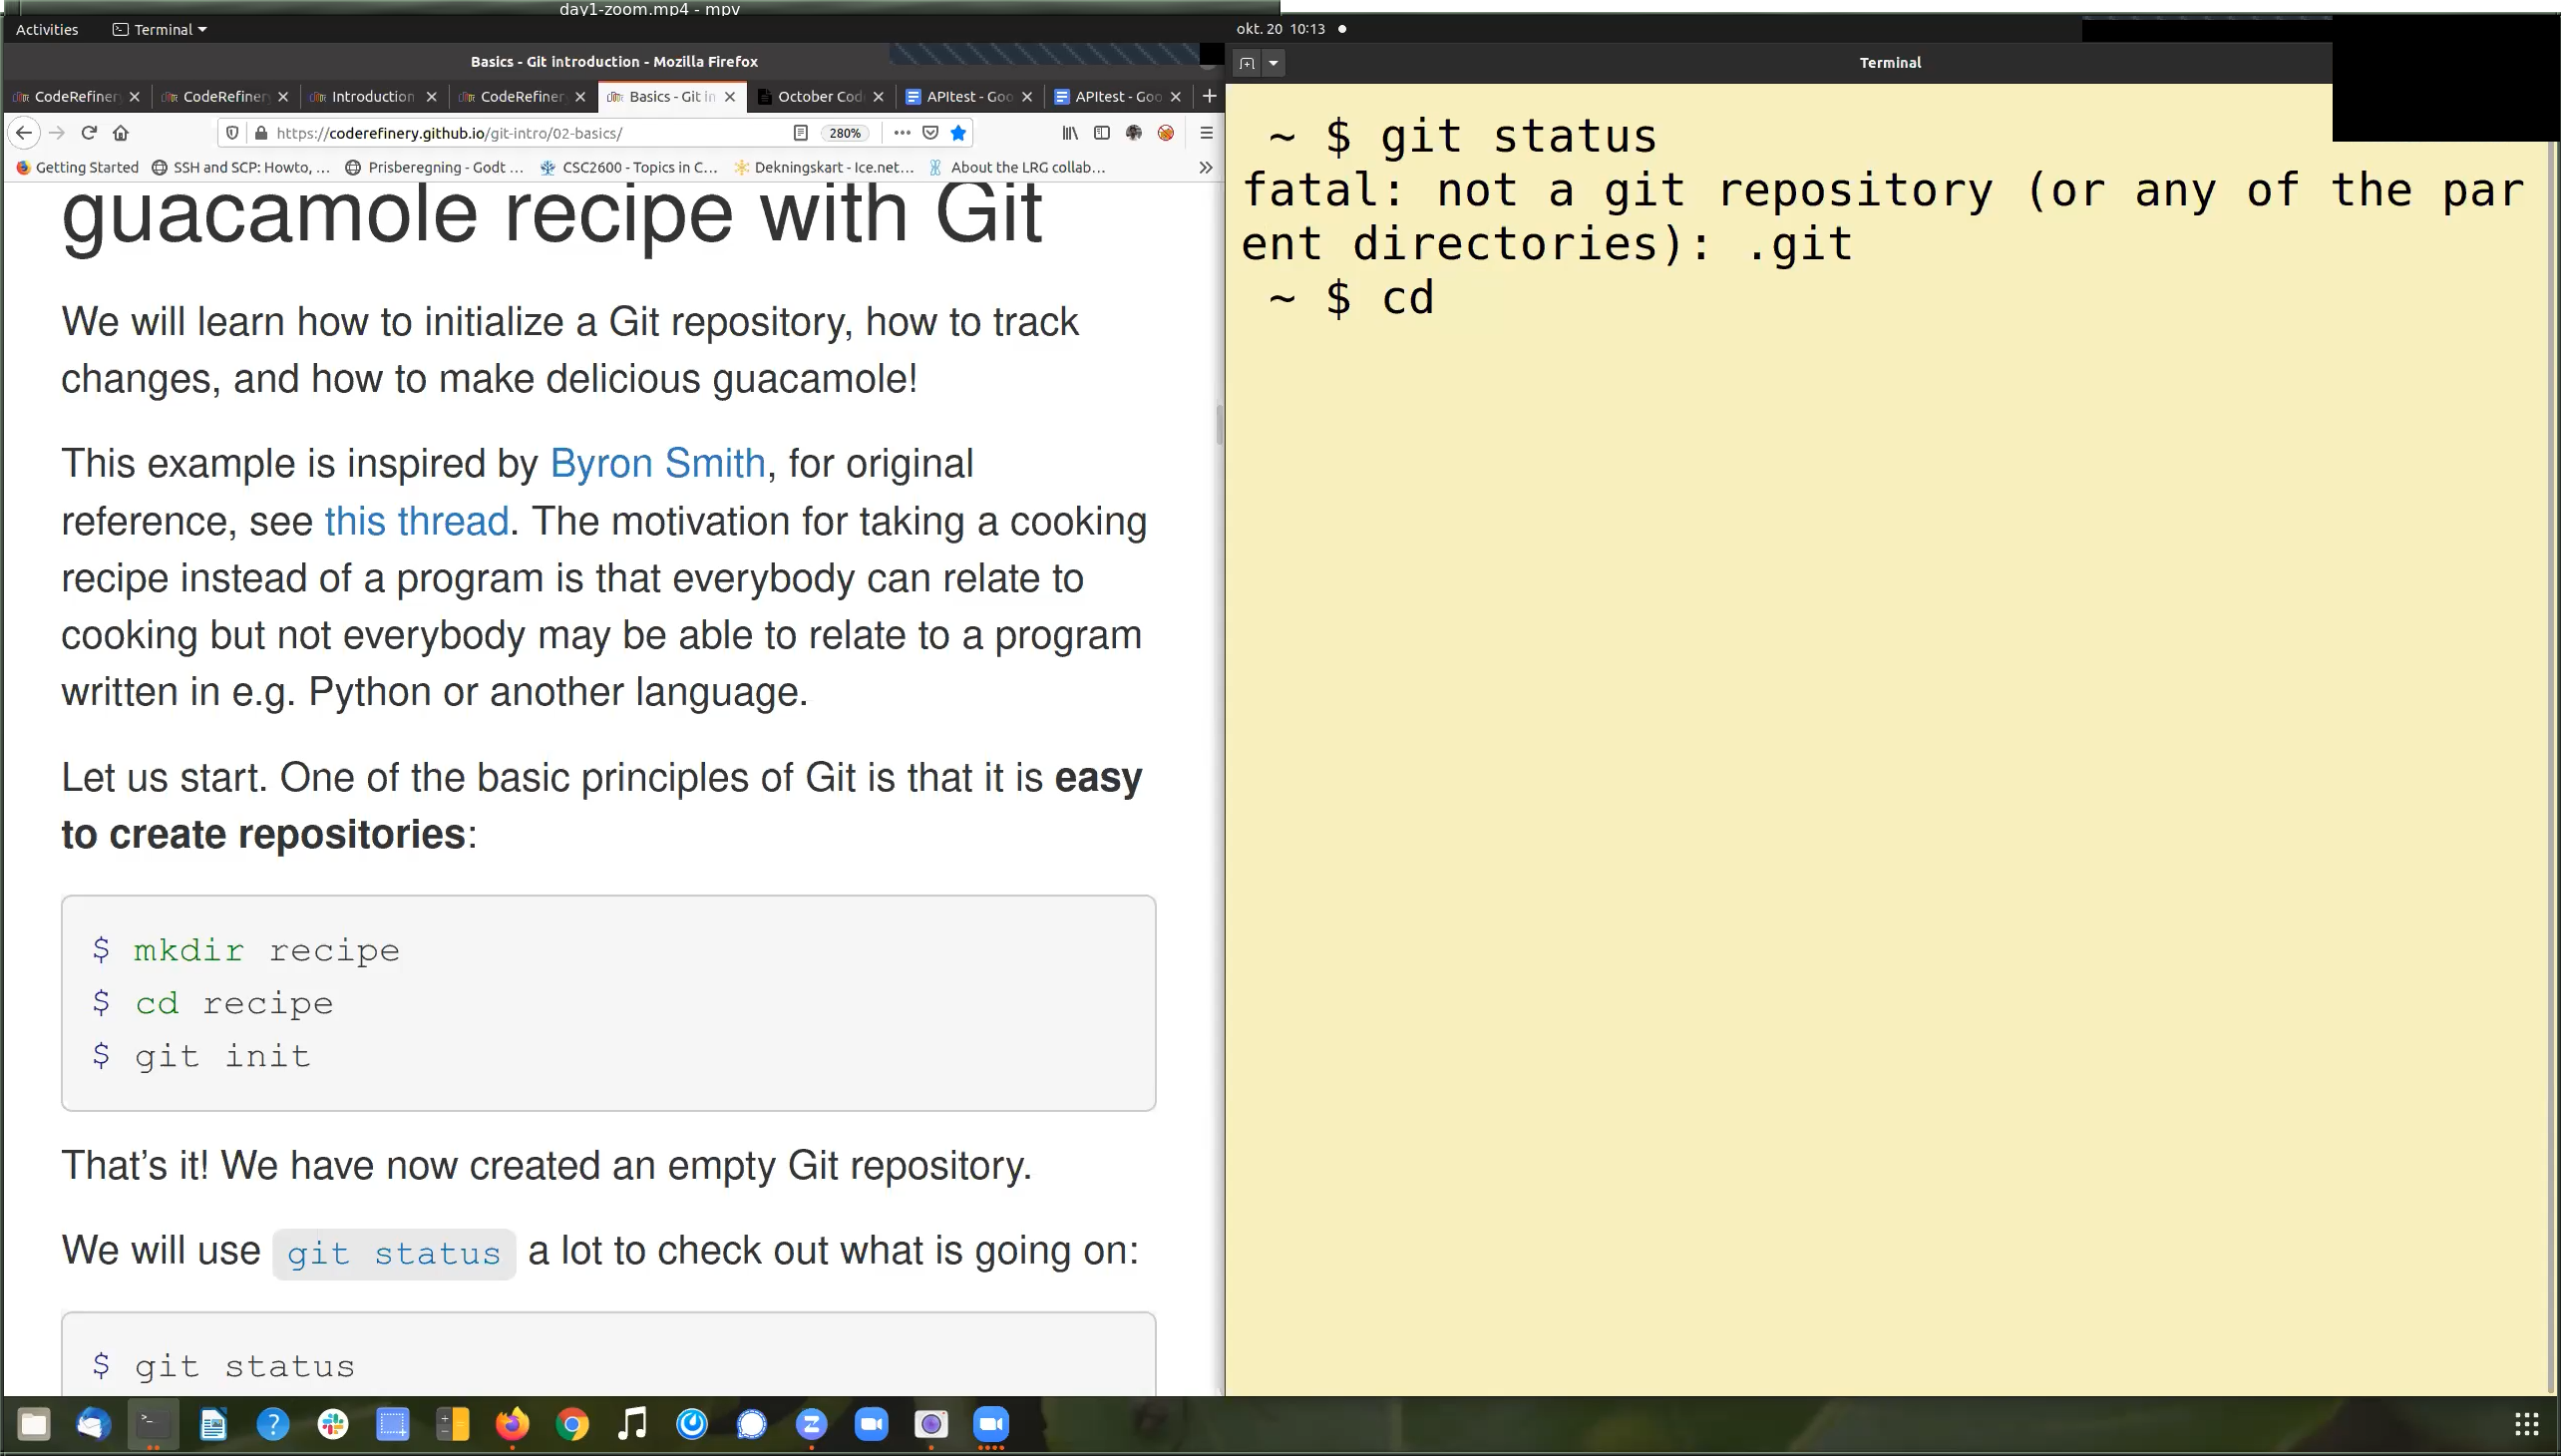
S4: This isn’t a screenshare from CodeRefinery, but may be instructive. Note the horizontal layout and shell history at the bottom right.

S5: Similar to above, but dark. Includes contents on the right.
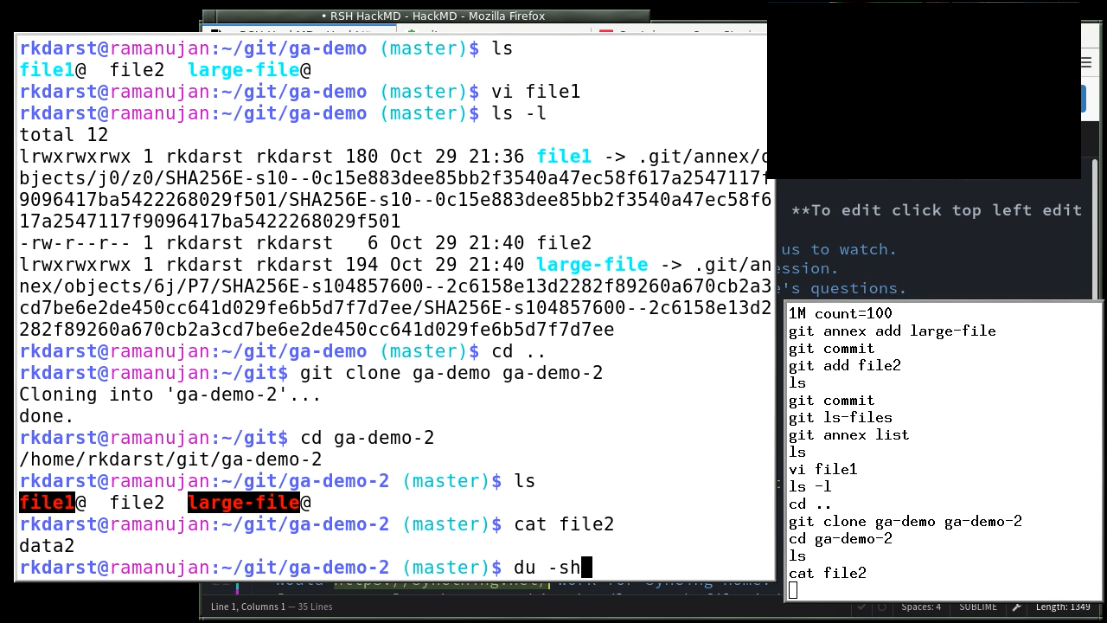
S8: Jupyter + terminal, including the fish shell and the
terminal history.

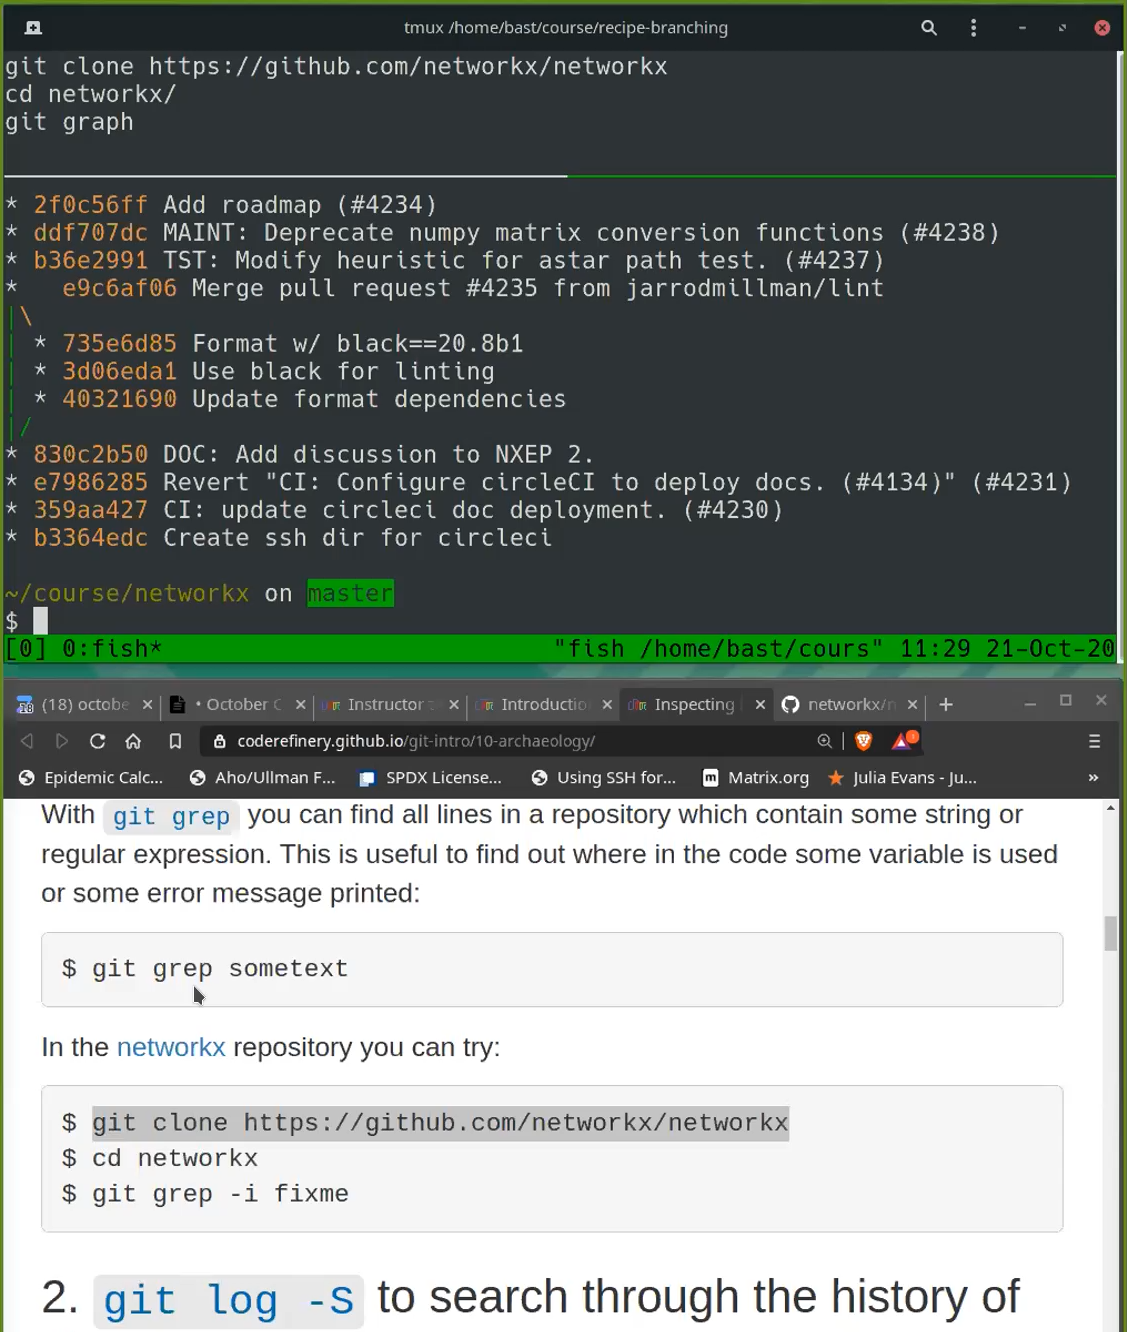
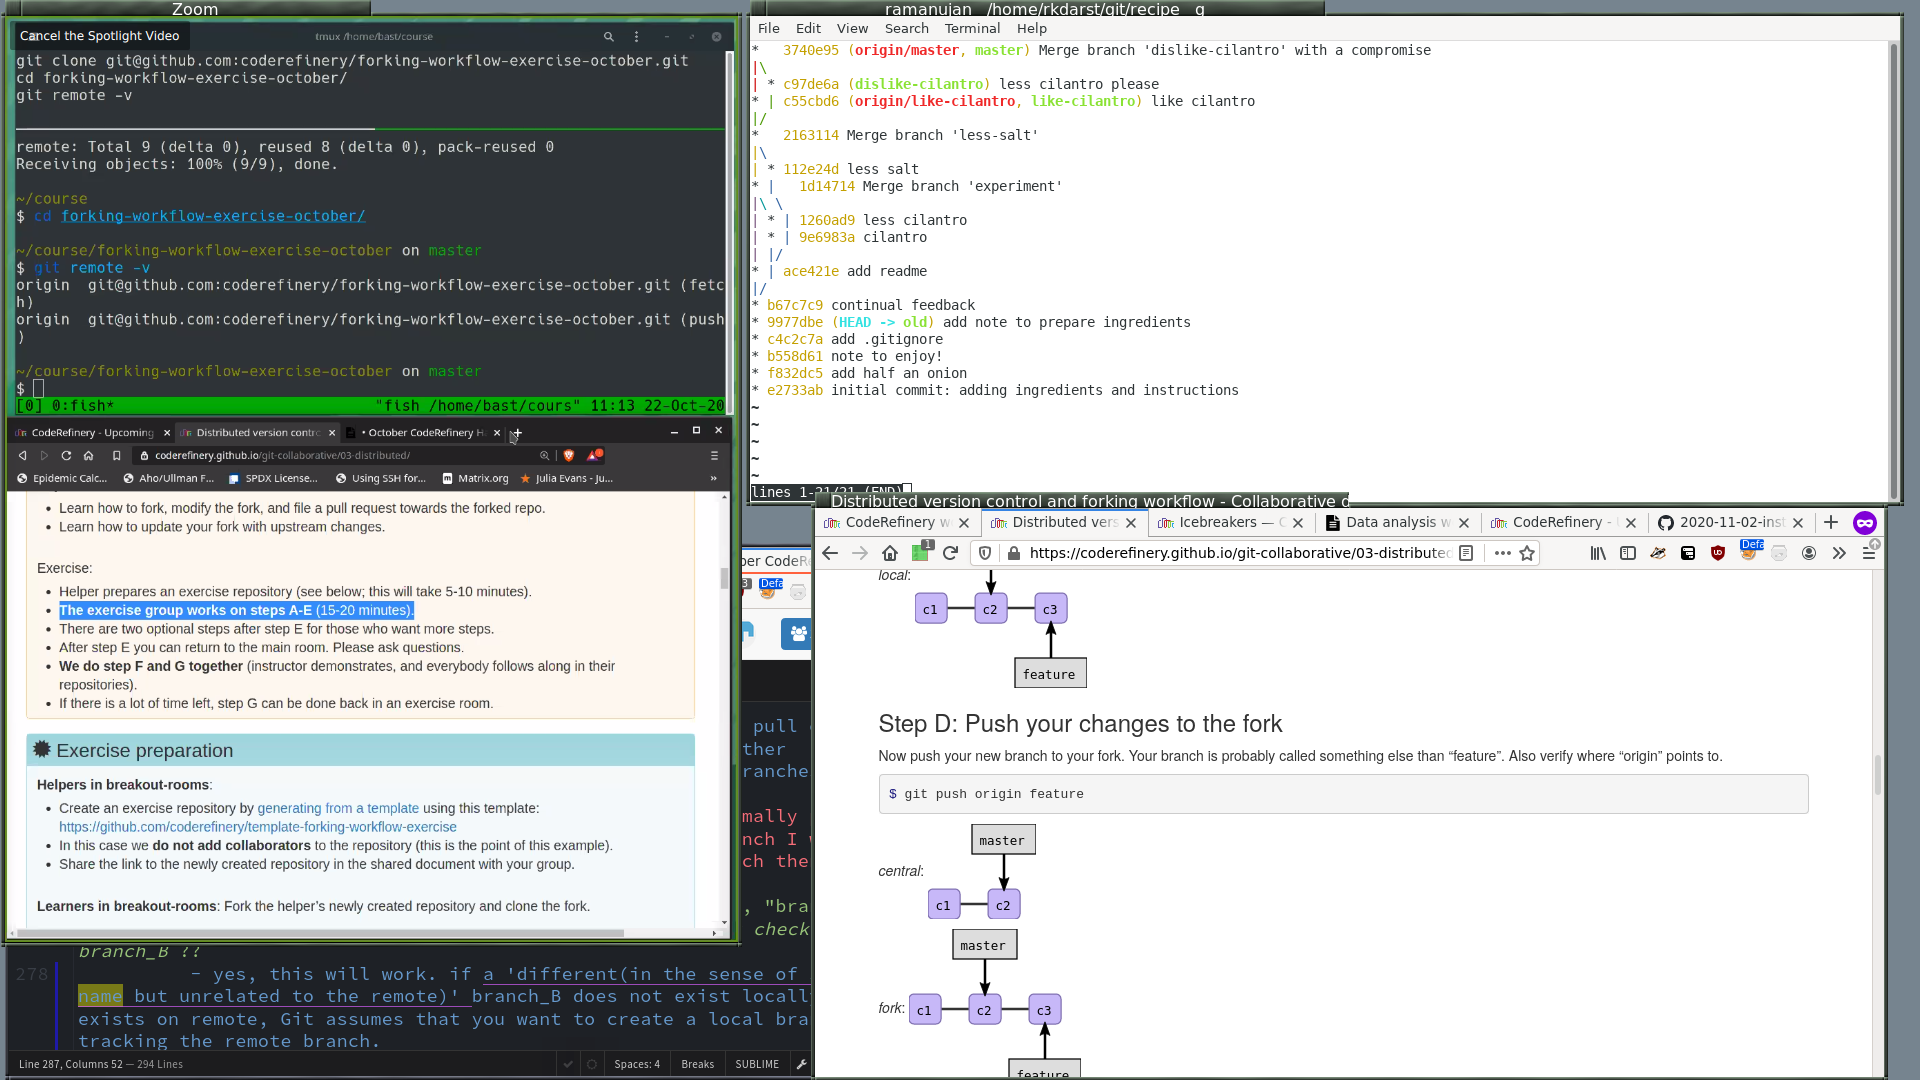
S9: Similar to S8. Lesson + terminal, tmux plus terminal history
and dark background.
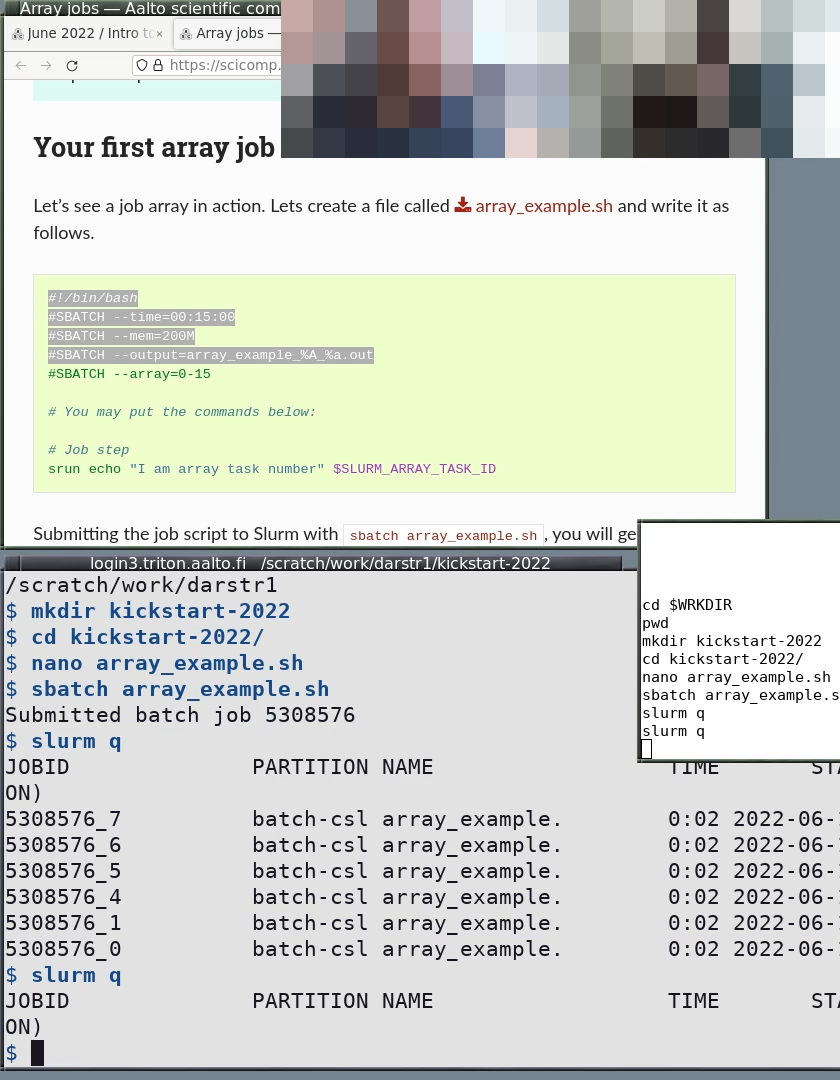
S10: HPC Kickstart course. Note the colors contrast of the windows and colors of the prompt and text. The history is smaller and doesn’t take up primary working space. The working directory is in the window titlebar.
Screen layout: learners
This is how learners can arrange their screen:
L1: Learner with a large screen, Zoom in dual-monitor mode so that the instructur pictures are not shown. Screenshare is on the left side, HackMD at bottom left, terminal and web browser on the right.
L2: A learner with a single large screen (Zoom in “single monitor mode”). Instructor screen share at right, learner stuff at left.
L3: A learner with a particularly small screen. Instructur screenshare at left, your windows at right.